| Icon | Function | Settings | Exit |
|---|---|---|---|
| The possibility to export records that have entered a specific flow in a campaign. For example, you could export all bounced records daily so that they can be followed up by your customer service department. Place a 'Bucket' object in front so that you can collect the customers first before exporting them, otherwise an export will be performed per customer. | Similar to when exporting data in the export module, you can then choose the fields that you wish to export and the location where you want to save the file. |
|
| This campaign object is used to configure an import as you are used to doing, but now the campaign will only continue once the import has finished. This object imports customers and select these customers within the campaign. Use the data model objects to perform a data model import. You can also use these objects in succession. | This object takes you to Deployteq’s import wizard. |
|
| This object can be used to unsubscribe customers from a campaign, all e-mail messages, and/or SMS messages. | You can unsubscribe a customer for:
|
|
| This object can be used to modify customer data. This may be done in response to a customer action (e.g. clicking in an e-mail updates a field) or to add environment fields (e.g. a temporary value from an API call) to your contact database. | First give the object a name. Choose the field to which the new data should be added. Choose the ‘Fixed’ context value option, enter the value or environment (the value from this environment field), and select the environment field. These values will be added to the selected database field for all customers that go through this object. |
|
| This object is used to identify a contact based on specific customer fields. The object searches your contact database for contacts that meet your specified criteria. | Give the object a name. Then select a customer field or customer option field from the list of fields. Now select an environment field in the drop-down menu. The data from the customer database is now compared with the data from the environment field. You can specify multiple conditions. |
|
 | This object is used to add a contact to the contact database or modify the data of an existing contact. Similar to the ‘Add customer’ object, it is possible to add customers that enter a campaign via a ‘Start on Event’ or ‘Start on SMS’ to the database. However, this object immediately assesses whether it is a new or existing customer record. It is also possible to deduplicate on the basis of one or more fields to prevent a contact from being included in the database several times. | In ‘System field’, you choose which Deployteq field you want to update and in ‘Context value’ you specify whether this value should be a fixed value or an environment value. Tick ‘Unique’ for the field on which deduplication should be based so that a check is made to see whether that field already exists in the database. |
|
| The ‘Add customer’ object is used to add a contact to the contact database. Under normal circumstances, contacts are added to the database by means of an import or subscription form. It is also possible to add contacts, which enter a campaign via a ‘Start on Event’ or ‘Start on SMS’ object, to the database. No deduplication will take place, but you can use the ‘Find customer’ object to check whether a contact already appears in the database. On this basis, appropriate follow-up actions can be carried out. The default (e-mail) Opt-in value is ‘Yes’, while the default (SMS) Opt-in value is ‘No’. | Give the object a name. You then specify which (environment) variables should be saved in which customer fields. You can, for example, save an e-mail address from a URL parameter in a customer field belonging to this new record. It is a good idea to place a ‘Find customer’ object in front so that you only add customers that do not yet exist and only modify other customers. |
|
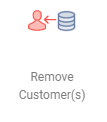
| The ‘Remove customer’ object can be used to delete a contact from the database. This is useful if you only want to keep a contact in your database temporarily (e.g. for Forward-to-a-friend campaigns). This action cannot be undone. By default, this object deletes customers in a single customer flow only. In the settings you can choose to delete several customers simultaneously. | Tick a checkbox in the object settings to allow multiple customers to be deleted simultaneously. |
|
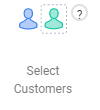
| This object is used to select a group of contacts based on the current campaign, profile, or group. The group that is selected proceeds to the next step in the campaign. | Enter a name for the object. Then choose whether you want the selection to be made on the basis of the current campaign, a group, or a profile. If you opt for a group or profile, select the desired group or profile in the file manager. You can choose from all groups and profiles that were created in the 'Profiles' and 'Groups' components in Deployteq. In the CRM, you can make contacts members of a campaign, such as for an import. |
|
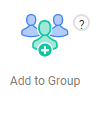
| This object can be used to add selected contacts to a group in the campaign. | Give the object a name and select the group to which the contacts should be added. You can choose from all existing groups. You can also choose to create a new subgroup of the chosen group. Check the box for ‘Create new group’. Here you can also use variables such as ‘$smarty.now’ or ‘manual field’. |
|
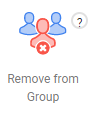
| You can delete selected contacts from a group in the campaign. | Give the object a name and select the group from which the contacts should be deleted. You can choose from all existing groups. |
|
| With this object, it is efficient and easy to set up to compare the current customers in a group with the customer selection of the campaign flow every time the campaign runs, and to update all differences. If a group customer is not present in the incoming selection, they are removed from the group, and if a selected customer is not present in the group, they are added. | Use this object to easily capture the customer selection in a campaign and store it in a group. After dragging the object into your campaign, you can customize its name. Then, you select the desired group to be synchronized. You can choose from all groups created in the 'Groups' section of Deployteq. The object before the 'Sync to Group' object in the campaign flow should be the 'Select customers' object. With this object, you select a group of relationships based on the current campaign, profile, or group. The group selected moves on to the Sync with Group step. |
|
| Encrypt customer data so that it can be used securely, such as in a URL. This enables you to follow a customer, prefill forms, or create a soft login. | Specify the fields that you want to encrypt and then the encryption method you want to use underneath. All encryption options can be found on a seperate page in this manual. |
|