If you have the correct rights, you will be able to create a new brand within your portal. There are several sections you can complete here to ensure you have the correct configuration. We explain what the different options are in each section and what they are used for.

To create a new brand, first go to the Brands menu item under Administration. If you do not see this, you may not have been assigned the corresponding rights. Please contact your portal administrator.
When you are in the brand manager, click on ‘Add brand’ in the top left.
Enter the name of the brand in the first tab Preferences. Here you can also add a brief description of the brand.
You can then enter additional information in the available tabs:
- Preferences (general brand description and preferences)
- Support & contact (contact person details and support information for this brand)
- SMS settings (if SMS is activated in your portal)
- Mailing types
- Social networks (manage social network accounts)
- Brand options
- Conversion measurement
- Default duplication settings
- Tags
It is recommended that you save each tab so that you do not accidentally lose the configured data.
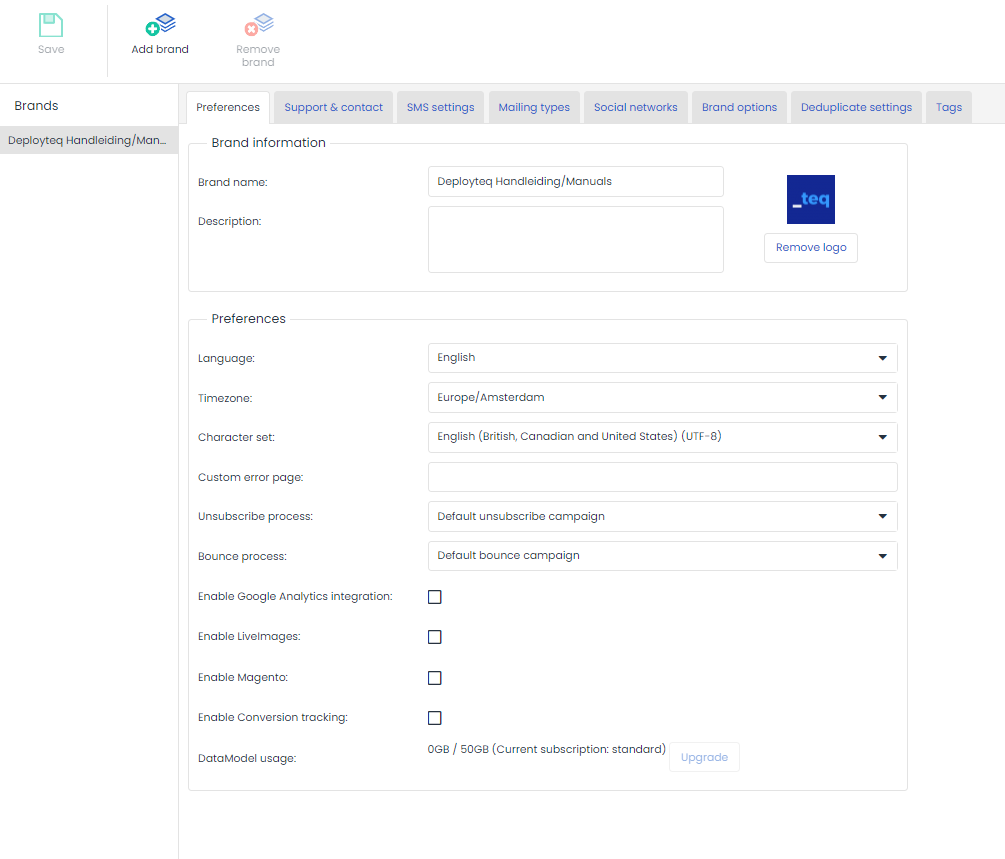
Brand information
- Brandname:
The name of the brand. This is a required field and must be unique. - Description:
A more detailed description of the brand. - Brand logo or image
The brand logo can be inserted on the right by clicking on the image. If a logo has already been inserted, click on it to modify or delete it.
Preferences
- Language:
The default language for the brand. If the user has not selected a language, this language will be used. This selection only applies to the user and has no effect on campaigns, e-mails, forms, etc. - Timezone:
The time zone for the brand which will only be used if no time zone is linked to the user. Deployteq will change all times so that they correspond to the selected time zone. - Character set:
This character set is used for sending content and for import/export purposes. Universal (UTF-8) is generally used here.
If no character set is linked to a user, Deployteq will use the character set linked to a brand. - Alternative error page:
Here you can configure your own error page.
When an error occurs in a campaign – for example, due to the deletion of a page – the page specified here will be displayed. You could, for example, use the 404 page for your website. - Unsubscribe process:
A default unsubscribe campaign can be selected here. This campaign will be used to unsubscribe customers if no other campaign is specified in the individual content. - Bounce process:
Just like the unsubscribe process, a default bounce process can be selected here. Although Deployteq handles bounces effectively, you can create a campaign that removes people from specific groups, or adds them to a group, if a bounce occurs. - Activate integration with Google Analytics:
If this is enabled for this brand, you can take advantage of extra fields to link to your Google Analytics campaigns in the e-mail content Clickthroughs tab. - Activate LiveImages (optional):
This can only be enabled if the LiveImages module has been purchased.
Please note! Checking this option will activate the module for this brand. - Activate SalesForce (optional):
This can only be enabled if the SalesForce module has been purchased.
Please note! Checking this option will activate the module for this brand.
Support & Contact

This information is displayed in the widget support on the user dashboard. If nothing is entered, the default information for Deployteq Support will be shown. However, if the first point of contact is someone within the organization rather than being put through to Deployteq Support immediately, you can enter their details here.
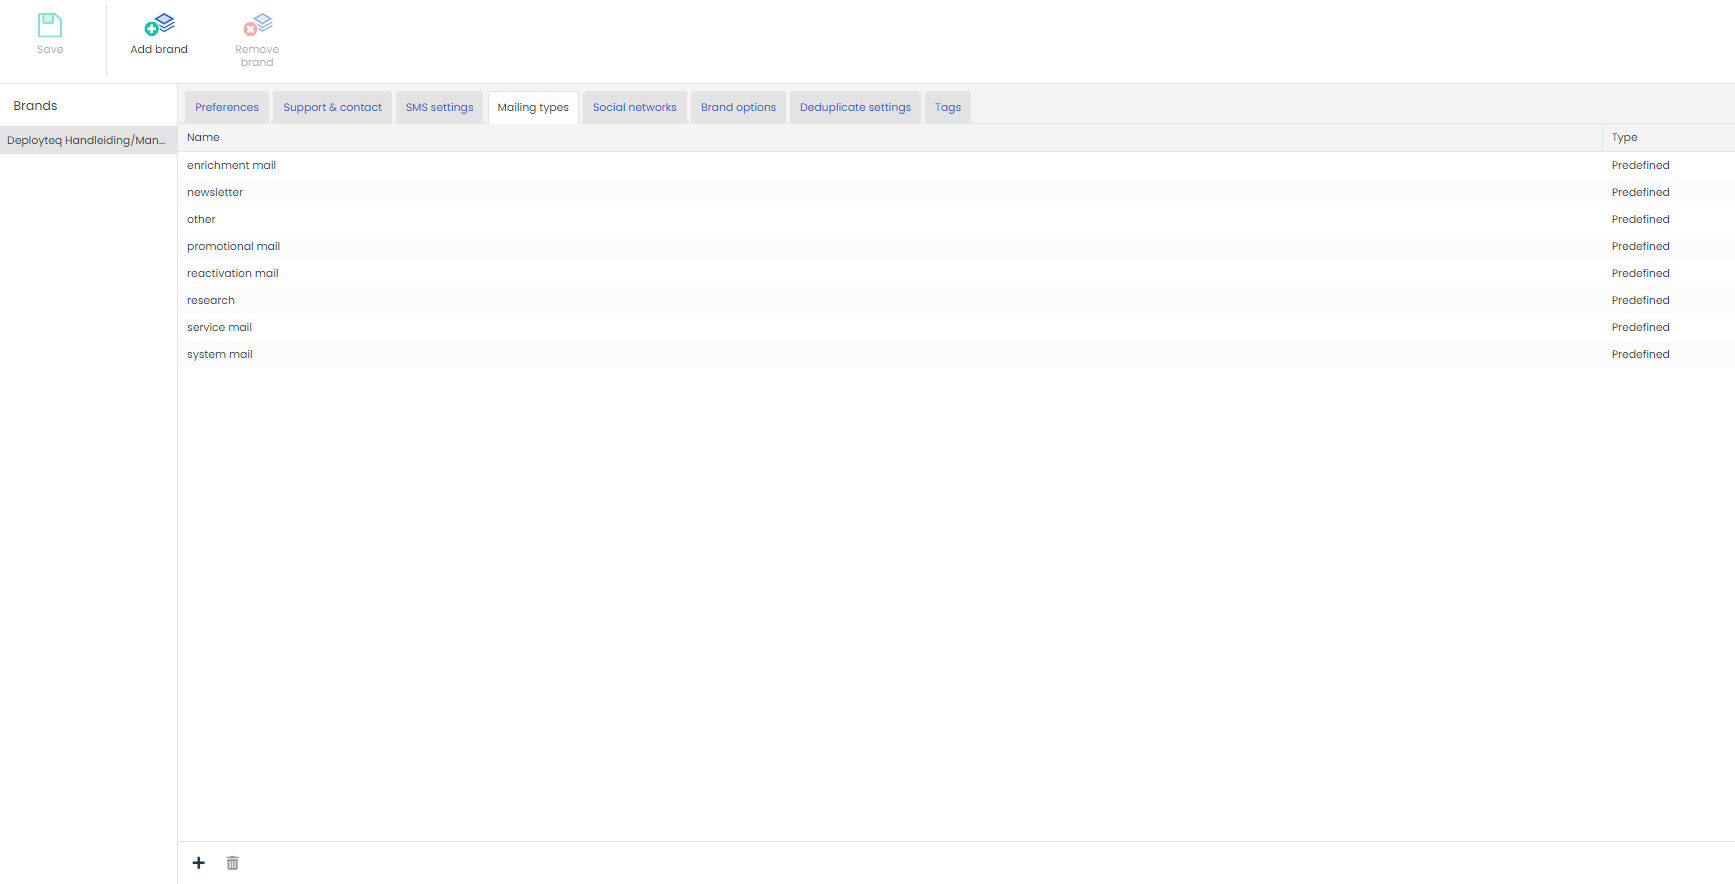
Mailingtypes
When sending e-mails, it is possible to add an extra mailing type. This makes it possible, for instance, to make a distinction between commercial e-mails and transactional e-mails. But you can extend this even further into newsletters, weekly offers, service e-mails, etc.
Deployteq already provides you with a number of pre-defined types, but you can also add your own types here. If you use these consistently in all your campaigns and mailings, you will be able to generate informative reports. For example, you will be able to see how many e-mails of this type are sent out each month, and can also see how these e-mails perform in our Analytics. In general, transactional e-mails are frequently opened but not often clicked. You can separate these from your commercial e-mails, which will produce very different results
Brand Options
Naturally, you will want to personalize your e-mails and campaigns as much as possible. We therefore offer you the option in Deployteq to add customer option fields and campaign fields. Brand options are configured per brand rather than per customer, which means that you can use them across various campaigns and e-mails. For example, you can configure default UTMs and include them in a template. Any changes made to them will automatically be implemented for all mailings.

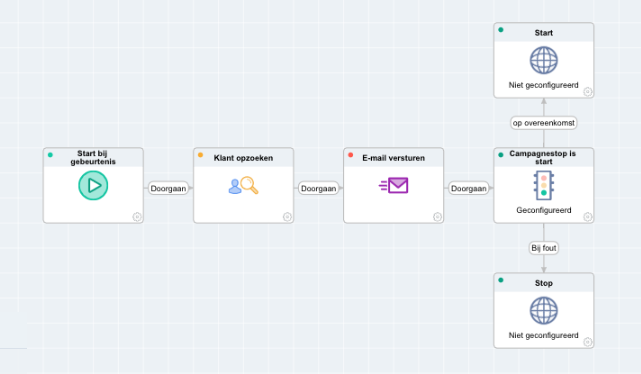
Brand options in campaigns
Brand options can also be used in condition objects in campaigns.
Once you have defined the brand options in the brand manager, these variables can be used in the condition object of the Campaign Designer. In this way, you can make automatic campaigns respond to a value in the brand options.
If, for example, you want to put multiple campaigns on hold at the same time, define an ‘On-hold’ brand option with a ‘Yes’ value and then use the condition object to verify this in the various campaigns. You can resume the campaign flow by subsequently changing the ‘On-hold’ brand option to ‘No’.
Using brand options in e-mails and forms
Defined brand options can also be used to display text in e-mails and forms.
This means that certain texts that should be displayed at multiple locations, but need occasional modification, can be defined as a brand variable. This makes it very easy to use a single action to implement multiple modifications for all content and forms.
Use brand options by inserting the code $brand.VariableName into the template, with ‘VariableName’ as the name of the brand option that you have defined.
Below is an example in which it is used as background colour and in the text:
![]()
Deduplicate settings
On this tab, you will find three options. These settings are used during the import of customers. The default setting is 'disable default deduplication.' It is a useful feature to prevent someone from accidentally 'ruining' the database through an incorrect import. Below, we explain what the three settings do:
Disable default deduplication
With this setting, Deployteq does not check for any deduplication settings. In the event that you perform a customer import and, at step 4, no field is marked as unique, the system will still provide the following warning:

If you choose 'Yes' here, the import will be accepted as usual.
Show warning
If specific fields have been indicated for deduplication (e.g., email address or customer number or a combination of fields), the Import Wizard will compare your field settings with the fields specified here. If not all of these fields are marked as unique, Deployteq will issue a warning that the deduplication settings are not met and will ask if you are sure you want to proceed with these settings:

In the Brand Settings, it has been configured that a warning should be triggered for the email address field:

Make mandatory
This setting works the same as 'Show warning,' but in this case, you cannot proceed until the deduplication settings are met.
Conversion measurement

The Conversion measurement tab displays the following elements:
- A checkmark that ensures that all links in your e-mails are measured by default. This can be overwritten per e-mail so that only a few links are measured.
- Default key terms are terms that return in the reports. You can configure which key terms are used for which links for each e-mail but you can also enter a number of default key terms here for all links.
- You will then see underneath an example of the JavaScript that can be copied or the SOAP call that you must use on the website.
More information on ROI conversion can be found in this manual.

Clickthroughs
In the e-mails, you can go to the Clickthroughs tab. In addition to your UTM codes for Google Analytics, you can also enter conversion key terms here for a single link.

When you go to this tab, you will see the key terms that you have configured in your brand. You can change these in the e-mail for each link. For example, a particular link may use a subscription as a conversion rather than an order. Check conversion measurement to enable it and remove the default terms and then add something like newsletter_subscription. Make sure that you do not add too many terms, as it will become more difficult to analyse. Determine which terms to use with your team beforehand and adhere to them so that you maintain a good overview and results can be measured effectively.
Javascript
When someone clicks on a link in the newsletter, the ‘clangct’ parameter is enclosed in the URL to follow the click. This addition to the link is a secure way to let Deployteq know which e-mail and which link are involved. This requires the JavaScript that we gave you for the brand settings. It retrieves this part from the link and sends it back to Deployteq. Your web developer can of course modify parts of the code here to enable it to fit in the website. We will therefore briefly explain below what the various parts of the script do
First of all, we need this part of the script to send the details after ‘clangct’ back to Deployteq. This makes it possible to trace back which e-mail the conversion applies to.
<script type="text/javascript" src="//secure.myclang.com/pub/resources/extern/js/clang.js"></script><script>//meet automatisch aan de hand van de url argumentenclang.conversion.track();</script> |
1. Save (all) term(s) with a value of 1
If all terms have the same conversion value of 1, you can add the script below.
<script>//meet automatisch aan de hand van de url argumentenclang.conversion.init('*************');clang.conversion.track();</script> |
2. Save term(s) with self-selected value (parameter present in URL)
If, for example, you consider the term ‘newsletter subscriber’ to be less important than an order and wish to see this reflected in the results, we can add this to the script. This lists all the terms with the self-selected value.
<script>//meet met aangepaste keyword/value maar met het id uit de urlclang.conversion.init('*************');clang.conversion.track({keyword: value});</script> |
3. Save term(s) with self-selected value (parameter not present in URL)
If it is not possible to retain the ‘clangct’ details in the link on the website – for example because you have your own scripts or referrals in the website – the parameter can be captured and included in the script. The code appears as follows:
<script>//meet met aangepaste keyword/value en idclang.conversion.init('*************');clang.conversion.track({keyword: value}, uniqueid);</script> |
The ‘uniqueid’ variable must be replaced with the ‘clangct’ parameter. The ‘keyword’ and ‘value’ should be entered in the same way as the variation in which the parameter is still present in the URL.
Enclosing amounts
It is also possible to enclose the exact amounts of an order. This requires your web developer to perform some extra work. Here, the price from the order can be processed in the script and sent back to Deployteq. This means that you do not work with order value averages but with the actual revenue generated by the e-mail.
It is important to know that only numbers can be saved in Deployteq. It is therefore not possible to enclose currency or text. If decimal numbers are enclosed, they may only have a full stop as delimiter. No other symbols (such as commas) are permitted.
To remove unnecessary punctuation marks, the following code can be used to convert the amount to a valid number for Deployteq
clang.conversion.formatNumber(value,'thousandSep','decimalSep');
Important
As you may have noticed, each piece of code includes the following line:
clang.conversion.init('*************'); This code is used to determine the brand/portal for which the measurement should be performed. Earlier, you saw that we provide an example script on the conversion measurement tab in the brand manager. This contains actual code that identifies your brand. Use this instead of '*************'
![]()
Another requirement is the ‘clangct’ parameter. If this parameter is not found in the URL and is not enclosed with the JavaScript, the measurement will be ignored.
Enclosing the ‘clangct’ parameter in the online store
When a customer clicks on a link in the e-mail, they are first taken to a landing page. The conversion often occurs later in the website. We therefore want the parameter that is sent back from the e-mail to still be available when, for example, the customer has completed the order process. To get this to work on your website, copy this section of script on all pages. This ensures that the information that is sent remains available after your customer clicks to other pages.
<script type="text/javascript" src="//secure.myclang.com/pub/resources/extern/js/clang.js"></script><script>//OPTIONEEL: Voorzie alle links in het document van de clangct-parameter indien deze//gevonden wordt in de url van de huidige paginaclang.conversion.initLinks();</script> |
This especially applies to the first two variations, because these variations expect to find the ‘clangct’ parameter in the URL for feedback to Deployteq.
Managing tags
It is also possible to collect information about a click from an e-mail. We use tags for this purpose. These tags are added to a link and when your customer clicks on the link, the tags are registered in the general reports for the e-mail as well as for the customer. After a customer has clicked on a particular category such as winter holidays or long-haul travel a number of times, a preference can then be registered for them.
If a recipient has clicked multiple times on a link with the same tag, that person is likely interested in that subject, and you can initiate a personalized campaign.
Tags can subsequently be used in profiles so that e-mails are only sent to those people who have expressed a particular interest in something. They can also be used to create variations in an e-mail so that you can adapt the main banner to the customer’s interests.
Tags are especially useful when there are not too many of them, but only a few categories for instance. The more tags you have, the more difficult it is for the customer’s main interest to emerge, which makes it impossible to create highly personal e-mails. It is therefore advisable to first define a number of tags with your team and then record them in the brand manager so that your colleagues can choose from this list.

In the section "Customers," it is possible to view on a relationship level which tags are linked to a relationship and their respective weight. The weight is calculated based on the point system outlined below:
| Object | Weight |
|---|---|
| Click on a link (Clicktroughs) | 3 points |
| Block variation (Legacy e-mails) | 2 points |
| Block container (Legacy e-mails) | 1 point |
| Legacy e-mail received | 1 point |
Example
Each click on a link with a Tag is worth three points (the 'weight'). If the recipient clicks again in a later email, and the relevant tag already exists for that customer, the existing weight is simply increased by three points. Within Profiles, customers can be selected who have a minimum weight for a specific tag within a defined period. The set weight thus determines the minimum number of clicks (e.g., 12 points = 4 clicks).