Setting up your first connection
Go to the Deployteq Store module in the left-hand menu in Deployteq. Here you will find all the apps available to you. Select the webhook from the list.

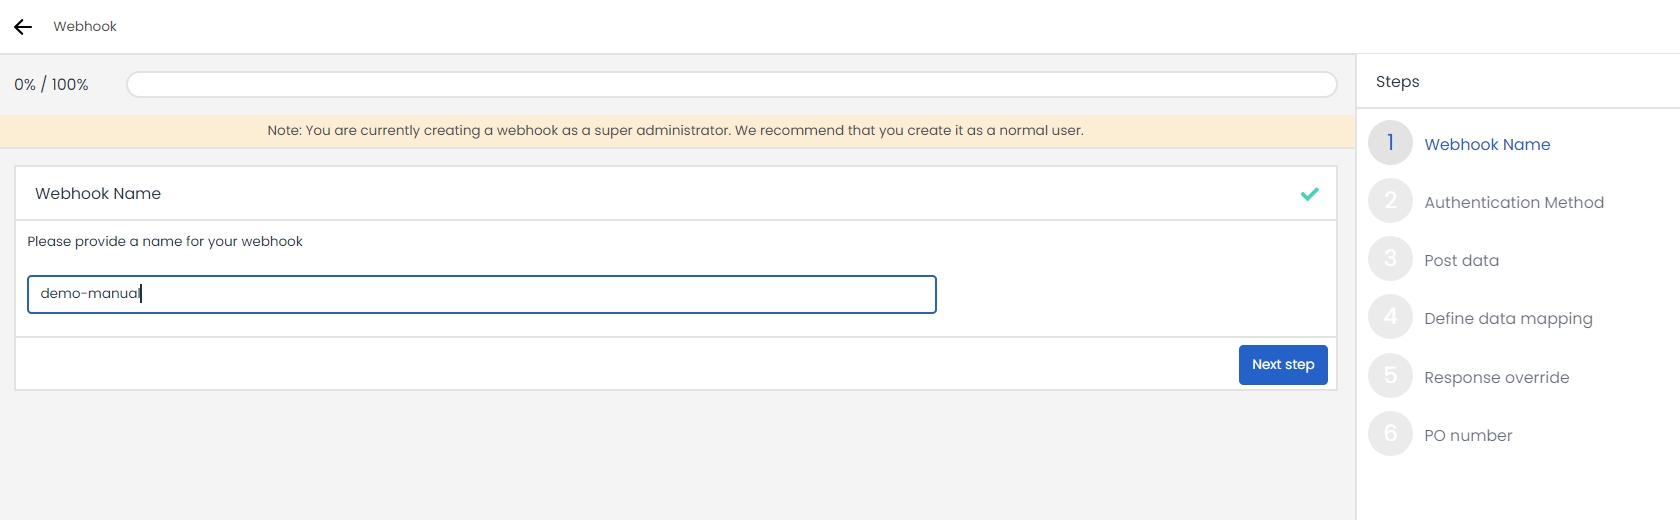
Follow the five-step wizard to install the webhook receiver. In the first step, you enter a name for your webhook; in the example below this has been called demo-manual:
Authentication
In the next step you can select the type of authentication you want to use for this webhook. Beneath the image we will explain the different methods.

Token
The Deployteq bearer token expects the next header in the call
"Authorization" : "Bearer <token>"
The token you will receive in the next step. This token will give you access to this webhook only. When you are creating an integration with multiple webhooks, it could be wise to use a token created on an API user, an integration token. An administrator can create a new user with token. The steps are explained in the manual: Links to other software
Basic Authentication
When you choos Basic Authentication, Deployteq will expect the header
"Authorization": "Basic <base64 user:password>"
The 'hash' will exist of user:password which will need to be base64 encoded. The password in this case will be a token, which Deployteq creates specifically for this webhook. The hash you need to use will be made for you in the next step. Just as with Basic Authentication, if you want to use multiple webhooks for one integration, you'll probably want to use a user token.
The following authentication options are only displayed if the additional app has been configured for this purpose:
TLS Certificate
With TLS Certificate, you can sign your API calls with a client certificate and key. This explanation will be a bit more than a few lines, so you can find a more extensive manual about this type of authentication on a separate page in this manual: Certificate authentication
OAuth 2
The Deployteq Webhook can also be validated with OAuth 2.0. This too needs some extra explanation and is to be found in our manual: Oauth 2.0 Server for Deployteq webhooks
Send data
After choosing the authentication method, you will receive the endpoint and extra information based on your method of authentication

Send the data to the created endpoint. For a first (test) call you can also use an online tool, like Postman. In the next example a simple order confirmation is send;

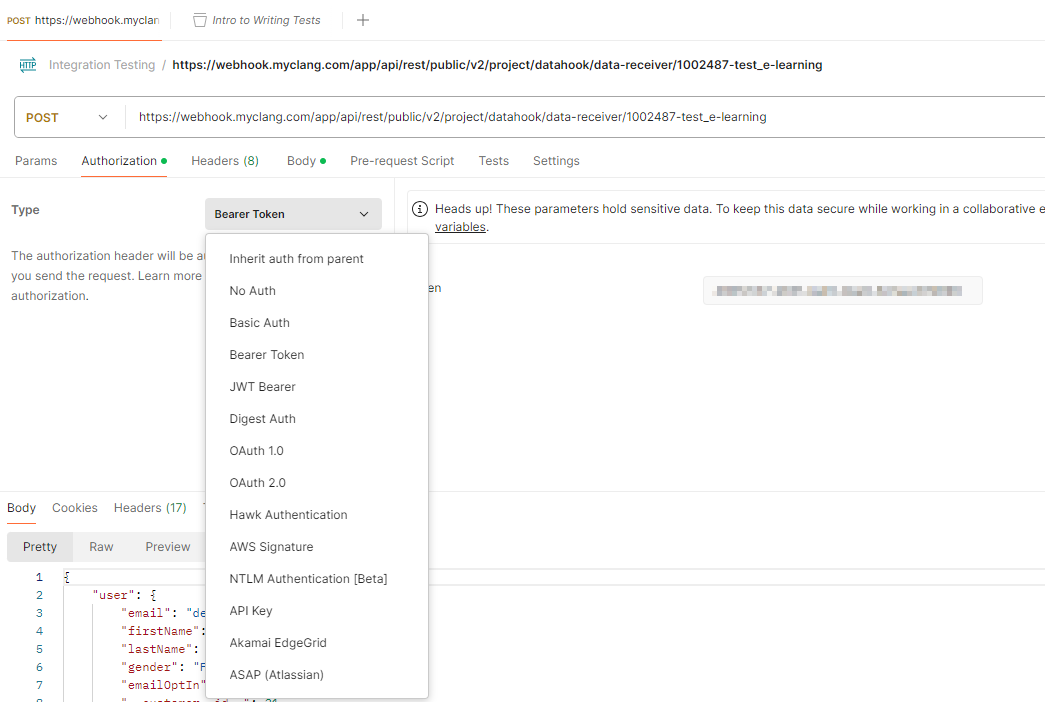
In Postman you can also choose one of the authentication methods:
Once the data is sent, you will see a confirmation of the data received in the wizard.

Data mapping
You can now link the data to the Deployteq fields. Just click on ‘Open data mapping’ to start.

The data can be linked to the customer and customer option fields as well as to the data model and the campaign environment fields to help determine your flow. Hover over a field to map it and click on the plus sign. When linking your data, select which fields you want to use for deduplication. The fields that you designate as unique display a key after the name.

If you are happy with your mapping, click on Save in the top left corner and click to go to the next step.
In step 5 you can choose to set a Response Override:

In step 6 it is possible to choose a monthly or annual billing cycle. The monthly invoice is deducted on the first day of the following month. In the annual cycle, the entire annual amount is deducted in the month following the month in which the webhook was installed. It is also possible to add a purchase number or order number. This is useful if this is mandatory within your organization, but if not you can leave it blank.

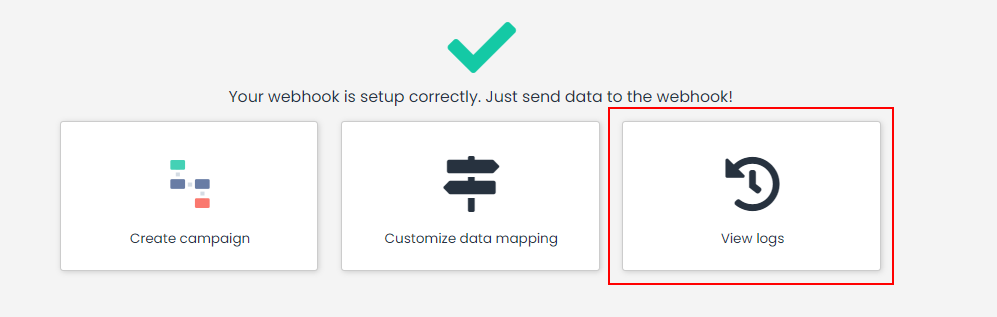
Click on Next to create a successful connection. You can now create campaigns and view logs.


Creating campaigns
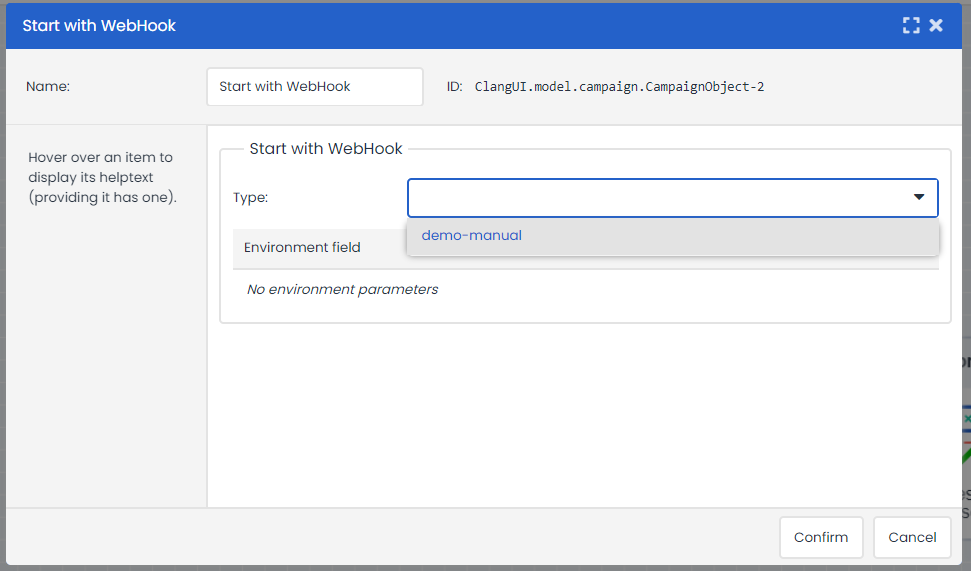
Go to the campaign designer and create a new campaign. Here you’ll see that you have a new campaign object, called ‘Start with Webhook’.
If you have installed one webhook, you only have to confirm the object. Your webhook is now ready to use. If you have installed several webhooks, select the correct endpoint from the dropdown list. When an environment is identified in the mapping, it will appear in the start object.
You can send an e-mail directly from the start object. Deployteq will send the saved data to the start object, including the saved order in your selection, in order to use this data in the e-mail. A confirmation campaign can therefore be very simple:

Modifying mappings
If you return to the Deployteq Store, you will see your installed apps in the list at the top:

Select the webhook that you want to modify and click on the third step in the wizard to go to the mappings. Here you can map the fields again that you received from the last call. If you wish to add a field to this call, send it to Deployteq and you can map the corresponding Deployteq fields.
Using logs
If you want to see which calls have been sent to Deployteq, which details have been saved, or whether a campaign has been triggered, you can see this information in the logs. Go to the webhook settings and click on the ‘View logs’ button. You can now see the calls to the webhook in chronological order.
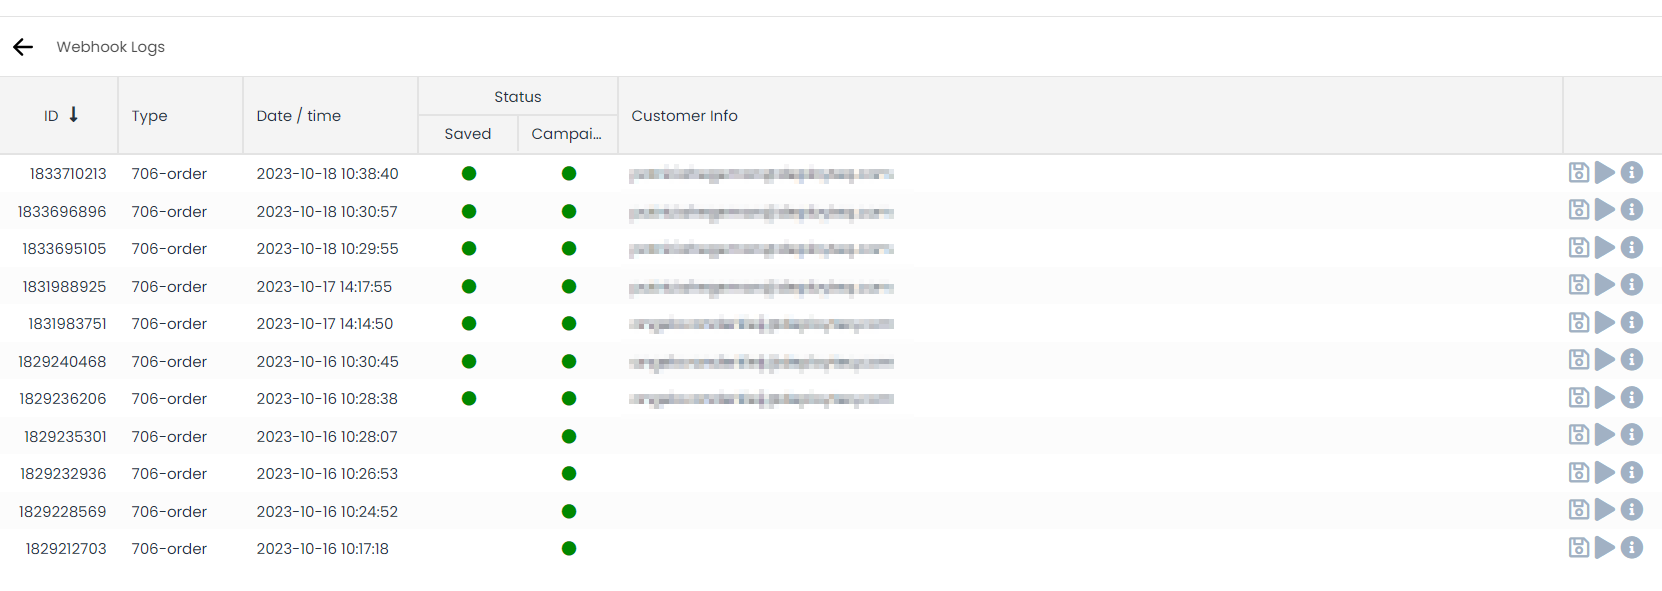
On the right-hand side you will see the following three icons: . From left to right these icons have the following functions:
Save; you can save the data again with the same call. When you have modified the mappings, you do not have to configure a new call. You only have to click on Save and all the data is saved again.
- Play; click on this icon to trigger the campaign again. If you have made changes to e-mails or campaigns, you can resend the saved customer to the campaign. Please note: if you have also made changes to your mapping, save it first and then trigger the campaign
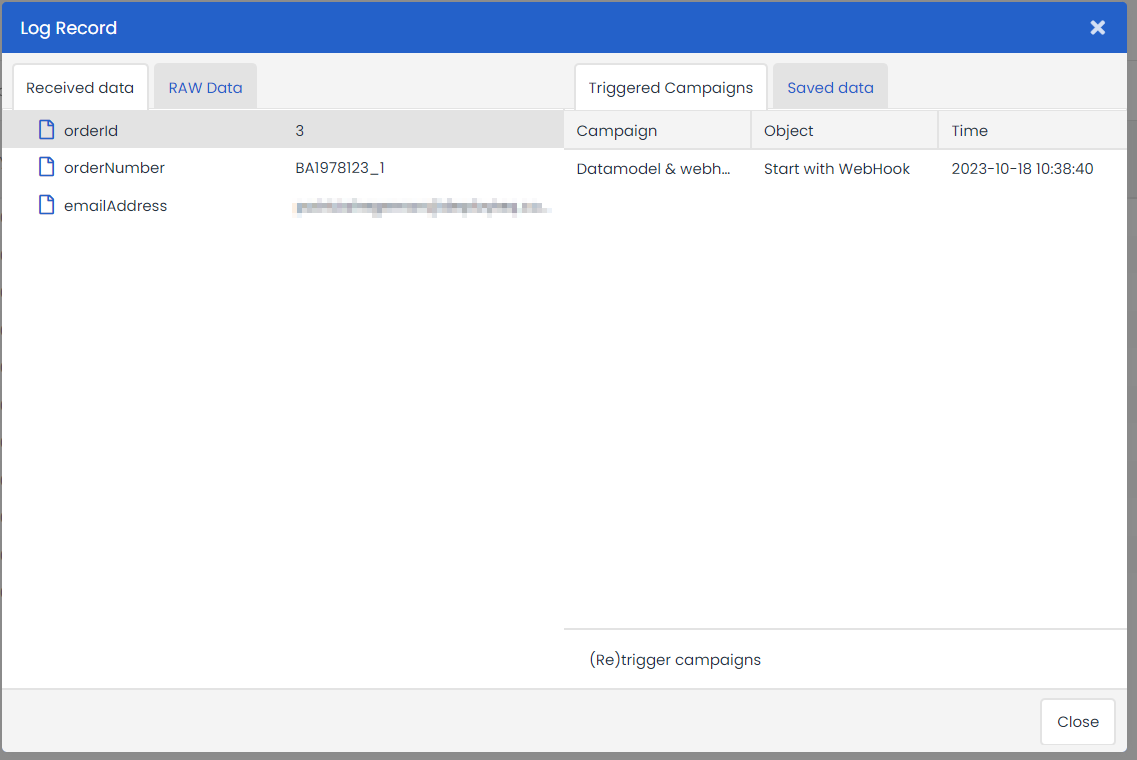
Info; use this icon to view the data of the call. You can see how often the data has been saved or how often the campaign has been triggered. You can also use the buttons on the right-hand side to save or trigger this interface.
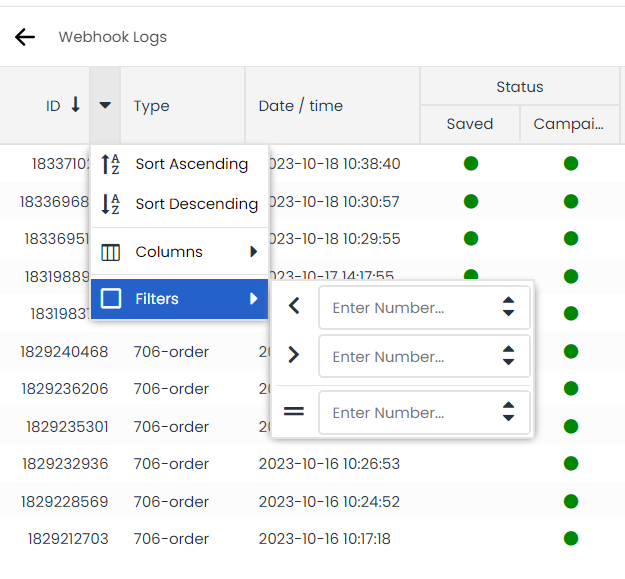
Filters in Webhook logs
It is also possible to filter the results of the log. Click on the arrow of the column to be filtered and choose the option "filter". Depending on the content of the selected column, a filter can be set for that column.
Examples of calls
The webhook has been created to accept everything that has a standard JSON format. Below are a number of examples of how data can be sent to the webhook.
Simple call
{
"name": "Sophie",
"gender": "WOMAN",
"email": "s.kumpen@domain.com",
"anything": "give me some data",
"newsletter": "Y"
}{
"name": "Sophie",
"gender": "WOMAN",
"email": "s.kumpen@domain.com",
"anything": "give me some data",
"newsletter": "Y",
"__customer__id__": 19
}Simple order call
{
"name": "Sophie",
"email": "welcome@domain.com",
"flag": "orders",
"anything": "more data",
"campaign": "transactional",
"order": {
        "order_id": "1321",
        "total": "49.5",
        "shipping": "5",
        "products": [
        	{
        	"SKU":"123",
        	"name": "Product1",
        	"price": "21.5"
        	},
        	{
        	"SKU":"123",
        	"name": "Product2",
        	"price": "28"
        	}
        	]
        }
}{
"name": "Sophie",
"email": "welcome@domain.com",
"flag": "orders",
"anything": "more data",
"campaign": "transactional",
"order": {
"order_id": "1321",
"total": "49.5",
"shipping": "5",
"products": [
{
"SKU":"123",
"name": "Product1",
"price": "21.5",
"__ordered_items__id__": 10
},
{
"SKU":"123",
"name": "Product2",
"price": "28",
"__ordered_items__id__": 11
}
],
"__orders__id__": 1
},
"__customer__id__": 19,
"__orders__id__": 1
}Extensive order call
{
"firstname": "Sophie",
"surname": "Kumpen",
"gender": "WOMAN",
"email": "s.kumpen@domain.com",
"flag": "orders",
"anything": "more data",
"campaign": "transactional",
"order": {
        "order_id": "5234",
        "total": "49.5",
        "shipping": "5",
        "date": "2017-08-24",
        "status": "Delivered",
        "payment": "iDeal",
        "products": [
        	{
        	"articleID":"123",
        	"name": "Product1",
        	"price": "21.5",
        	"category":"sneakers",
        	"color": "white",
        	"size": "38"
        	},
        	{
        	"articleID":"456",
        	"name": "Product2",
        	"price": "88.25",
        	"category":"pumps",
        	"color": "purple",
        	"size": "38"
        	}
        	]
        }
}{
"firstname": "Sophie",
"surname": "Kumpen",
"gender": "WOMAN",
"email": "s.kumpen@domain.com",
"flag": "orders",
"anything": "more data",
"campaign": "transactional",
"order": {
"order_id": "5234",
"total": "49.5",
"shipping": "5",
"date": "2017-08-24",
"status": "Delivered",
"payment": "iDeal",
"products": [
{
"articleID":"123",
"name": "Product1",
"price": "21.5",
"category":"sneakers",
"color": "white",
"size": "38",
"__ordered_items__id__": 15
},
{
"articleID":"456",
"name": "Product2",
"price": "88.25",
"category":"pumps",
"color": "purple",
"size": "38",
"__ordered_items__id__": 16
}
],
"__orders__id__": 2
},
"__customer__id__": 19,
"__orders__id__": 2
}Multiple customers call
{
	"contacts":[
				{
			"firstname": "Sophie",
			"surname": "Kumpen",
			"gender": "WOMAN",
			"email": "s.kumpen@domain.com",
			"newsletter": "Y"
			},
			{
			"firstname": "Angelo",
			"surname": "van der Kleij",
			"gender": "MAN",
			"email": "a.vanderkleij@domain.com",
			"newsletter": "N"
			}
    ]
}{
"contacts":[
{
"firstname": "Sophie",
"surname": "Kumpen",
"gender": "WOMAN",
"email": "s.kumpen@domain.com",
"newsletter": "Y",
"__customer__id__": 19
},
{
"firstname": "Angelo",
"surname": "van der Kleij",
"gender": "MAN",
"email": "a.vanderkleij@domain.com",
"newsletter": "N",
"__customer__id__": 23
}
]
}Error messages
{
    "error": "Unsupported API call"
}{
"error": "Unauthorized session"
}The above 401 response usually occurs because the user data (token and user account combination) no longer exists or the user has been disabled. Please contact your Portal Admin or our support desk at support@deployteq.com to resolve this issue.
{
    "error": "Daily limit reached"
}Internal Server Error
Unsupported API call