Contents
Introduction
This document is used for implementing Oauth2.0 authentication for Deployteq Webhooks.
Steps:
- Application manager: Register your application within Deployteq, this will result in an Client ID and secret
- Get an access token, supported grant types are 'Client credentials' and 'Authorization code'.
- Configure your webhook
Application manager
The first step is to register the application which will connect with the Deployteq, this will result in a client id and secret.
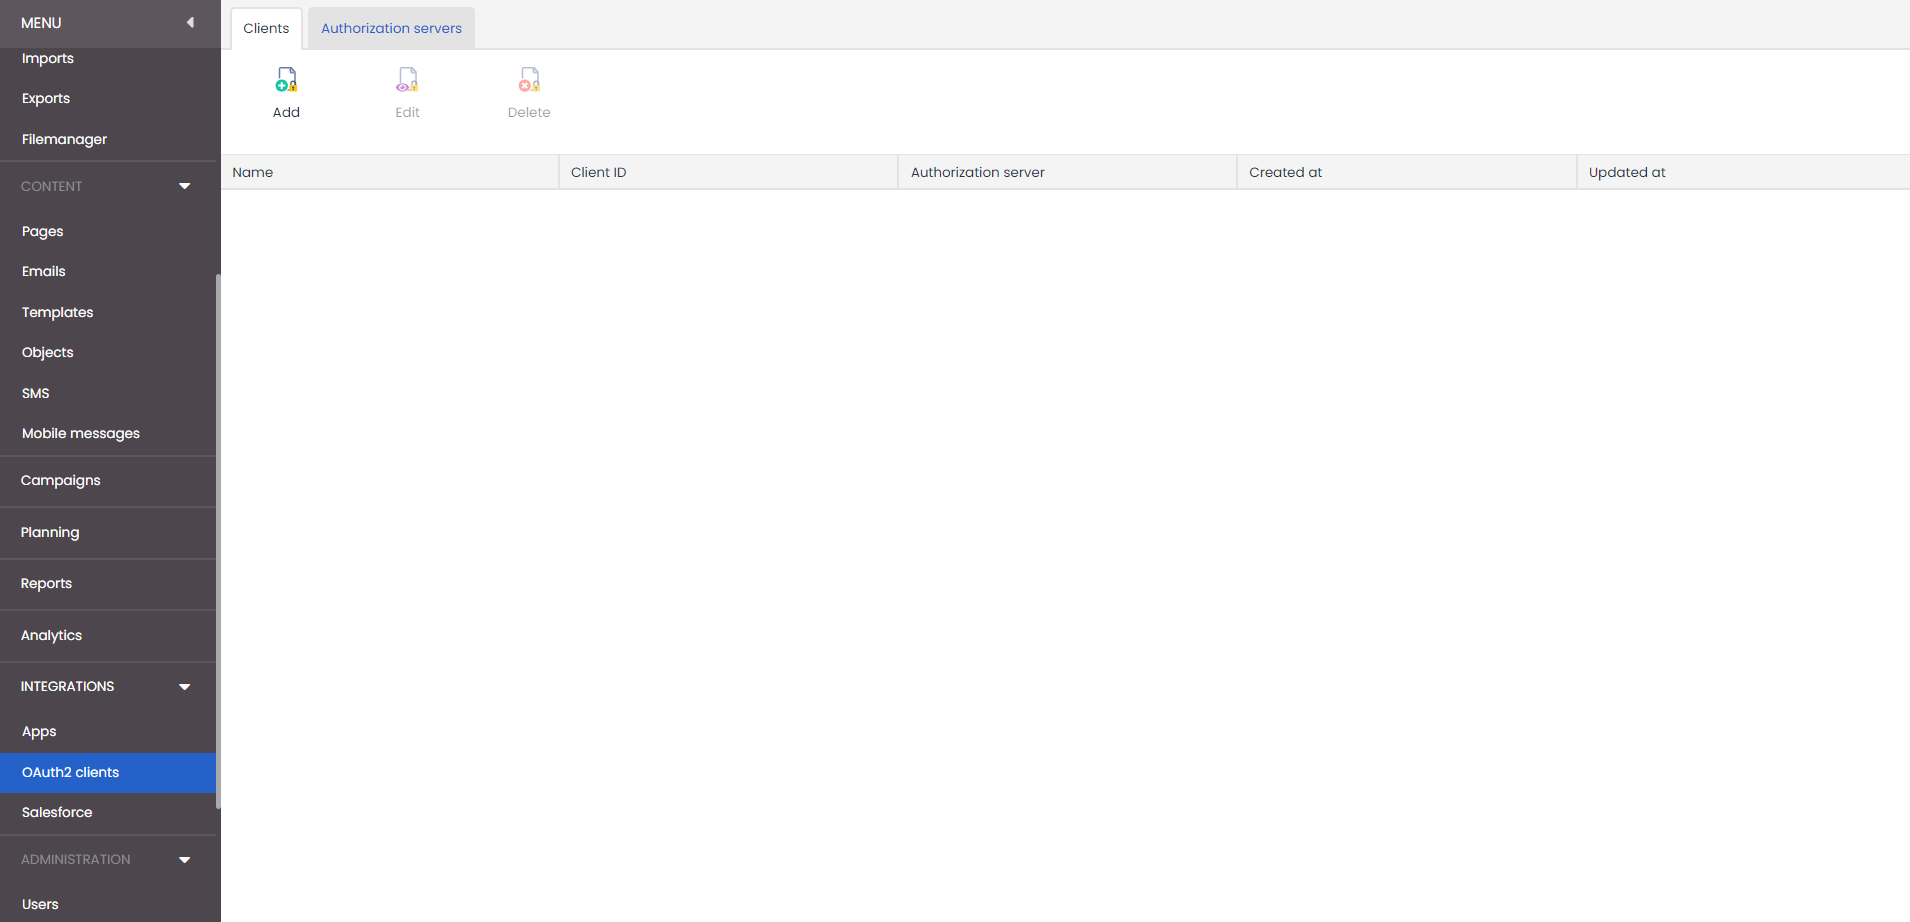
If the Oauth2.0 Server module is activated you will see a new menu-item in Deployteq to manage all your Oauth2.0 integrated applications. Within this interface users will be able to see an overview of the application which has been connected to Deployteq using the Oauth2.0 authentication and update or delete them;
Add new application
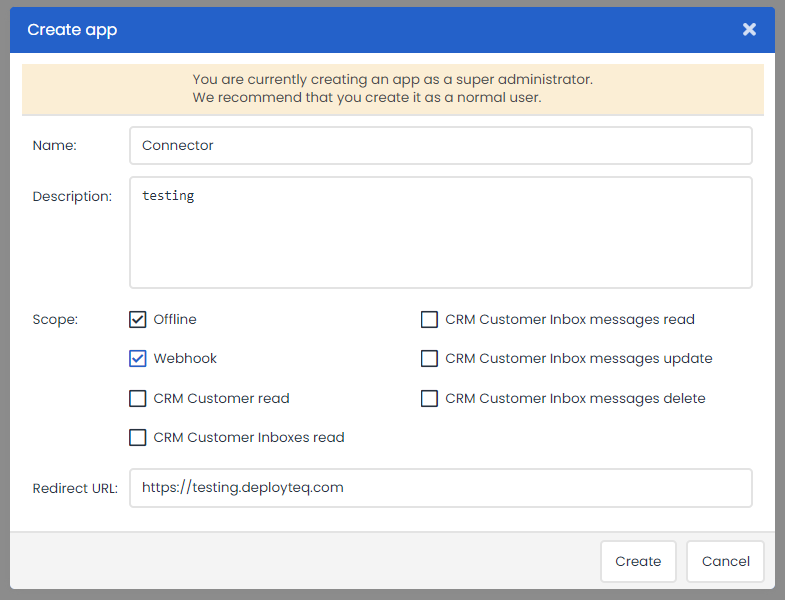
Also new applications can be registered which will result in a personalised Client Id and Client Secret which can be used to require an Oauth2.0 Access Token. The following information is requested:
- Application name
- Description
- Scope
- Currently the following scopes are supported:
- Webhooks: apps.webhook:execute
- This scope supports executing webhooks within Deployteq
- Offline access: offline_access
- Offline access only applies for grant type "Authorization code" and is used for refresh tokens.
- Webhooks: apps.webhook:execute
- Currently the following scopes are supported:
- Redirect URL
- Enter your own redirect URL for the OAuth flow, this value can also be overwritten within the query string when requesting an authorization code.
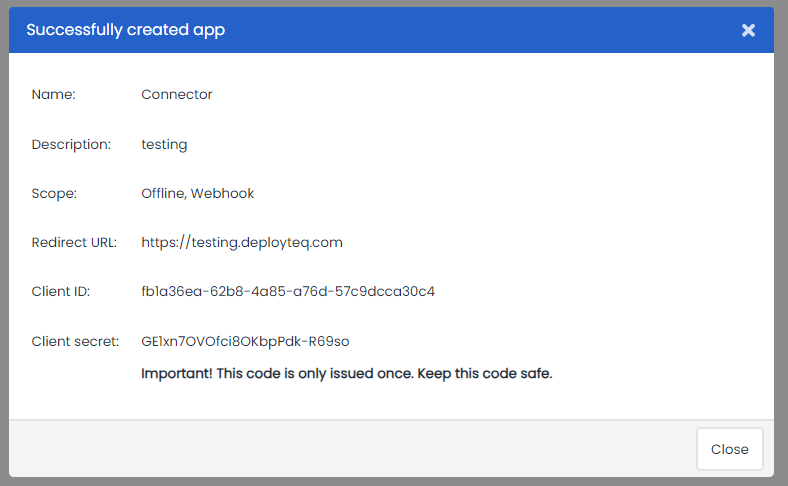
If all the required information is supplied and confirmed, a confirmation screen will be shown including the Client ID and Secret:
Get Access token
Based on the chosen grant type an access token can be acquired for communication with the webhook. The term “grant type” refers to the way an application gets an access token. OAuth 2.0 defines several grant types, including the authorization code flow. We support the grant types "Client Credentials" and "Authorization code" as described below.
Client Credentials
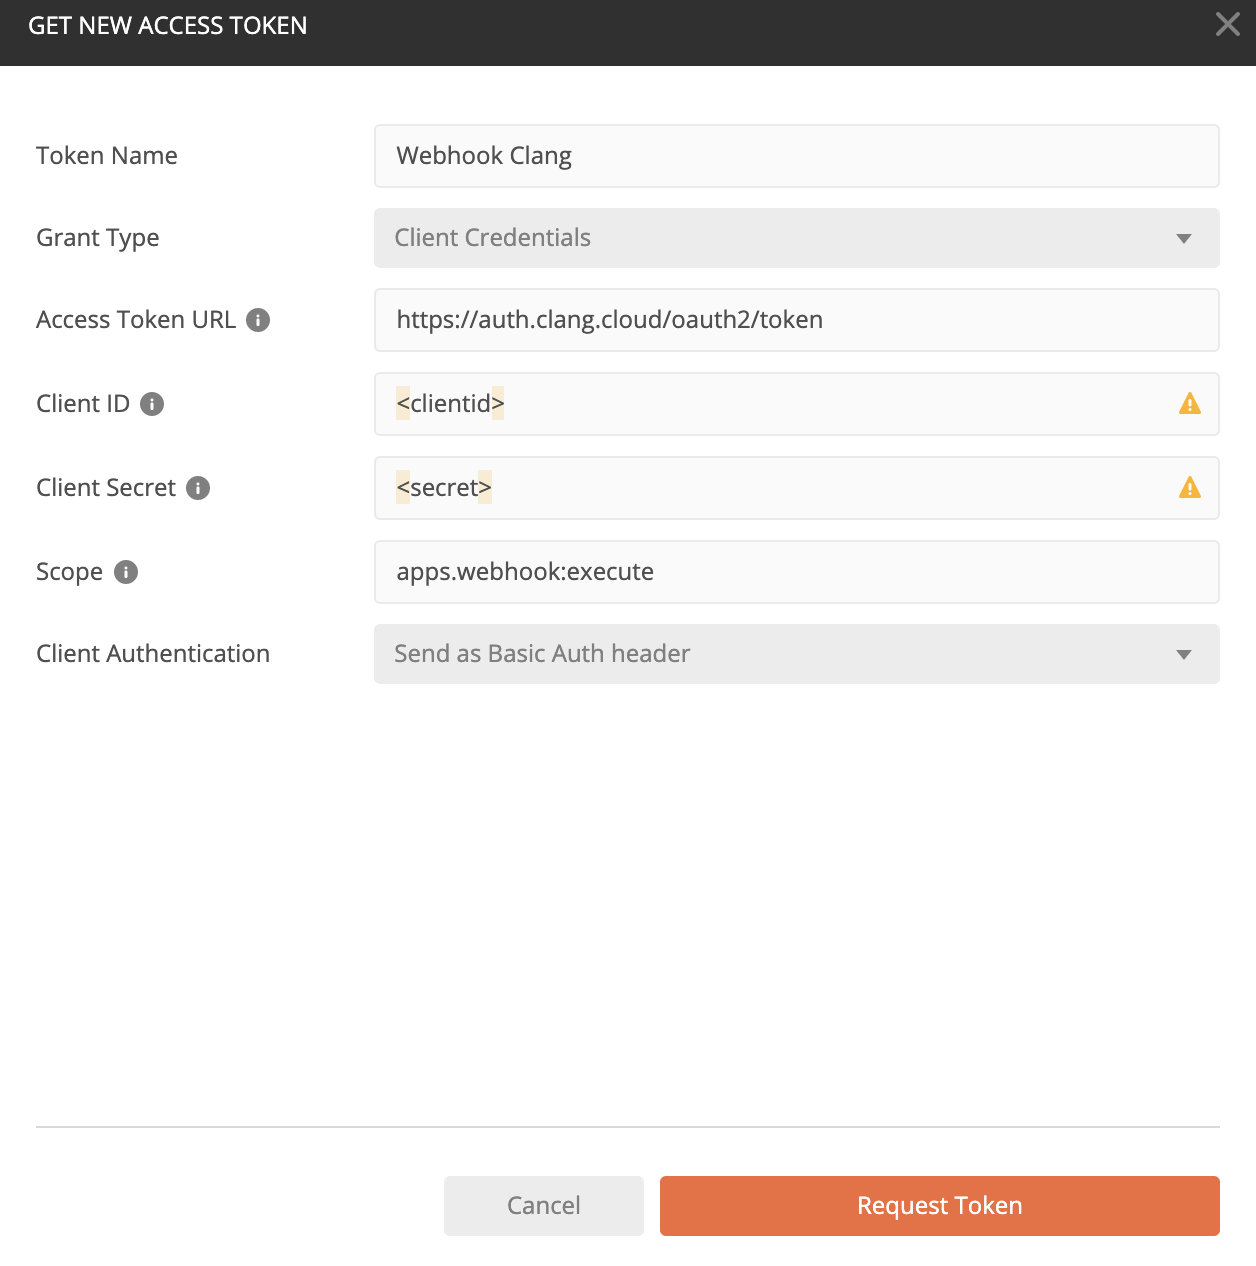
The grant type "Client Credentials" is the simplest way to retrieve an access token. The following information is required:
- Access token URL: https://auth.clang.cloud/oauth2/token
- Client ID
- Client secret
- Scope
- Client Authentication (Send as Basic Auth headers)
See the two example request below where you can send a request for an access token:
curl -u "{client_id}:{client_secret}"
-d "grant_type=client_credentials&scope=apps.webhook:execute" https://auth.clang.cloud/oauth2/tokencurl --location --request POST 'https://auth.clang.cloud/oauth2/token' \
--header 'Authorization: Basic {Base64 Encoded: "client_id:client_secret"}' \
--header 'Content-Type: application/x-www-form-urlencoded' \
--data-urlencode 'grant_type=client_credentials' \
--data-urlencode 'scope=apps.webhook:execute'Within the response you will receive the access token and the lifetime of the access token in Unix time (3600 seconds, which means 1 hour):
{
  "access_token": "{access token}",
  "expires_in": "3600",
  "scope": "apps.webhook:execute",
  "token_type": "bearer"
}
Authorization Code
The Authorization Code Grant Type is probably the most common of the OAuth 2.0 grant types. It differs from most of the other grant types by first requiring an authorization code and then the app launches a browser to start the flow for requiring an Access token.
Get user permissions and receive Authorization code
OAuth is all about enabling users to grant limited access to applications. The application first needs to decide which permissions it is requesting, then send the user to a browser to get their permission. To begin the authorization flow, replace your client_id and open the following URL in a browser:
https://auth.clang.cloud/oauth2/auth?client_id={client_id}&response_type=code&state={state}&scope={scopes}

For example:
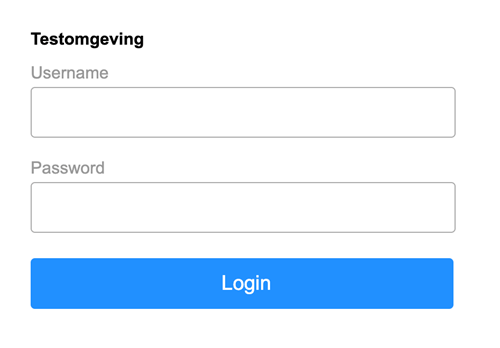
https://auth.clang.cloud/oauth2/auth?client_id=a227118e-7c51-4b26-9ae&response_type=code&state=Example12345&scope=apps.webhook:executeThis will show the Deployteq consent page, please login with the Deployteq credentials of the user which has created the application within Deployteq:
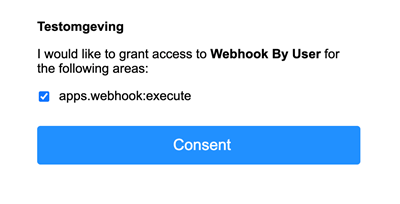
You need to use the Deployteq login information from the same Deployteq user as the one who registered the application in Deployteq. After the login Deployteq will ask for your consent for the defined scopes, in this case executing webhooks:
After the scope is consent, you will be redirected to the redirect URL as defined in the application. The redirect URL (in the browser address bar) has a authorization code added to the query string:
https://your-application.com/registered/callback?code={authorization code}&state=Example12345Exchange the Authorization Code for an Access Token
Now that you have an Authorization Code, you must exchange it for an Access Token that can be used to call Deployteq webhooks.
To complete the Oauth2.0 flow we need to exchange the Authorization code for an Access token. The following information is required:
- Access token URL
- Client ID
- Client secret
- Scope
- Authorization code
- The application includes the authorization code it was given in the redirect.
- Redirect_uri
- The same redirect URL that was used when requesting the code.
curl -u "{client_id}:{client_secret}"
-d "grant_type=authorization_code&code={Authorization_code}" https://auth.clang.cloud/oauth2/tokencurl --location --request POST 'https://auth.clang.cloud/oauth2/token' \
--header 'Authorization: Basic {Base64 Encoded: "client_id:client_secret"}' \
--header 'Content-Type: application/x-www-form-urlencoded' \
--data-urlencode 'grant_type=authorization_code' \
--data-urlencode 'code={Authorization_code}'{
"access_token": "{access token}",
"expires_in": "3600",
"scope": "apps.webhook:execute",
"token_type": "bearer"
}Configure your webhook
If you retrieved the Access token, you can use this to call Deployteq webhooks. First setup a new webhook from the Deployteq store;
In the install wizard of webhooks, the second step is where you set the authentication to Oauth2.0. Simply copy the endpoint and use this to send the first request.
See the example below:
curl --location --request POST '{endpoint}' \
     --header 'Authorization: Bearer {Access Token}' \
     --header 'Content-Type: application/json' \
     --data-raw '{
       "firstname": "Oauth",
       "email": "oauth2@e-village.nl"
      }'
For more information about webhooks and configuration, see our manual.
Using Postman
You can also use Postman for acquiring an Oauth2.0 Authorization tokens
Postman - Client Credentials
See the example below based on a grant type "Client Credentials";
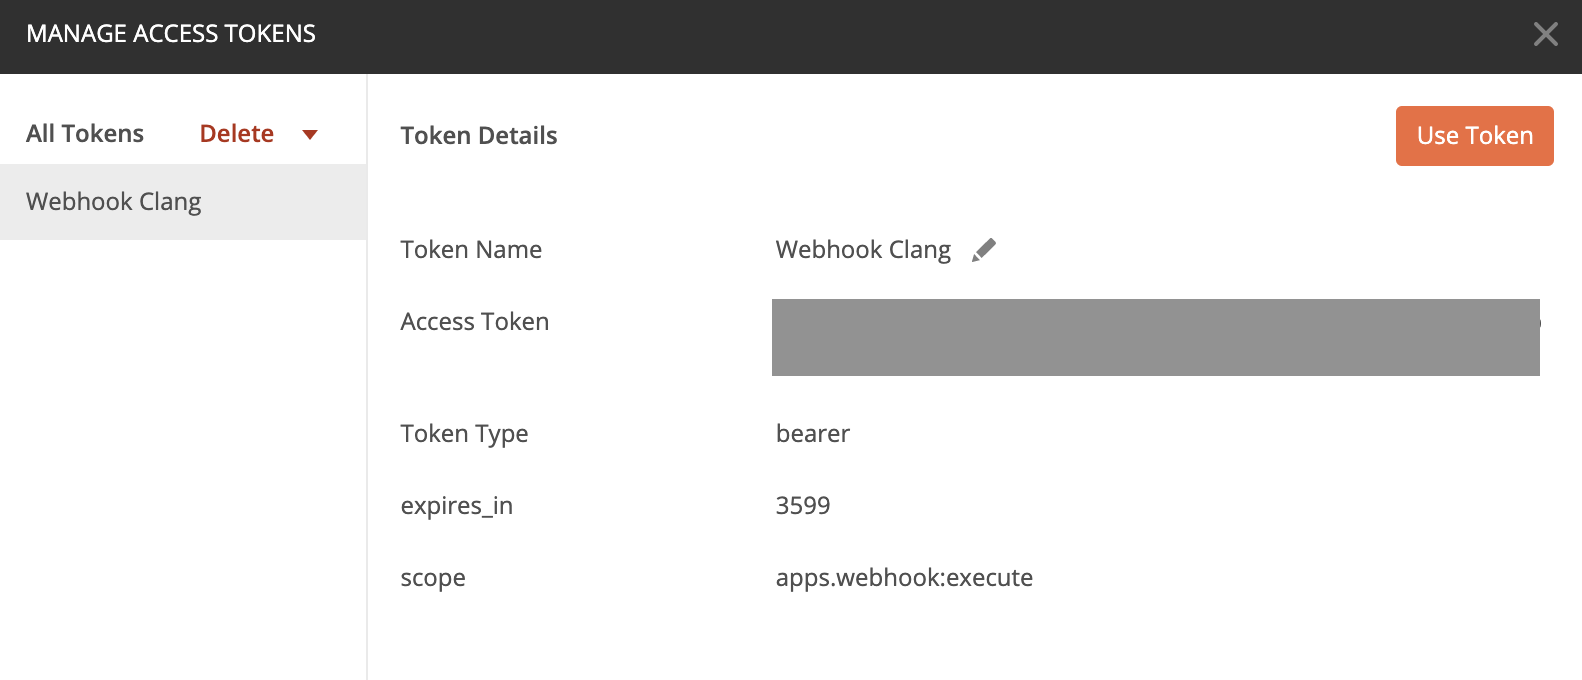
If the token has been requested succesfully, Postman will show an confirmation screen with the required Access Token:
Postman - Authorization Code
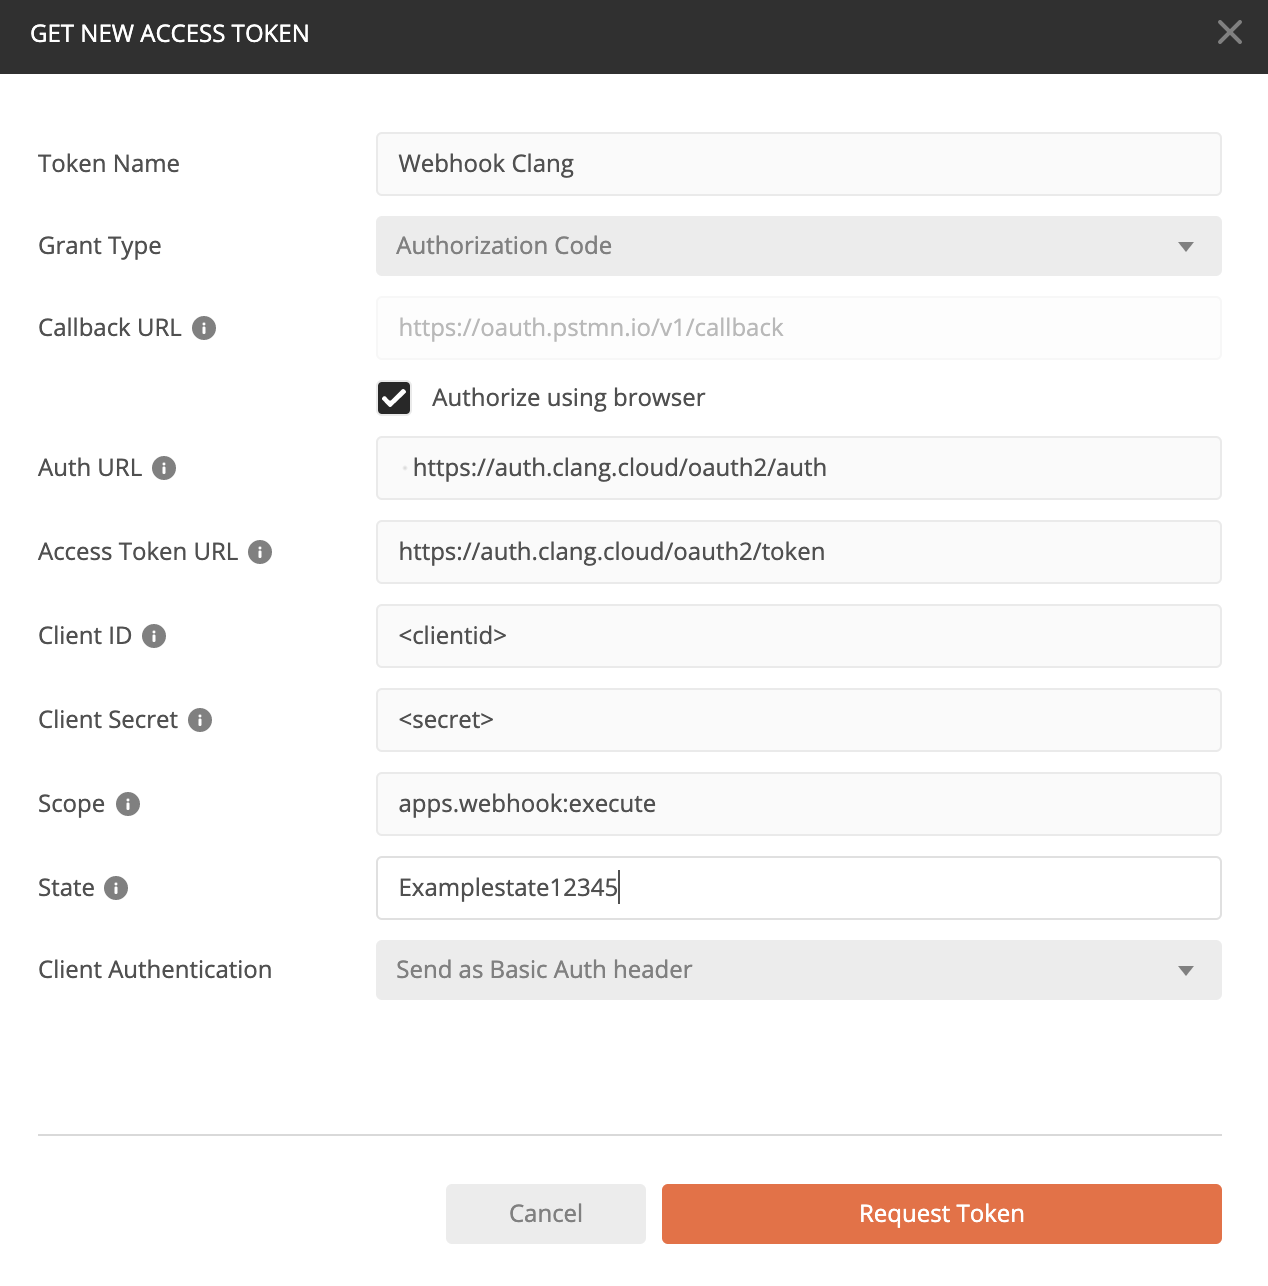
See the example below based on a grant type "Authorization code";
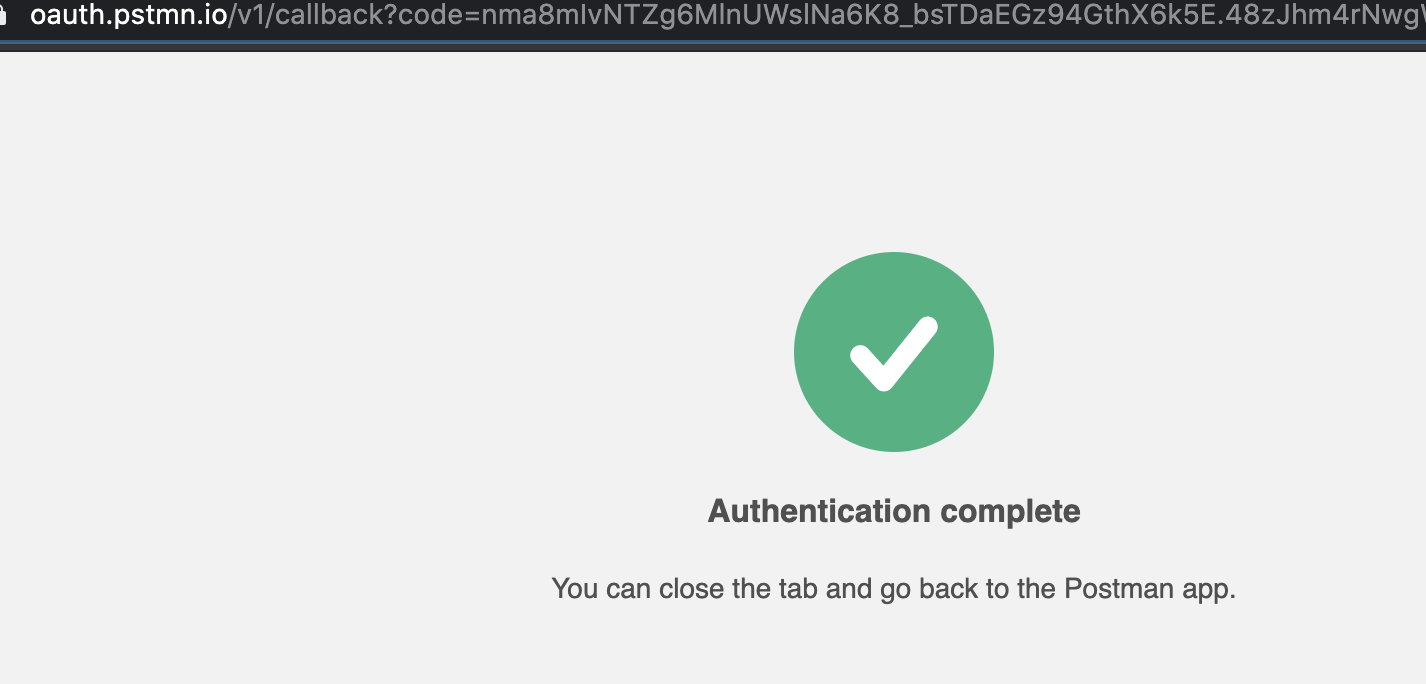
When you request an token, Postman will send you to the browser:
And ask you for your consent:
If the consent was successfull, you will see a confirm page;
