Webhook mapping
The Deployteq Webhook provides the ability to receive data from external systems. Please refer to our documentation for the installation and usage of the Webhook. In this document, you will find a description for setting up the following mapping:
Mapping customer data
The incoming data can be directly written as customer data. Data can be written in:
- Customer fields
- Customer option fields
- Campaign fields
- Environmental variables
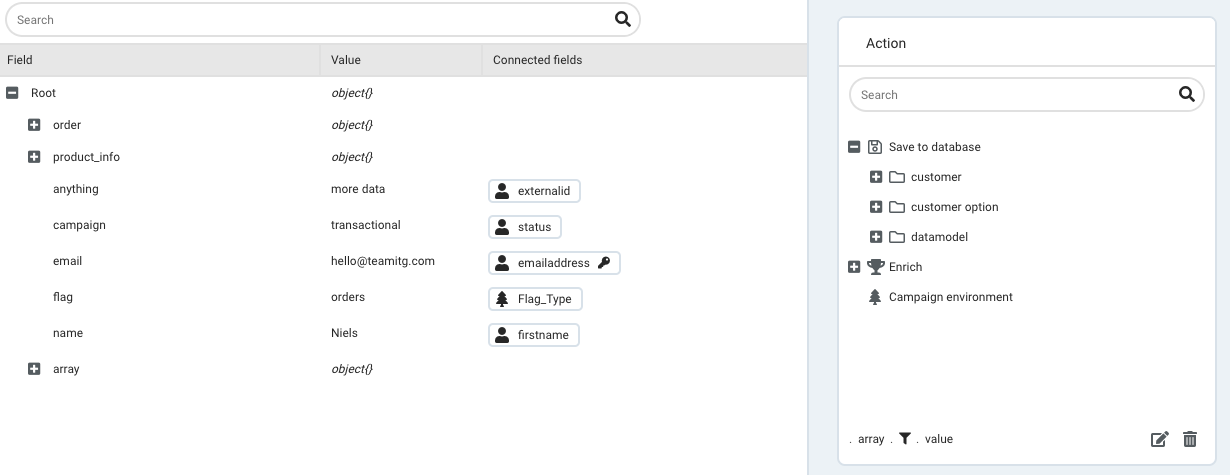
You can set up this mapping as follows (see figure 1):
- Open the Webhook in the Store you want to configure.
- Open the mapping using the "Customize data mapping" button.
Open the structure using the '+' button.
Click the '+' button next to a field
On the right-hand side, you will see the available Deployteq fields.Select the field where you want to store the data. Here, you determine where the incoming data will be stored in Deployteq.
Repeat these steps for all fields you want to save.
- Click on Save in the top left corner to save the mapping.
Figure1: Webhook Mapping
Deduplicate
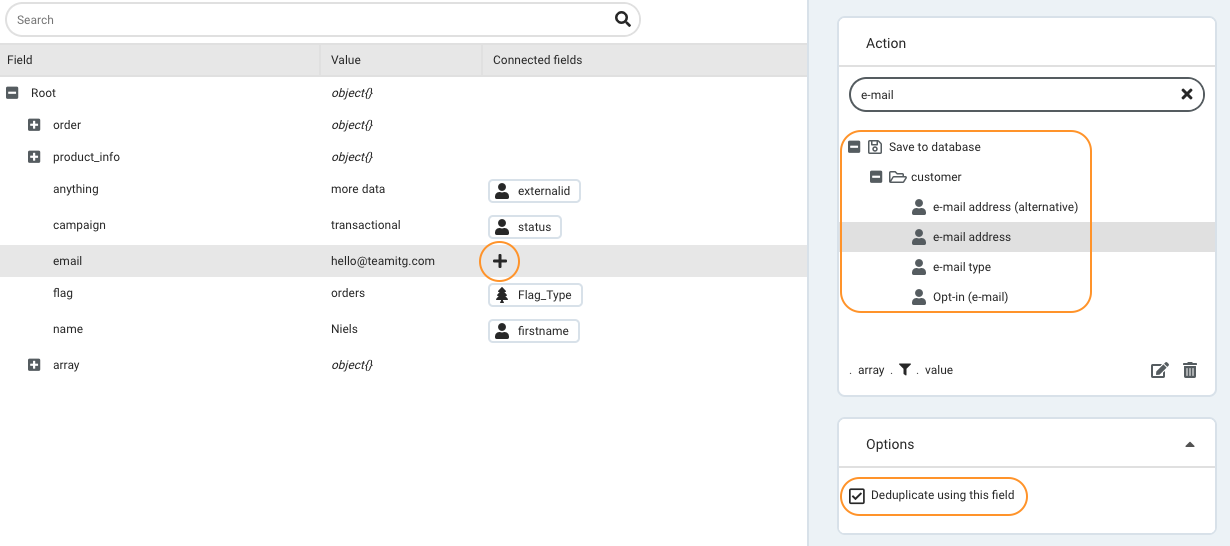
The mapping provides the option to deduplicate based on one or more fields. You set this up as follows (see figure 2).
- Click the '+' button next to the deduplication field.
- Select the field where you want to store the data under 'Action.'
- Select the checkbox next to 'Deduplicate using this field' under 'Options.'
- Click Save in the top left corner to save the mapping.
The deduplication you set up here is similar to the 'Unique' field in a customer data import. Deployteq checks if a record already exists in the database, and based on the outcome, either a new (customer) record is created or existing (customer) data is updated.
Figure 2: Setting up the Webhook mapping and deduplication
Mapping Datamodel data
The incoming data can be directly written into the Data Model. Data can be written into:
- Contains tables
- Lookup tables
- Stand-alone tables
You set up Data Model mapping as follows:
- Open the Webhook mapping using the 'Customize data mapping' button.
Open the structure using the '+' button
- Click the '+' button next to a field.
On the right-hand side, you will see the available Deployteq fields. Below the customer fields and customer option fields, you will find the data model tables. - Open the table where you want to store the data. Within this table, select the field where you want to store the data.
- Repeat these steps for all fields you want to store.
- Click on Save in the top left corner to save the mapping.
Deduplicate
When linking data model data, it is important to specify a deduplication key for each table in the data model. If a data model row is submitted again (in our example, the same 'order_id'), the data will then be deduplicated properly. Existing data can also be enriched and supplemented in this way.
Practical example
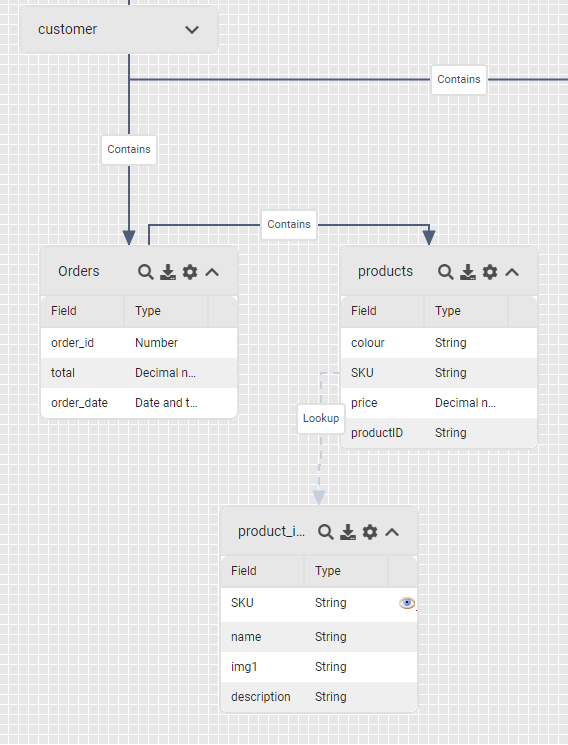
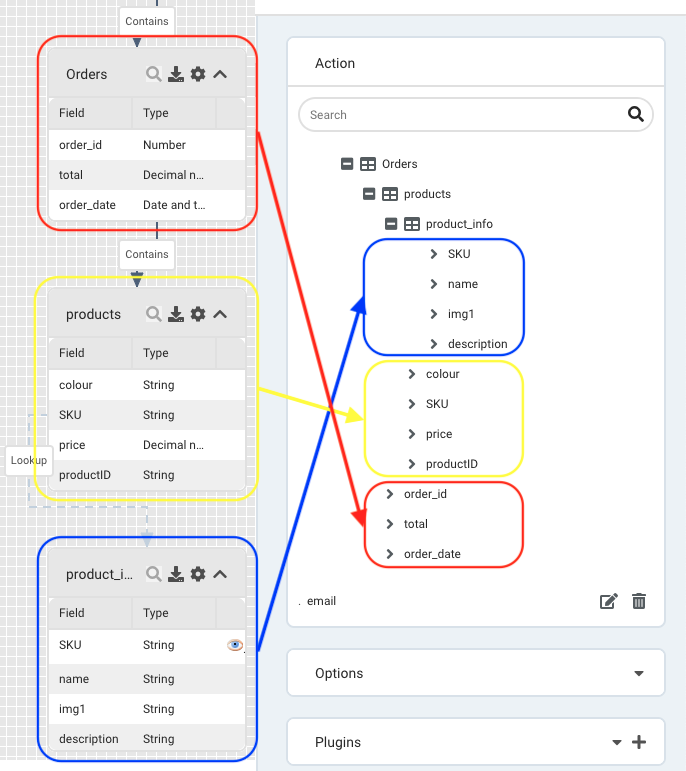
To illustrate this, let's use an example data model structure, as shown in the diagram (figure 3) next to this. This model consists of three tables:
- Orders: where general information about the orders is stored.
- Products: where specific information about the products (within the order) is stored.
- Product_info: a stand-alone lookup table with additional information/data about the SKUs.
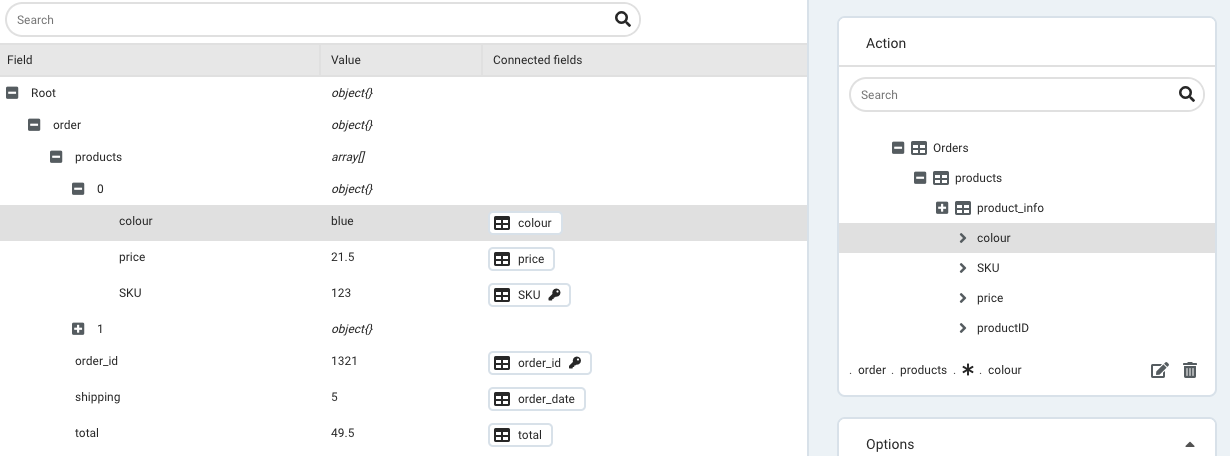
These different tables are visible in the mapping of the Webhook. You can expand each table, with the deepest nested table at the top of the list (see figure 4).
Data is typically provided to a Deployteq Webhook using a JSON structure. For this example, we will use the following structure:
{
	"name": "Steve",
	"email": "hello@deployteq.com",
	"flag": "orders",
	"anything": "more data",
	"campaign": "transactional",
	"order": {
		"order_id": "1321",
		"total": "49.5",
		"shipping": "5",
		"products": [{
				"SKU": "123",
				"colour": "blue",
				"price": "21.5"
			},
			{
				"SKU": "124",
				"colour": "red",
				"price": "28"
			}
		]
	},
	"product_info": {
		"SKU": "124",
		"name": "Product2",
		"img1": "image2.png",
		"description": "example2 description"
	}
}
In the example above, you can see:
- Customer data
- 1 order,
- consisting of: 2 separate products
- 1 line of product information
The data that comes in with the call is stored both in the customer database and the data model. Each field from the call can be mapped to a separate (data model) field. In our example, the data model mapping is as follows:
As we can see above, one order can consist of multiple products. It is not necessary to map each product individually; Deployteq automatically does this for each 'line' within the order.
Figure 3: Datamodel structure
Figure 4: Datamodel structure in the Webhook mapping
Lookup data
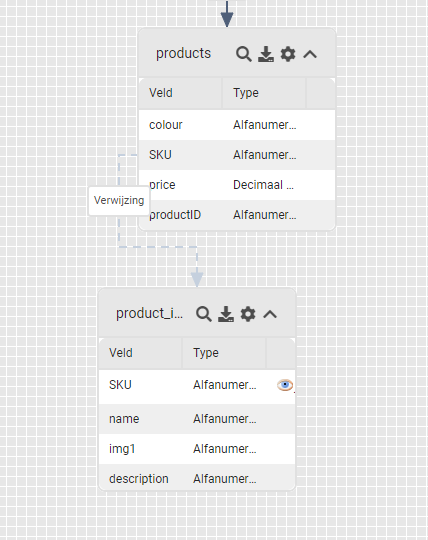
Within the data model, you have the option to create a Lookup table. In this table, you can include information that is not directly linked to a customer record, for example, product information.
In the example next to this, a connection is made based on an SKU value; this value is present in both the Products table and the Lookup table. If the value matches, the Products table retrieves additional information about the product from the Lookup table.
The connection shows exactly which connection is set up; the reference goes from the SKU field to the Lookup table.
The Webhook provides the ability to create product data in a lookup table. You can map the incoming data in the same way as other data model data.
Figure 5: Lookup relation
Mapping Arrays
Sometimes data arrives with a different JSON structure; the array is structured differently. Compare the following structures:
{
 	"name": "Steve",
	"email": "hello@deployteq.com",
  "array_a": [{
			"name": "SKU",
			"value": "123"
		},
		{
			"name": "colour",
			"value": "blue"
		},
		{
			"name": "price",
			"value": "21.5"
		}

	],
	"array_b": [{
			"name": "SKU",
			"value": "124"
		},
		{
			"name": "colour",
			"value": "red"
		},
		{
			"name": "price",
			"value": "28"
		}

	]

}{
"name": "Steve",
"email": "hello@deployteq.com",
"order": {
"order_id": "1321",
"total": "49.5",
"shipping": "5",
"products": [{
"SKU": "123",
"colour": "blue",
"price": "21.5"
},
{
"SKU": "124",
"colour": "red",
"price": "28"
}
]
}
}If you were to map the 'value' field in the usual way, it would be filled with different values that don't actually belong in that field. In our example, both the SKU, the color, and the price would be stored in the same (data model) field. This is the Wildcard option. Deployteq offers two options to adjust this.
Filter
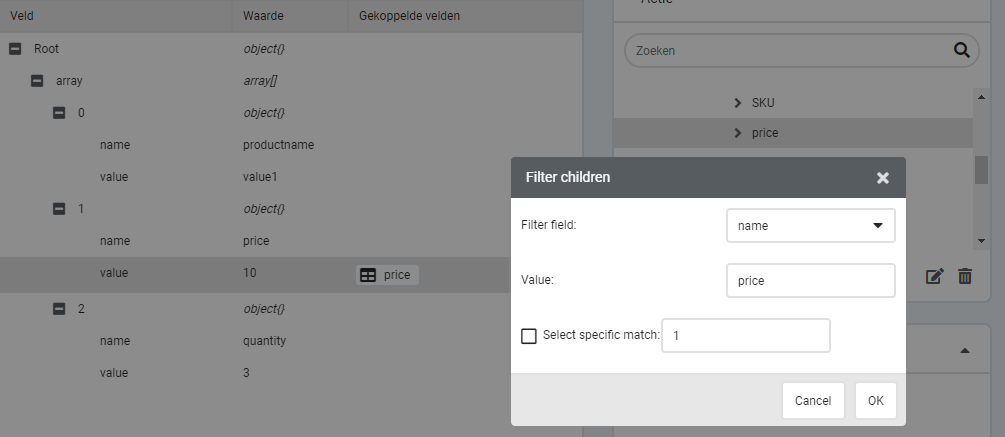
The Webhook has the ability to set a filter so that the value (for 'value') is only stored if the object has a certain 'name'. You can set this up as follows.
- Open the Webhook mapping using the 'Customize data mapping' button.
Open the structure using the '+' button.
- Click the '+' button next to a field.
On the right-hand side, you will see the available Deployteq fields. Below the customer fields and customer option fields, you will find the data model tables. - Open the table where you want to store the data. Within this table, select the field where you want to store the data.
- Directly below the field mapping, you will see the 'path' of the mapping. Click on the wildcard (the asterisk) here.
- Select 'Filter'.
- Select the field you want to filter on under 'Filter field.' In our example, this field is 'name'.
- Enter the value you want to filter on under 'Value.' In our example, this is 'productname' for filtering on product name
The value in the 'value' field is now stored in the selected Deployteq field, but only for the 'productname' line. Repeat these steps for all fields you want to store.
- Click Save in the top left corner to save the mapping.
It's possible for a JSON structure to have multiple objects (lines) with the same name. Deployteq can store the value from one specific object. You set this up as follows:
- Set up the filter as described above.
- Check the checkbox next to 'Select specific match'.
- Enter the number of the object you want to store. If there are three objects with the same name, and you want to store value #2, enter '2'.
Single child
This means that you choose a specific line in the array, and all others are not selected. This only works if the order of the array is the same in each call.
