You will generally group customers with profiles so that you reach the right target group. Of course, you may sometimes search for an individual contact because you have contacted that customer or for the purpose of checking the data in your e-mails and campaigns. Go to ‘Customers’ under the CRM to search for individual customers.
Searching for a customer
By properties
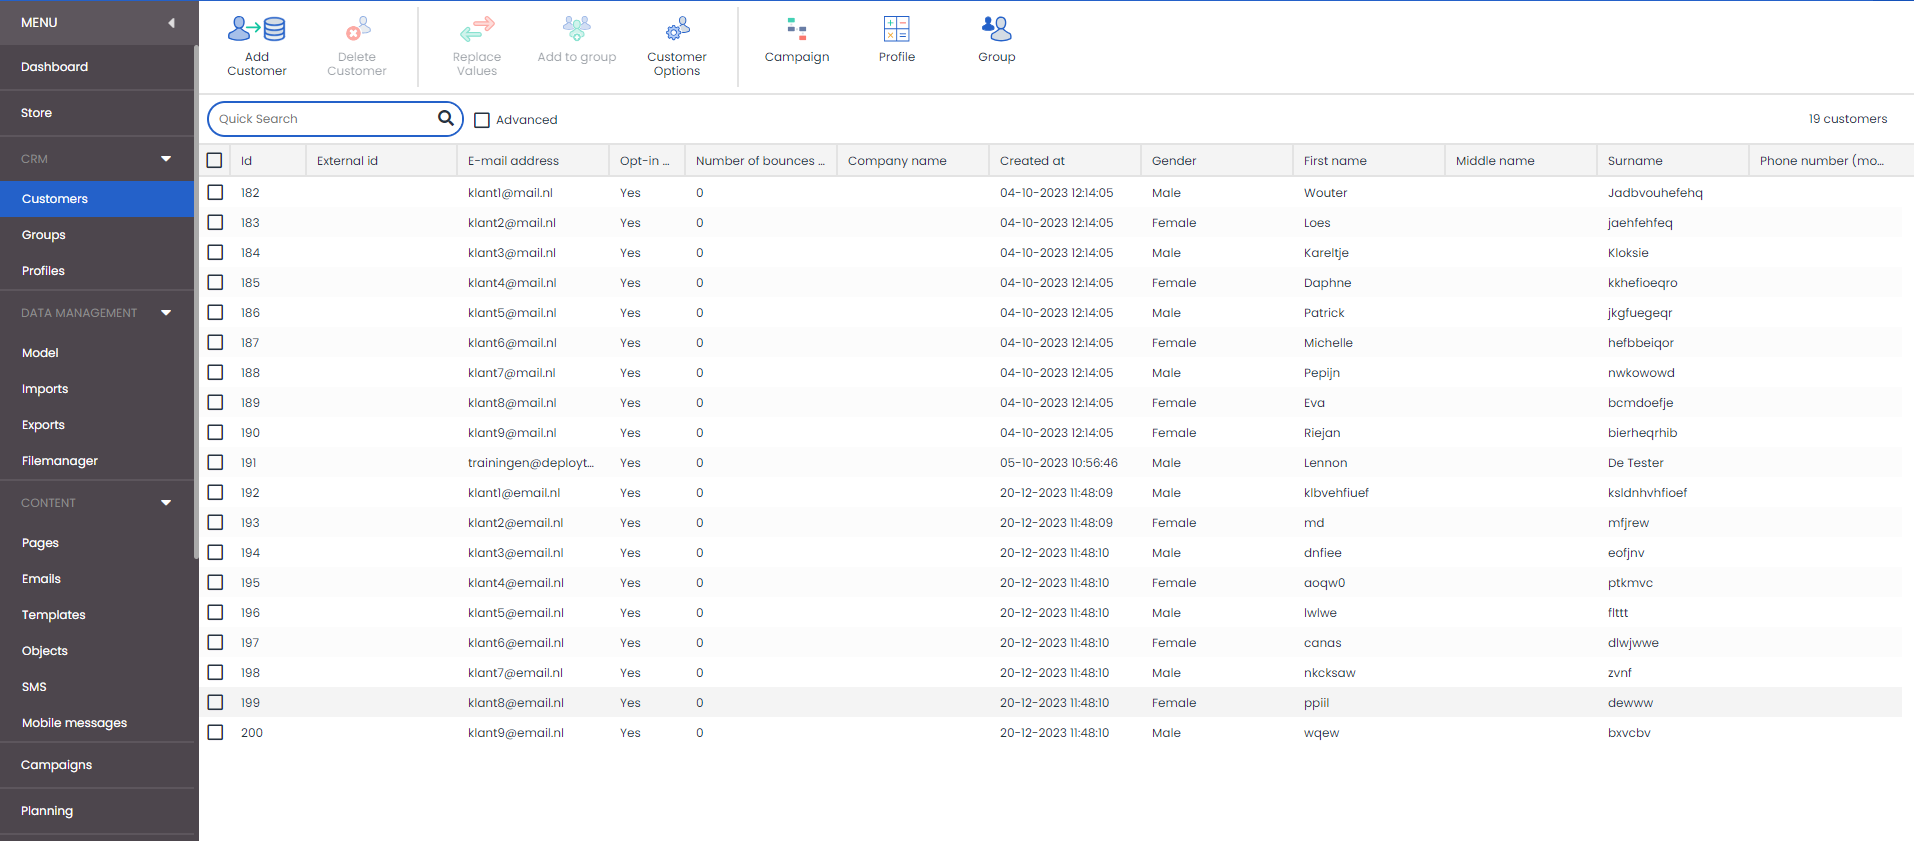
You can perform quick searches in the Deployteq CRM when you have a name, e-mail address, or customer number. If you have part of the e-mail address, you can also use a wild card in your search. The wild card used in Deployteq is an asterisk ‘*’. For example, if you are looking for an e-mail address that ends in @deployteq.com, then use a wild card in *@deployteq.com. Deployteq will ignore everything placed before the ‘@’ and search for everything that ends in this domain name.
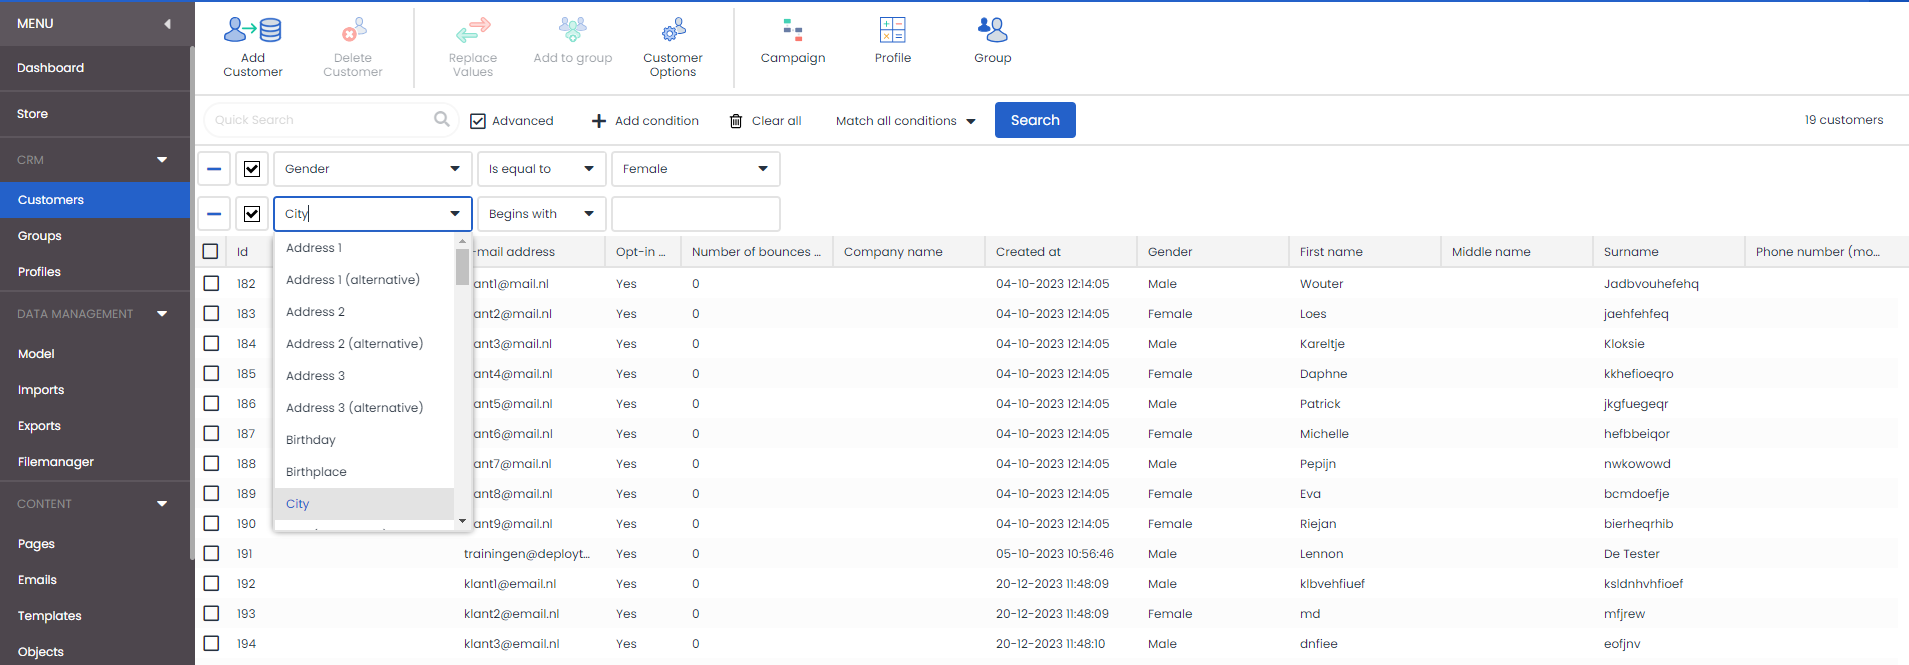
If you do not get many results or are looking for a specific group, you can also perform an advanced search. Click on the ‘Advanced’ checkbox. Here you can add several conditions for your search. If you are satisfied with your conditions, click on ‘Search’ to find all the customers who meet the criteria you have set.
By campaign, profile, or group
If you want a list of customers participating in a specific campaign or who correspond to a profile created earlier, you can also search by these criteria. You’ll find the three buttons for these search options at the top right. Once you select one of these three buttons, it will be highlighted and the name of the campaign, profile, or group will appear behind the search bar.

If you want to search for everyone that appears in that particular campaign, click on the magnifying glass in the Quick search field. If you want to filter these results, you can search for keywords or use the options for advanced searches. The difference now is that you are not searching among all customers but only within the campaign filter.
Creating customers manually
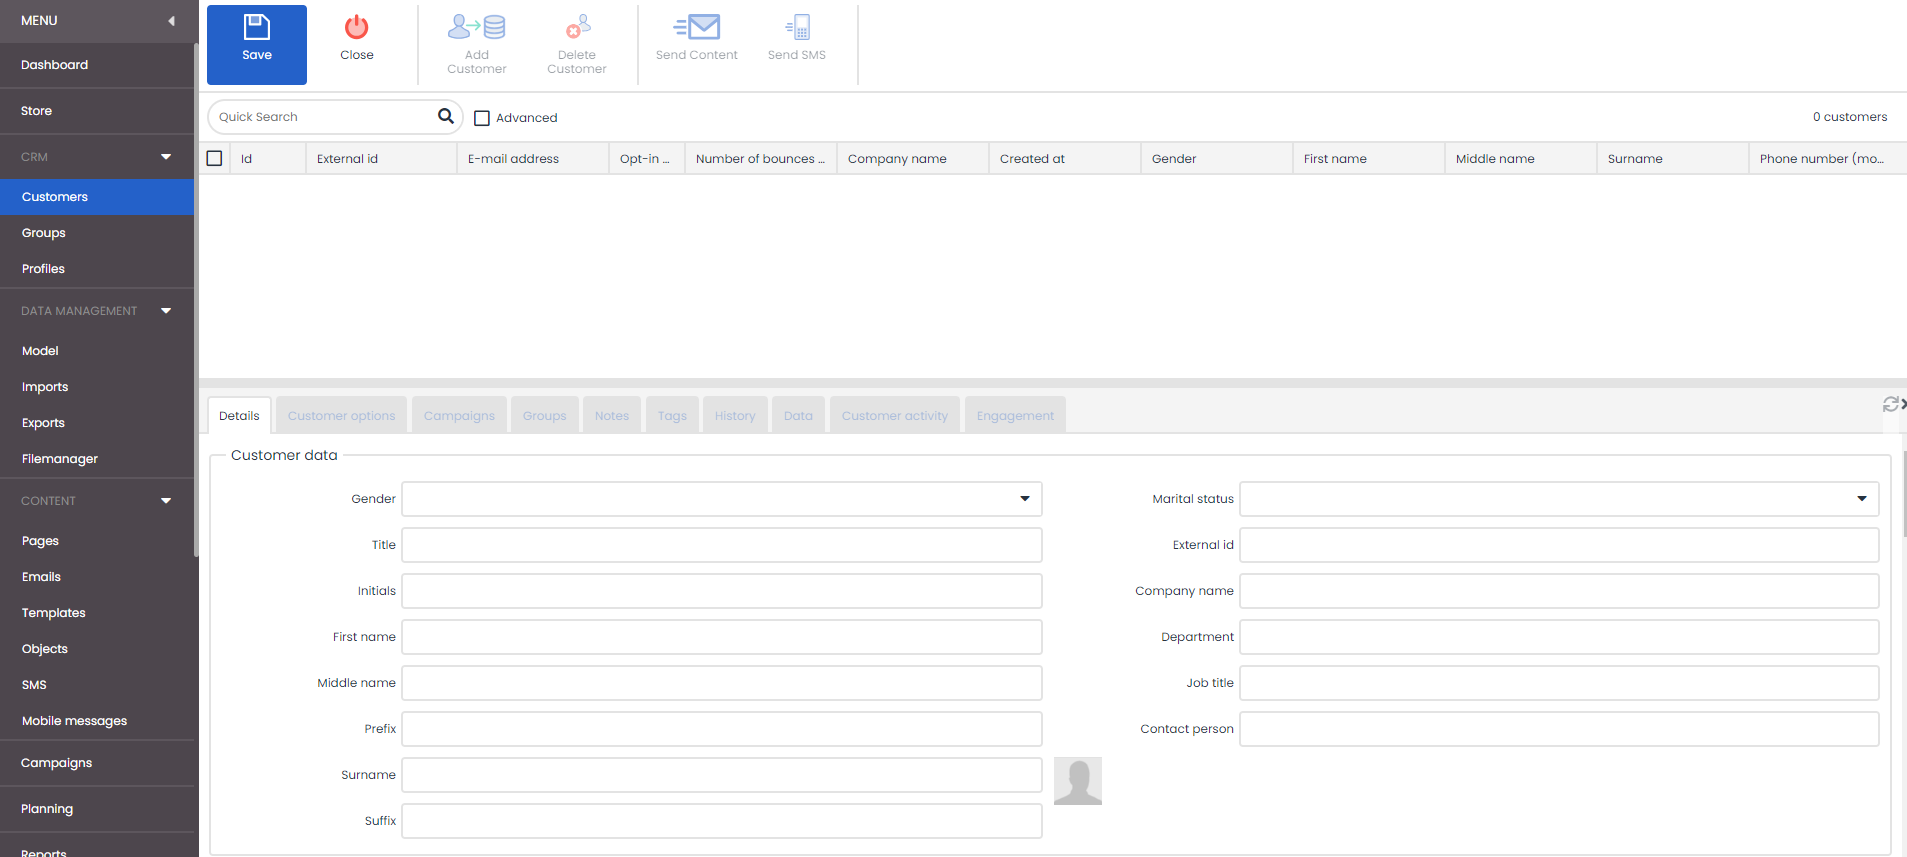
Although you can enter customers in your CRM via an import or API, you may want to enter customers in Deployteq manually. For example, for testing purposes or if you have had personal contact with a customer. To do so, go to the CRM and click on ‘New customer’ in the top left. Similarly to when opening a customer, you will also see a customer card at the bottom of the window. Initially, you can only fill in fields in the ‘Details’ tab. As soon as you have saved the fields, the other tabs will become available. Fill in what you can or what you need for your tests and click on ‘Save’.
 850
850
When you create a customer, this also appears in the history together with the user who added the customer.

What information can I find for a customer?
When you click on a contact, you will see the customer and their personal details at the bottom of the window. There are multiple tabs available, containing various data.
The ‘Details’ tab, for example, contains all general name, address, e-mail address, and opt-in details. You can also see here whether someone has bounced and you can also add their birthday.
In addition to the default fields, you can create extra fields in your brand in order to save the right data for your customer. You’ll find these under the ‘Customer options’. (See: Customer option field)
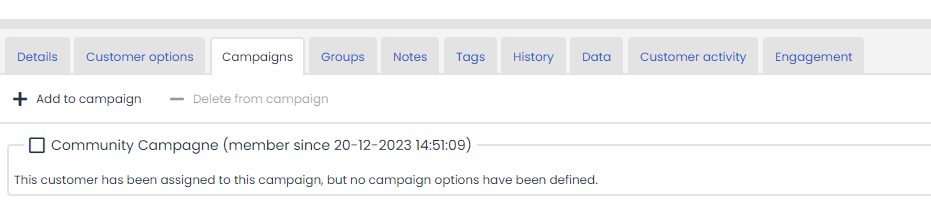
This can be created per brand by the brand administrator. These fields could be input fields, as well as selection fields or date fields, for example. You can then see under the ‘Campaigns’ tab which campaigns the customer is involved in and any filled campaign fields if relevant. These are fields that can be used in this specific campaign or in the e-mails.
The ‘Groups’ tab shows you which groups the customer belongs to. Add customers to a group manually by clicking on the ‘Add to group’ button. You’ll see an overview of the groups that correspond to your brand. You can also select groups by checking the appropriate boxes. Delete customers from one or more groups by clicking on the ‘Delete from group’ button after selecting the relevant group or groups.
You can also add ‘Notes’ for the customer. This is especially useful if you also use Deployteq as a CRM. Add a note, for example, if you have spoken to a customer or if you have modified their details. If you have modified an opt-in manually, it is always sensible to mention why and when you did so. Please be aware that the notes cannot be exported to another system. If you use another system as your main CRM, it would be better to make these changes there.
If you use ‘Tags’ for your links, you’ll find the personal tags under this tab. These can also be added or deleted manually. In practice, these manual actions will mainly be used for testing purposes.
One tab that is interesting is the ‘History'. Here you can find everything that has happened to the customer, such as which imports included this customer, what steps a customer had in a campaign, and which e-mails this customer received.
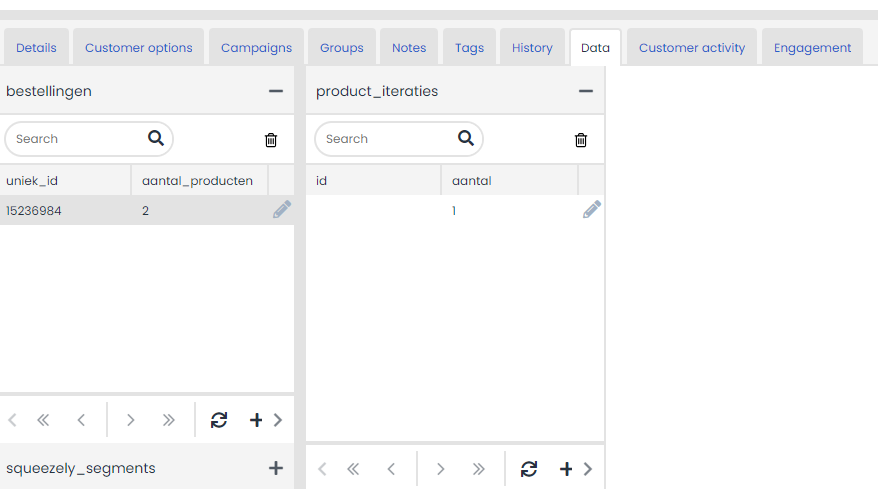
If you use the datamodel you’ll find this customer’s details under the ‘Data’ tab. If you have many tables, you will first need to open the relevant table before you can find the underlying data. You can also add or delete data using the plus sign or recycle bin icon. Again, these will mainly be used for testing purposes. Large amounts of data will mainly be processed with an import or via our API.