In Deployteq, there is already a considerable amount of data that you can save in the customer record. Customer fields and customer option fields can be used to store customer details. However, this data is always overwritten during a campaign or import. Sometimes, the history of the data may also be important, such as in the case of orders or bookings. This is what the data model is for. Just like the customer options, you can create this model entirely by yourself. However, it goes a few steps further, as you can also create relationships between the different tables or even create separate tables that you can use for set information in your e-mails. Below we explain how to create the tables and what choices you can make and when. Lastly, we provide some examples for inspiration.

Creating tables
You can create the entire data model yourself. There are numerous possibilities and it can store a lot of information. Our advice is to keep it simple! Before you start building your model, think about what you will use the stored data for. What campaigns do you want to create? What profiles do you want to create with this data? Do you want to save all the data with its history or can it be overwritten? How far back do you want to view data?
Why do we advise this? Because you could otherwise make it very difficult for yourself. The more data that is entered into the model, the more difficult it is to retrieve the data you want. If it contains a lot of data that you don’t actually want to use, you would have to exclude a lot of the data. If you have many different tables, you would have to search deeper and deeper in your profiles and e-mails to get to the right data. Below, we provide some examples often seen in the various sectors as a source of inspiration for your own model. If you need any assistance or just want someone to bounce ideas off, let us know and we will be glad to help.
New table
To create a new table, go to ‘Add table’ at the top of the screen. Enter a unique name, without spaces, for your table. If you are going to link to another system, think about whether you want to use capital letters or not. Both are possible, but make sure you are consistent to make it easy to create links.
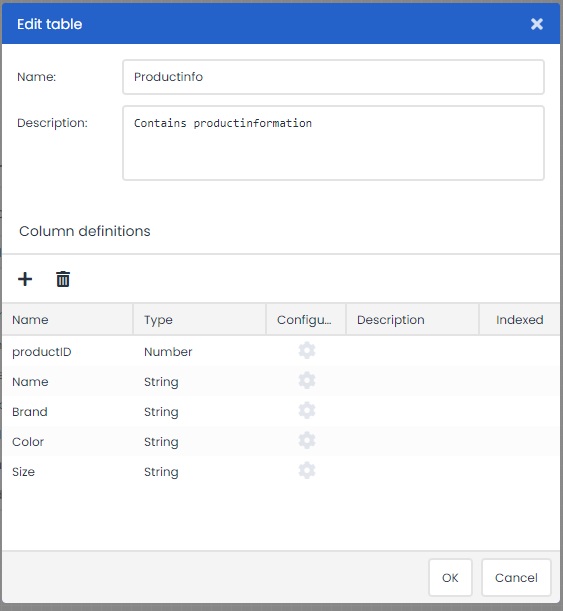
Constructing a table
You will now create columns for storing the data. In these columns you can only use letters, numbers, or underscores. You cannot use spaces or special characters. Give everything a unique name and be consistent in your use of capital letters, to keep things simple.
You also need to specify the type of fields used. The following types are available:
- String type
This field type can be filled as you please, and both letters and numbers can be used. - Date
This field stores a date that you can also use in your profiles to calculate with. For example, the subscription date field is three weeks in the past. - Time
This field only stores a time. - Date/Time
This field stores both a date and a time. If you perform calculations with date/time fields, you will need to use an interim time of X and Y. If you calculate with IS exactly three weeks in the past, Deployteq will only look at the date/time that is identical to the second. - Yes/No
This field can only have the value Yes or No. - Integer
This field stores whole numbers. Use it, for instance, for IDs or codes that mean something to you. You can also use these later in your profiles. You could also use them, for example, to perform calculations with bigger than and smaller than. - Float type
This type of field stores a number with decimals. If you choose this type, you can also select how many decimal places you would like to use. In general, this type of field is used for currency, such as total turnover value. This enables you to perform calculations in your profile with bigger or smaller than.

Creating relationships
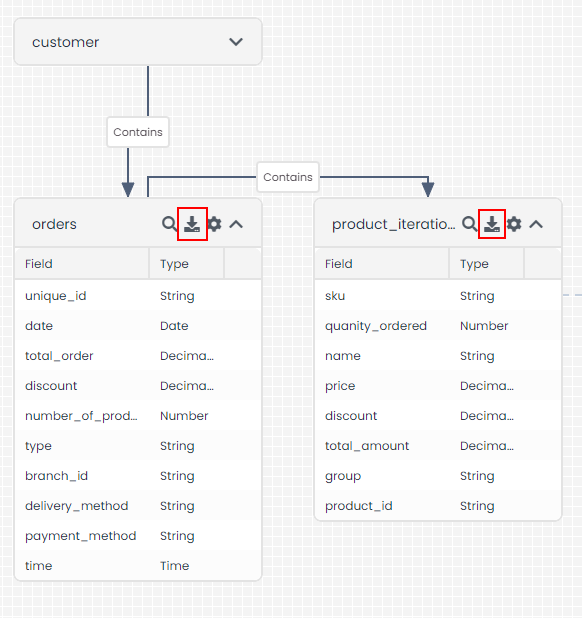
Once you have created the tables and columns, they still need to be linked to other data. In the previous example of the clothing brand, for instance, you would want to link the orders to the customer. A customer can have one or more orders. When you hover with your mouse
over the table, you will see arrows displayed. Click and drag an arrow to the table you want to link this table to. You will see a pop-up window with the possible options.
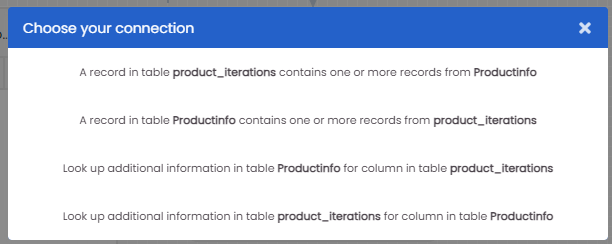
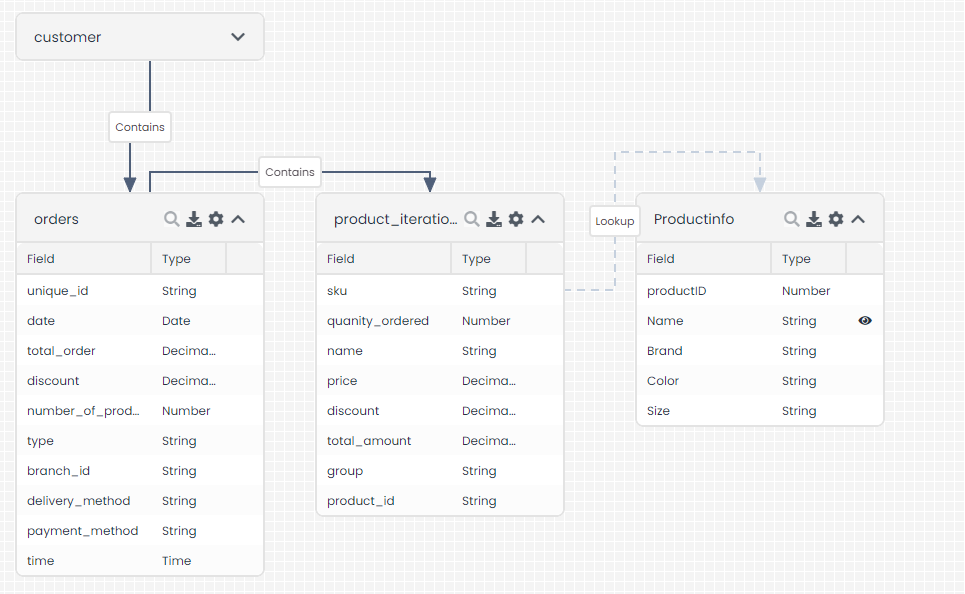
- The ‘contains’ connections run from table to table and indicate that a single record in a table can contain multiple subrecords from the other table.
- The ‘reference’ connections run from column to column and indicate that the values for that specific field must be retrieved from the other table.
There are a number of things you need to take into account with references:
- You can only create a ‘contains’ connection from the customer table and not to the customer table.
- You cannot create a ‘contains’ connection and a ‘reference’ connection from one table to another table. This action is restricted.
- It is not possible to create a loop between tables. This action is restricted.
- You link a customer to a data table by using an e-mail address and/or customer ID.
Seperate tables
It is also possible to create tables that are separate from other tables or from customers. One reason is so that you can retrieve data from here that you want to display in an e-mail, regardless of the customer. Use Smarty to insert the data from your table into the e-mail. You could have a customer option field, for example, containing a preferred branch with a code. You would then insert the same code in the separate table, along with the opening hours, address, and a link to directions. By matching the code from the customer option to the data model, you can always display the current data for the preferred branch.
Data from the data model
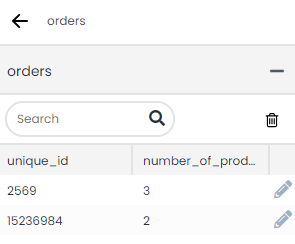
Although you will mainly use the data from the data model for your profiles, it may sometimes be useful to verify the data in the data model. Click on the magnifying glass for the table you want to view to see the table’s contents. It is not possible to see here which relationships are associated with this data. If a relationship with another table does exist, e.g. with orders and products, just click on the order to see the associated products. If you have a lot of data, you can browse between the different pages at the bottom and also see the total number of lines that your table contains. Click on the plus (+) sign to add extra data. If you do this in this window, it will not be linked to a customer. Often, you may want to add data for testing purposes and it would be better to do this from the customer.
Data model data associated with the customer
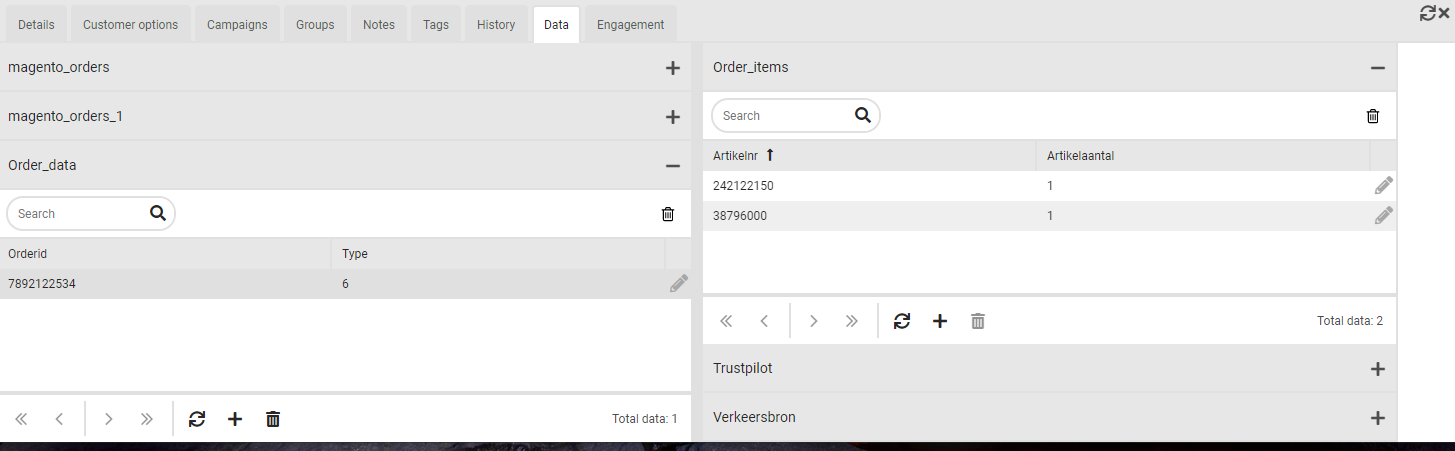
Go to the CRM and search for a customer for whom you want to check or add data for a test. When you have opened the customer, go to the ‘Data’ tab. Here you’ll find the data associated with the customer and can also link data to the customer using the plus (+) sign. In the same example, click on the order to see or add the associated products.
Adding data
In addition to adding data manually, you will want to transfer the large bulk of your data to the data model so that it contains all your data. There are several ways of doing this. You can also use a Deployteq import to fill the data model. This makes it possible to load the orders of the past day every night. The instructions for doing this can be found here in our manual. If you want to use the data as soon as an order has arrived, for example to send an order confirmation, it would be best to use the Deployteq API. There are also several ways that you can do this. The webhook receiver is the most suitable tool for this purpose. It receives the customer data as well as the order data and can subsequently save this data. Once everything has been saved, you can immediately start a campaign that e-mails the confirmation to the customer. Another possibility is to use our REST API in combination with the SOAP API. This option requires several calls to achieve the same as the webhook, but this solution is free of charge. If you need help or advice on which solution is best for you, please let us know by calling +31 (0)30 - 698 8080
Deleting data
Lastly, you can also delete data from the data model. When your test has been completed, you may want to delete the model or delete the data for a specific person. To do so, go to the records in the data model as explained above. If you want to delete an individual record, select the record and delete it by clicking on the recycle bin at the bottom. If you want to delete the entire model, click on the recycle bin at the top.
Data model size
You can place 2 GB of data in the data model at no extra cost. At this size, profiles can still work at their most efficient. If you need to use more data, you can increase this data via the Deployteq Store for a monthly fee.
Downloading data
You can download all the data from the data model. To do so, go to the model and click on the Download button. You will retrieve all the data that the model currently contains.