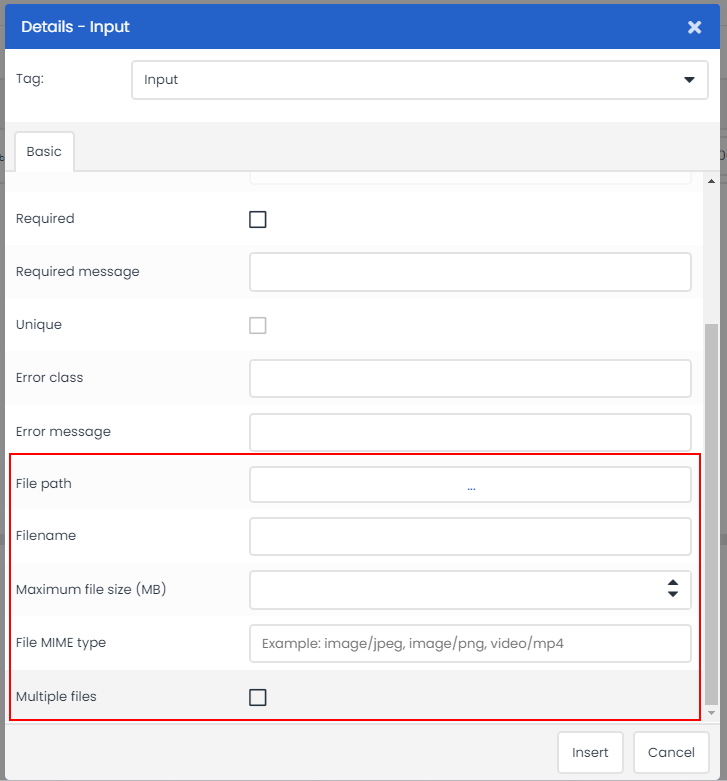
In the pages you create in Deployteq, you can now create an input field for uploading files. This will ensure that files uploaded here will be placed in a specified (external) folder in Deployteq's file manager or sent as attachments in an email using the PDF attachments module.
Installing the app
In the Deployteq Store, you can find the app named "Page Upload Files".
You can install the app in two simple steps:
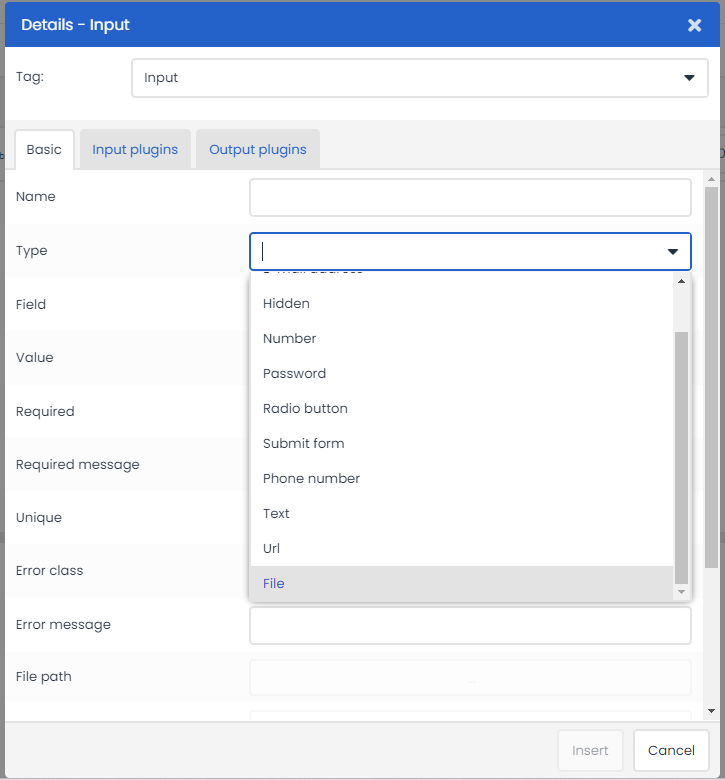
Installing the app adds the capability to add an input type of "File" when creating/editing a page, enabling the addition of upload functionality.
When inserting, you can add a form element for your file upload.
Using the functionality in Pages
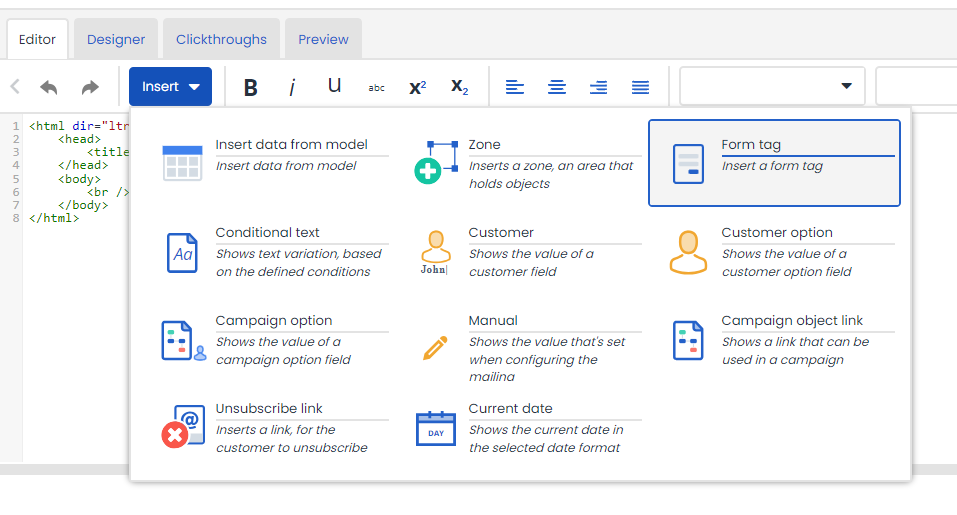
When the app is installed, you can insert a new input on the desired page (not a page template!) through the editor.
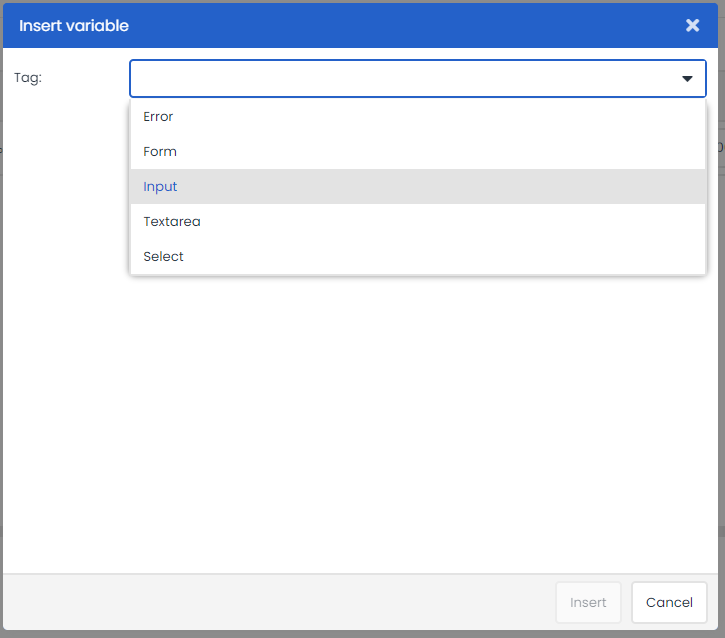
Just like with any form, you first select a form tag and add it to your page. Within the form element, the input element of type "File" must be added.
If you have chosen the file type, you will get additional options to configure. These extra options are explained below:
File path* Filename By default, we retain the filename of the uploaded file and append a unique ID to it, ensuring that files with the same name do not overwrite each other. For example: <original name>_980c038f-30ed-4e55-979a-c9af787ce90b.png Maximum file size (MB) File MIME-type * Multiple files * These fields are mandatory for configuring the file upload. |
MIME types
The most commonly used MIME types in Deployteq pages are:
| Extensie | Bestand | MIME Type |
|---|---|---|
| .doc | Microsoft Word | application/msword |
| .docx | Microsoft Word (OpenXML) | application/vnd.openxmlformats-officedocument.wordprocessingml.document |
| .dwg | AutoCAD Drawing Format | image/x-dwg image/vnd.dwg application/acad application/octet-stream |
| .gif | Graphics Interchange Format (GIF) | image/gif |
.jpeg .jpg | JPEG images | image/jpeg |
| .mp3 | MP3 audio | audio/mpeg |
| .mpeg | MPEG Video | video/mpeg |
| .mp4 | MP4 video | video/mp4 |
| .png | Portable Network Graphics | image/png |
| Adobe Portable Document Format (PDF) | application/pdf | |
| .zip | ZIP archive | application/zip |
A complete list can be found online, for example at Mozilla.
Smarty for upload
When you have configured everything according to your preferences and click on insert, you will receive a piece of Smarty code for uploading on your page. See the examples below:
{{input name='fileupload1' type='file' field='environment' file_path='Upload campagne.folder' file_mime='image/png' required='true' error_message='Upload jouw bestand' error_class='error'}}{{input name='fileupload1' type='file' field='environment' file_path='Upload campagne.folder' file_mime='image/png' required='true' error_message='Upload jouw bestand bij veld 1' error_class='error'}}
{{input name='fileupload2' type='file' field='environment' file_path='Upload campagne.folder' file_mime='image/png' required='true' error_message='Upload jouw bestand bij veld 2' error_class='error'}}For each upload button, you will see the selected field:
{{input name='Multiupload' type='file' field='environment' file_path='Upload campagne.folder' file_mime='image/png' required='true' error_message='Upload jouw bestand(en)' error_class='error' file_multiple_allowed='true'}}In the page, you can then see how many files are being offered simultaneously;
CSS Styling
Of course, you'll want to style the upload button to fit seamlessly within your form. When you inspect the source code of the final page, you'll see that it has become an input element, allowing you to customize its appearance using CSS.
Send as attachment
With the PDF Attachments module, you can directly use the uploaded files as attachments in emails. In the campaign, the environment variable is available based on the name of your file upload input element. In this example, it's "Multiupload".
When the PDF Attachments module is configured, an extra option will be available when sending emails to select an environment variable with the file. In this case, the page upload App has created 2 environment variables:
- page.Multiupload
- This variable contains all file names, comma-separated, which have been uploaded. These can be optionally displayed in the email confirmation by adding the following Smarty code to the email content or page:
{{manual field="page.Multiupload"}}
- This variable contains all file names, comma-separated, which have been uploaded. These can be optionally displayed in the email confirmation by adding the following Smarty code to the email content or page:
- page.Multiupload_attachments
- This variable contains the local path to the files and can be used to add the uploaded files as attachments.
