In order to link Deployteq to Shopify, we want to look into building a standard connection. However, this will take some time to develop. Until such time, there is another, faster way to get data from Shopify into Deployteq which is to use the Webhook functionality.
API Token
First of all, it is advisable to create a separate user for Shopify. You will need to create a token for this. You’ll find the instructions in our manual: https://docs.canopydeploy.net/cden/getting-started-with-canopydeploy/data/links-to-other-software#Linkstoothersoftware-APItoken
Webhook receiver
You then create an endpoint with the webhook receiver from the Deployteq Store. The link appears as follows: https://{{portal}}.{{platform}}.myclang.com/app/api/rest/public/v2/project/datahook/data-receiver/3-update-customer?token={{token}}
You’ll find the exact instructions in our manual: https://docs.deployteq.net/dug/getting-started-with-deployteq/deployteq-store/webhook-receiver
Configuring the endpoint in Shopify
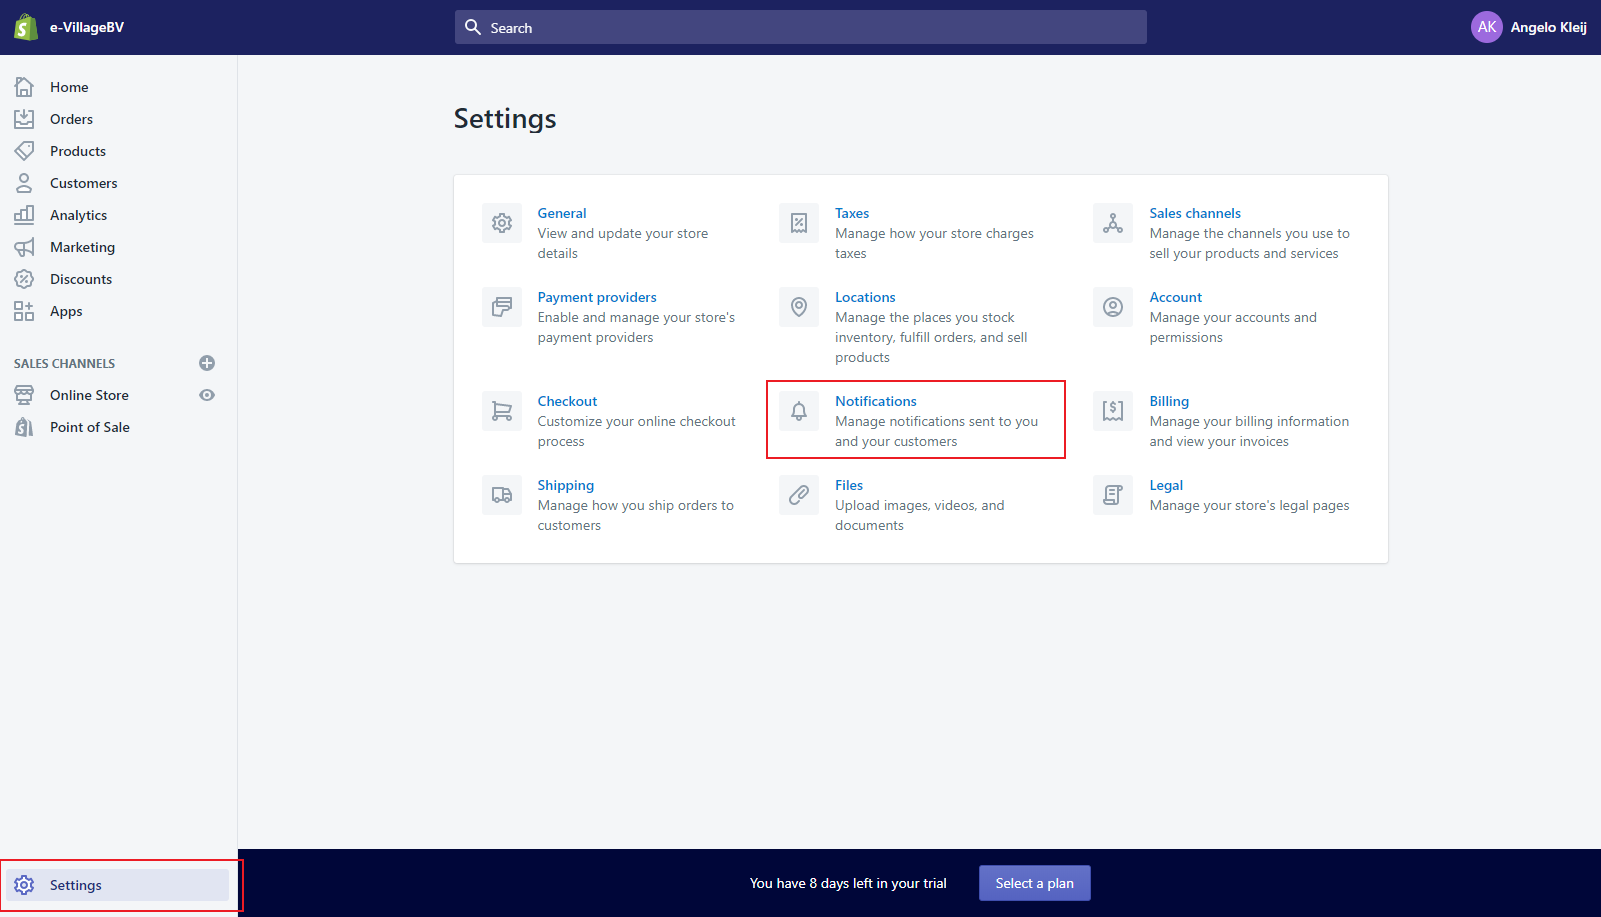
Within the Shopify environment, click on Settings in the bottom left and then go to Notifications
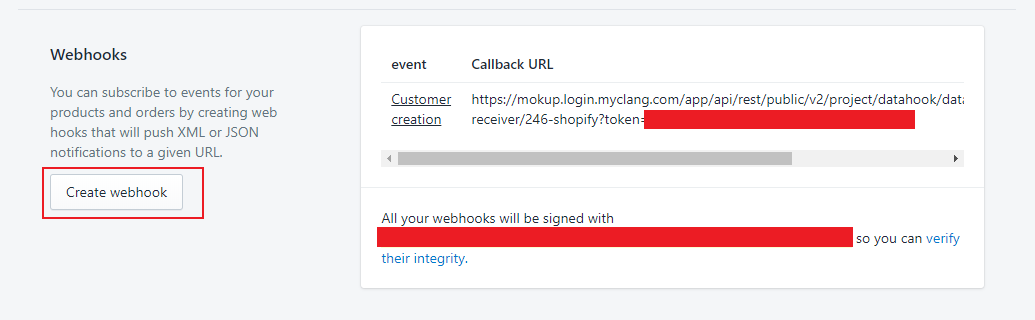
Right at the bottom, you can create a Webhook with the URL that you have obtained from Deployteq.
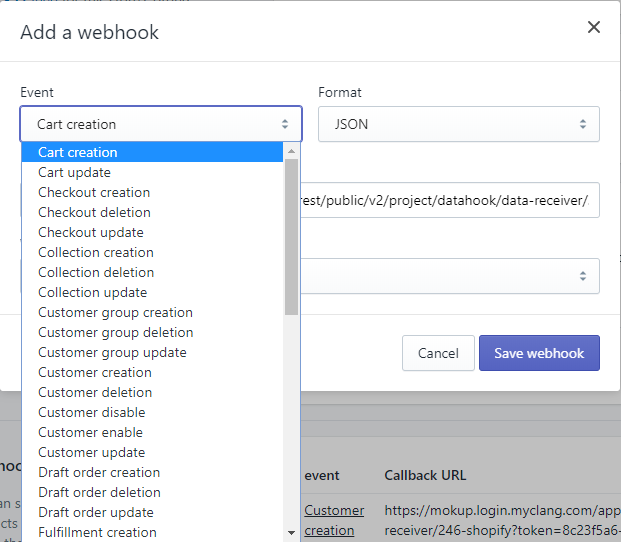
Choose an event in Shopify with which to start the trigger.
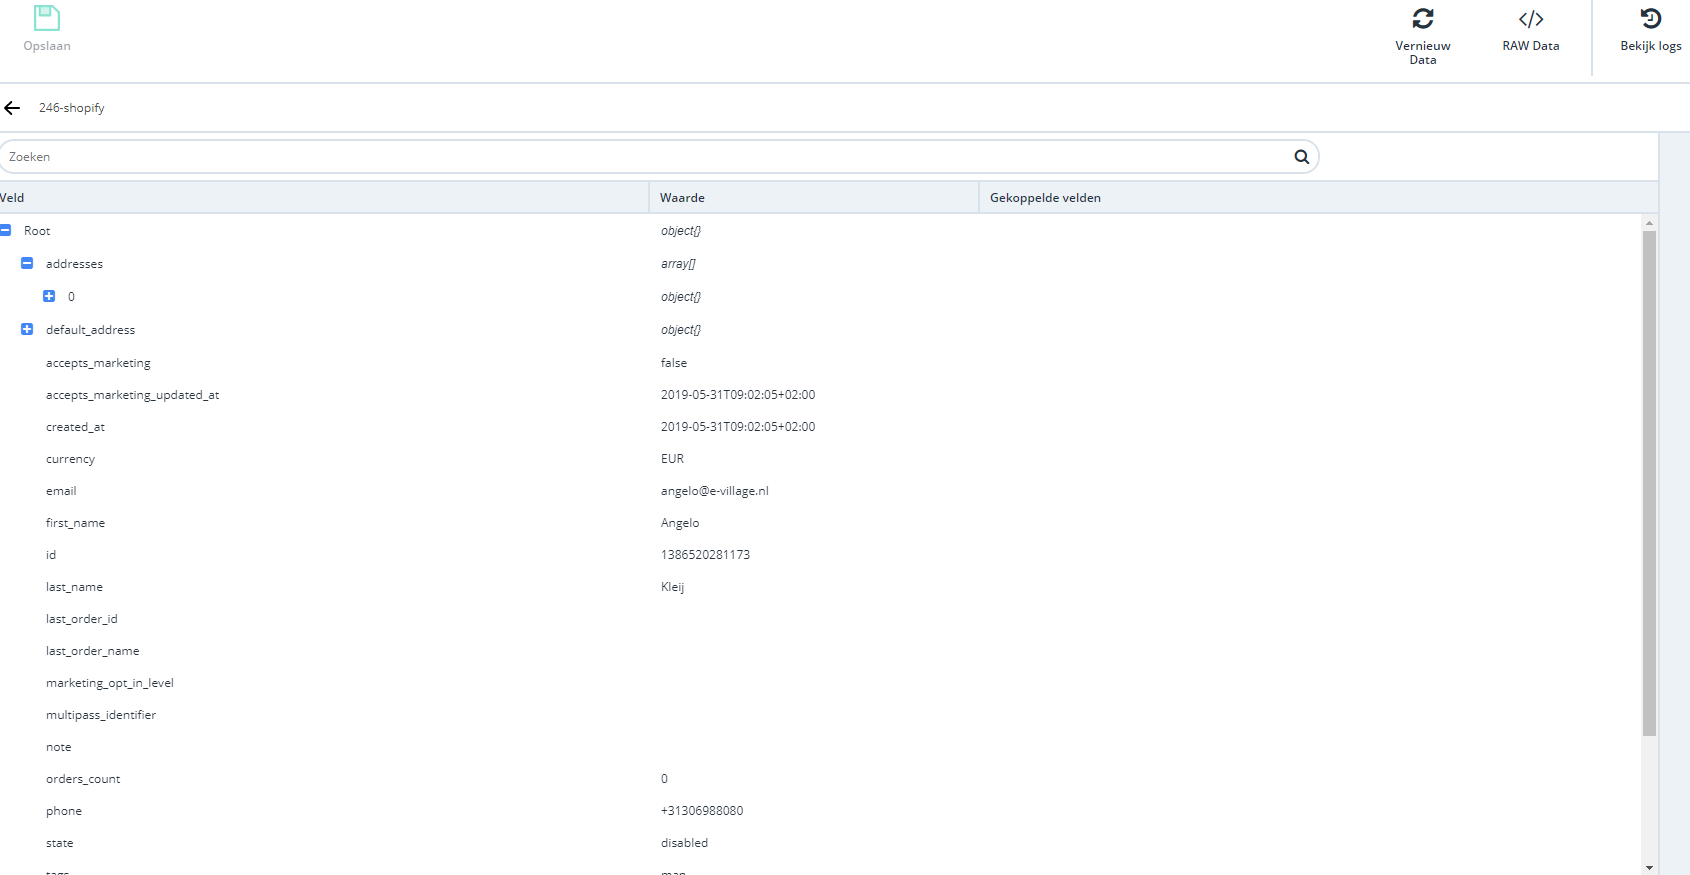
The data then arrives in Deployteq. This is an example of a create-customer call:
This data can be mapped in the interface for the webhook receiver. You’ll find the instructions in the manual again.
You can then use the ‘Start with Webhook’ campaign object to start your flows with e-mails again.
Need support?
No experience with webhooks or temporarily short on time to set this up yourself? Feel free to contact us at via =31 30 698 80 80 or via tpm@deployteq.com.