Do you use HubSpot as your CRM system? It is convenient to have new and updated contact information directly available in Deployteq, ensuring your contacts are always up-to-date. Moreover, you can use this updated information as input for campaigns, such as a welcome campaign for new users. Contacts deleted from HubSpot are automatically removed in Deployteq. No more time-consuming manual updates; let the HubSpot integration do the work for you.
From Deployteq, email interactions are synchronized to HubSpot, visible on the contact's HubSpot activity timeline.

What does this app offer?
The integration offers the following functionalities:
- From HubSpot to Deployteq:
- Newly created contacts
- Updated contacts
- Deleted contacts
- From Deployteq to HubSpot:
- Activity Timeline events based on sent emails
- Campaign objects:
- Start in HubSpot to immediately execute a campaign when data is received from HubSpot.
1 - Installation
Through the Store, you can easily set up the HubSpot integration with the wizard. Below the steps are described.
Step 1: Connect with HubSpot
The wizard consists of 3 steps, with the first step being connecting your HubSpot environment to Deployteq:
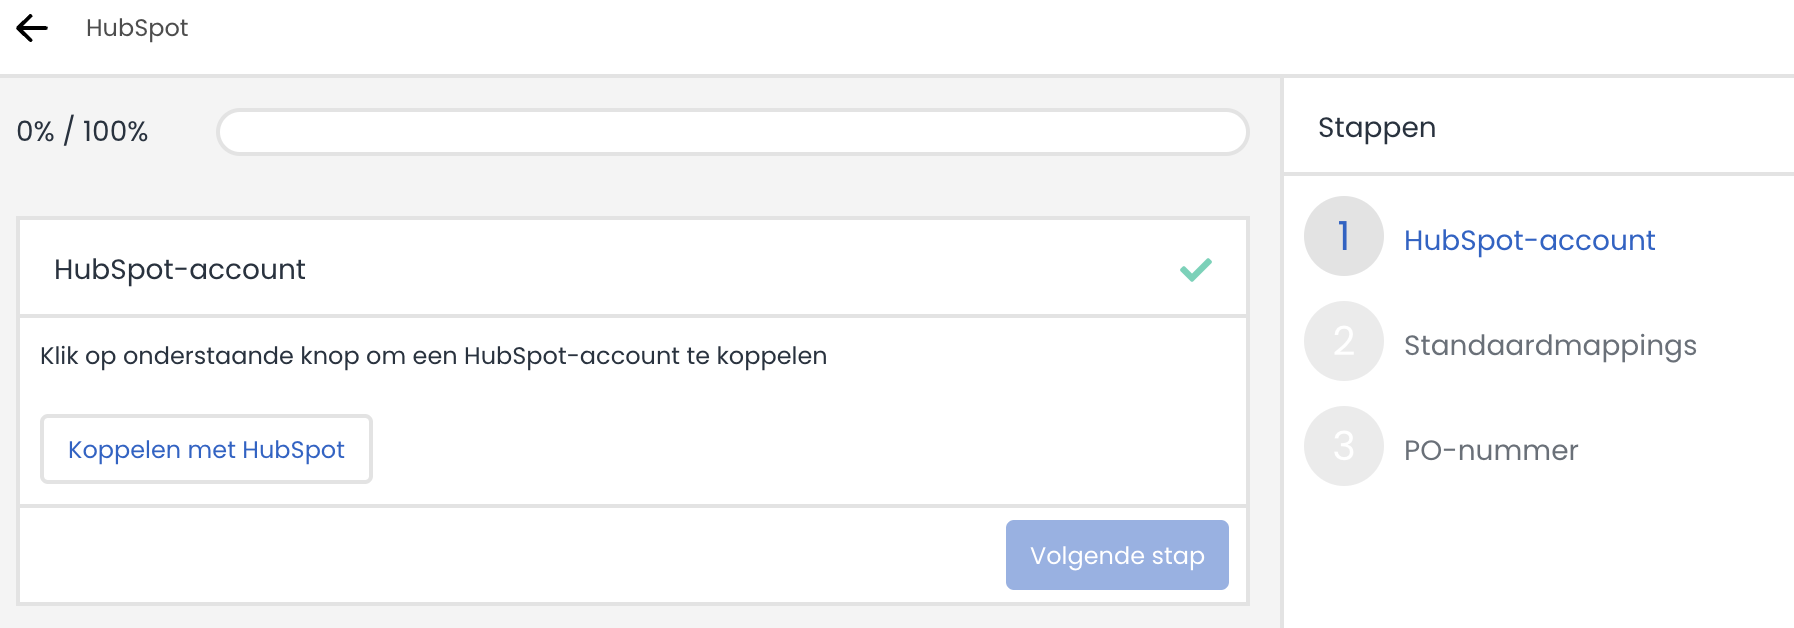
Click the "Connect with HubSpot" button; this will open a new page where you can choose the desired HubSpot account;
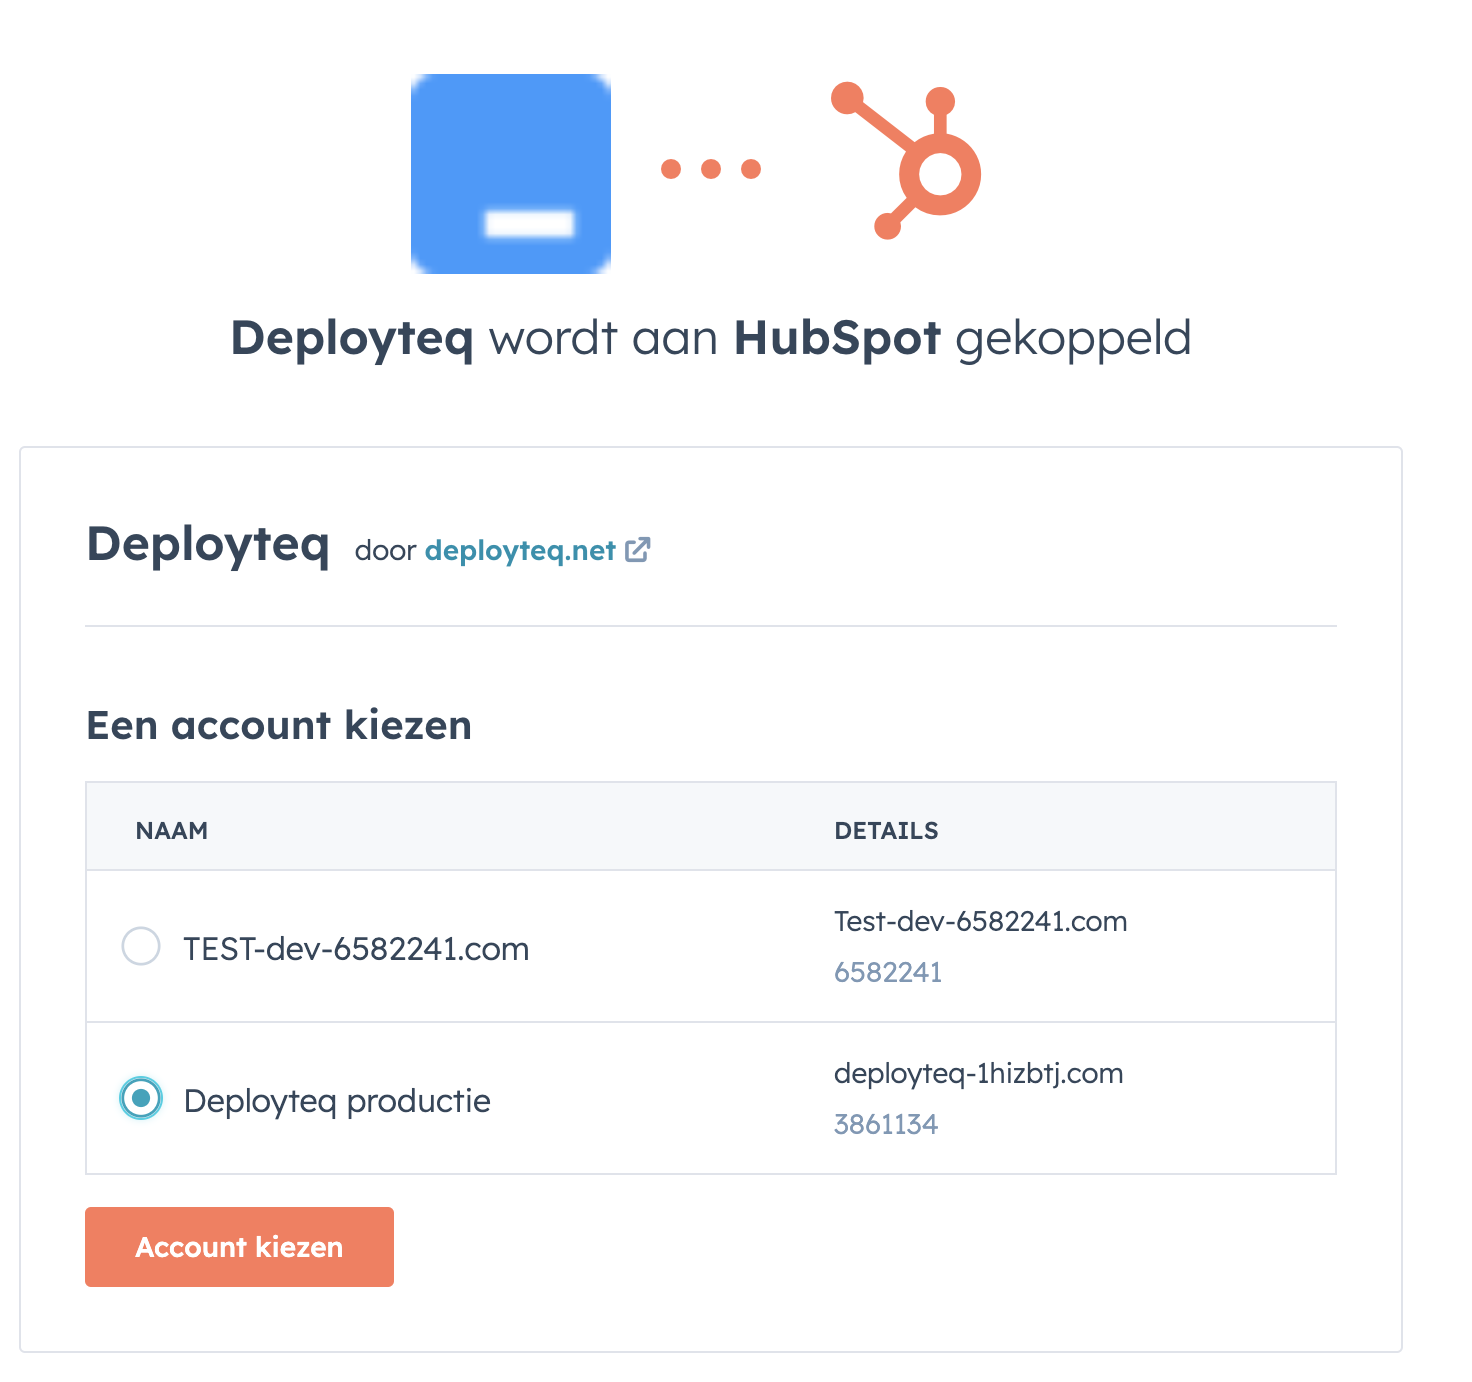
After confirmation, you return to the store at step 2 of the wizard.
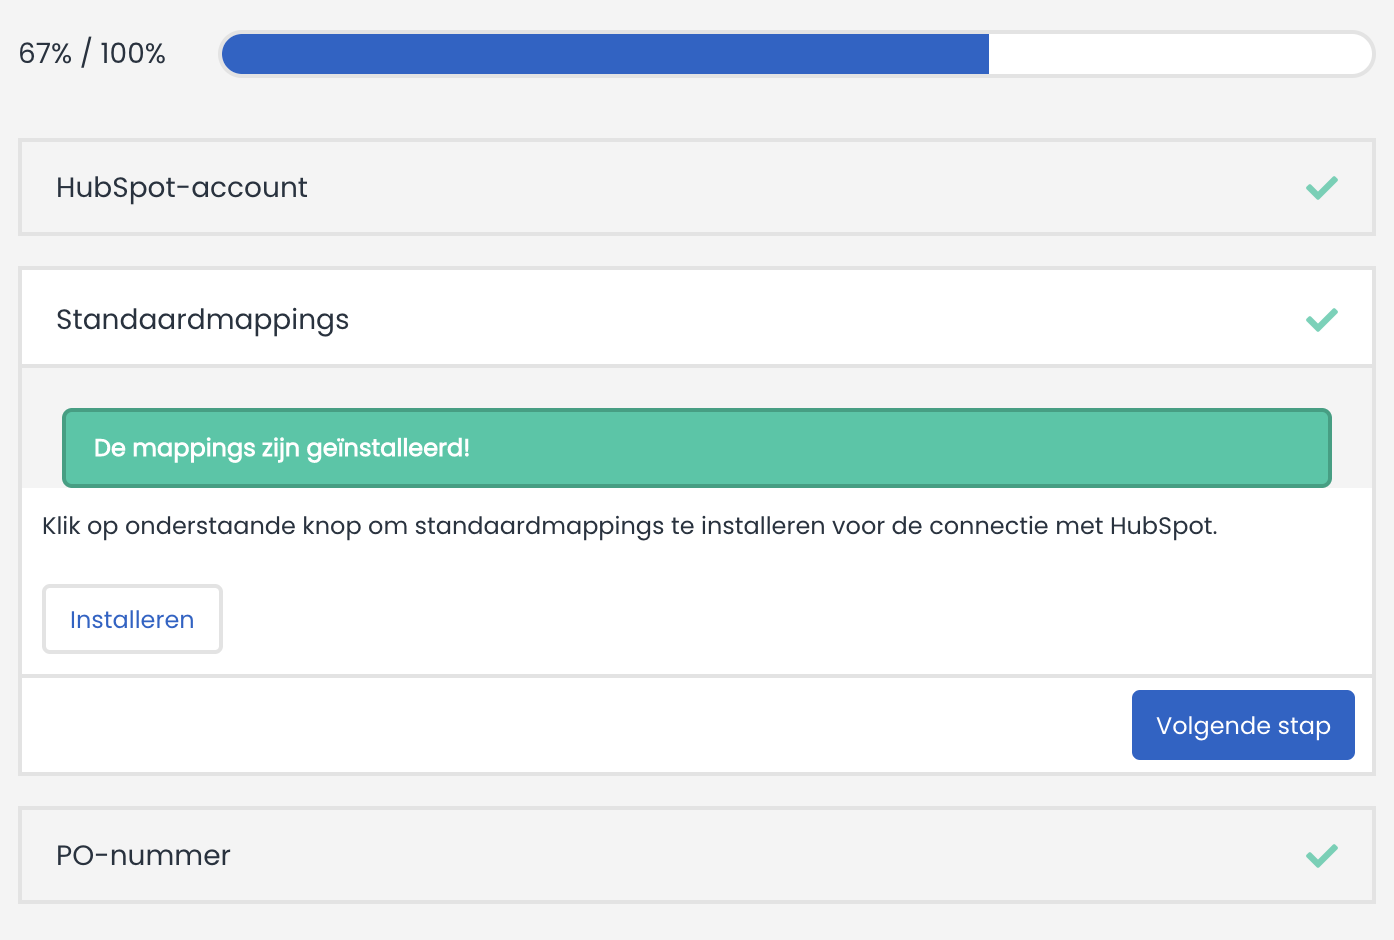
Step 2: Standard mappings for contact synchronization
The wizard offers the option to create a standard mapping for contact synchronization;
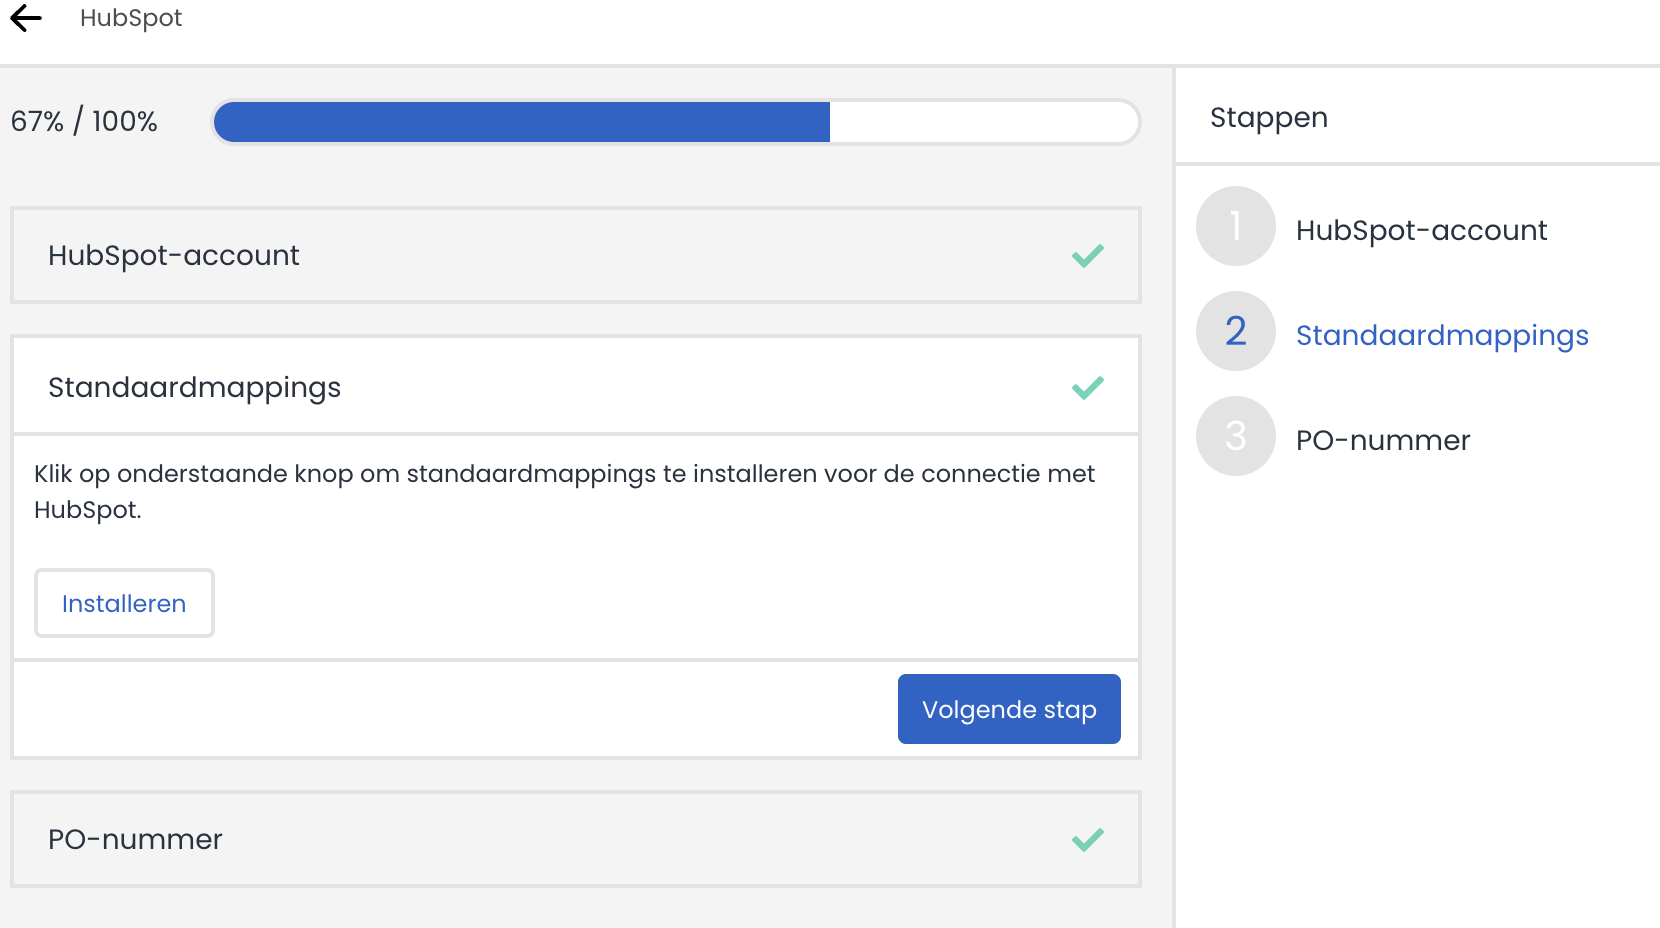
Click the button, and a standard mapping will be created, which can be expanded later. Once the standard mappings are installed, you will see a confirmation in the wizard.
Step 3: Financial settlement
The final step involves financial settlement, where you can choose to pay the license monthly or annually in advance. Optionally, a PO number can be provided for invoicing;

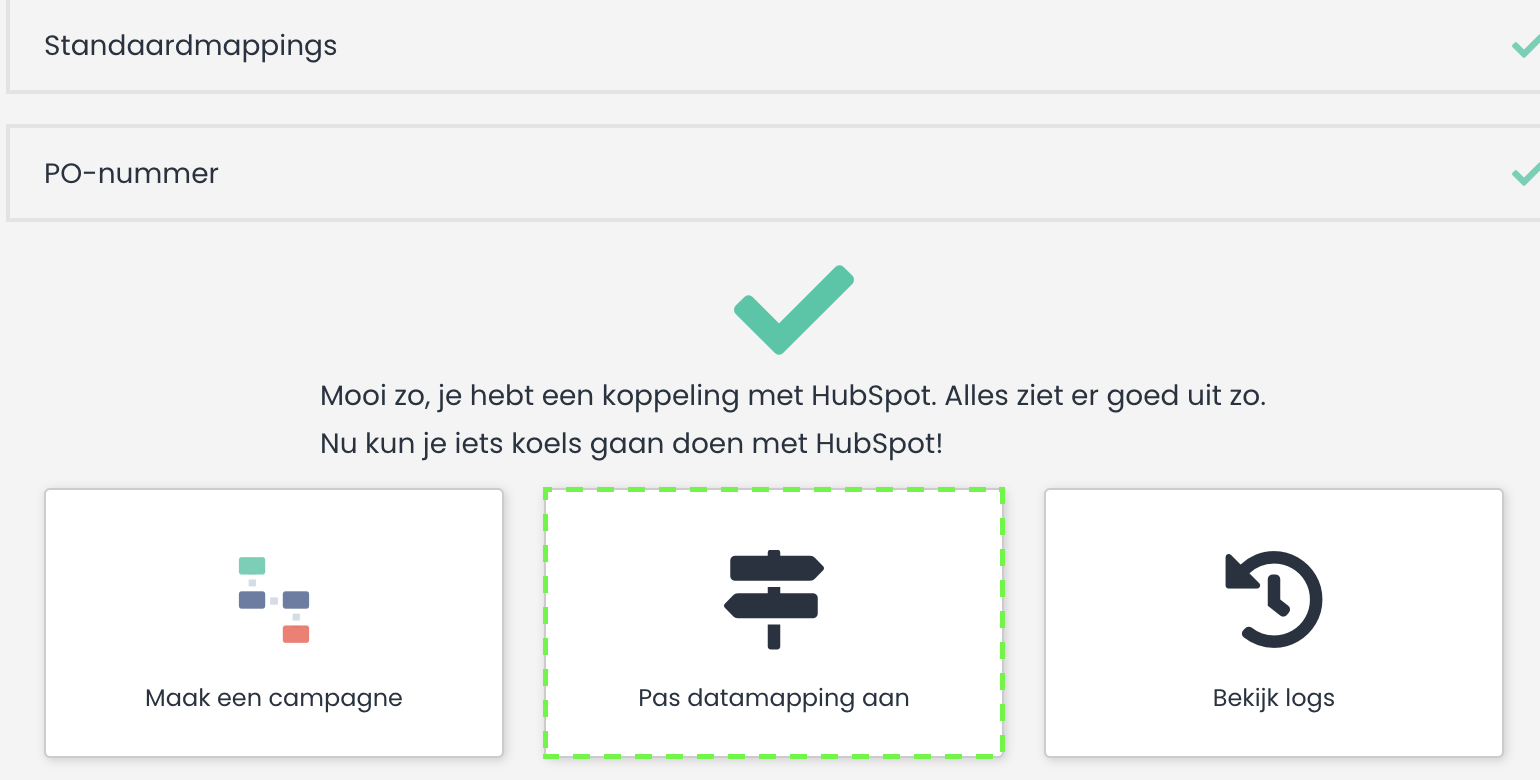
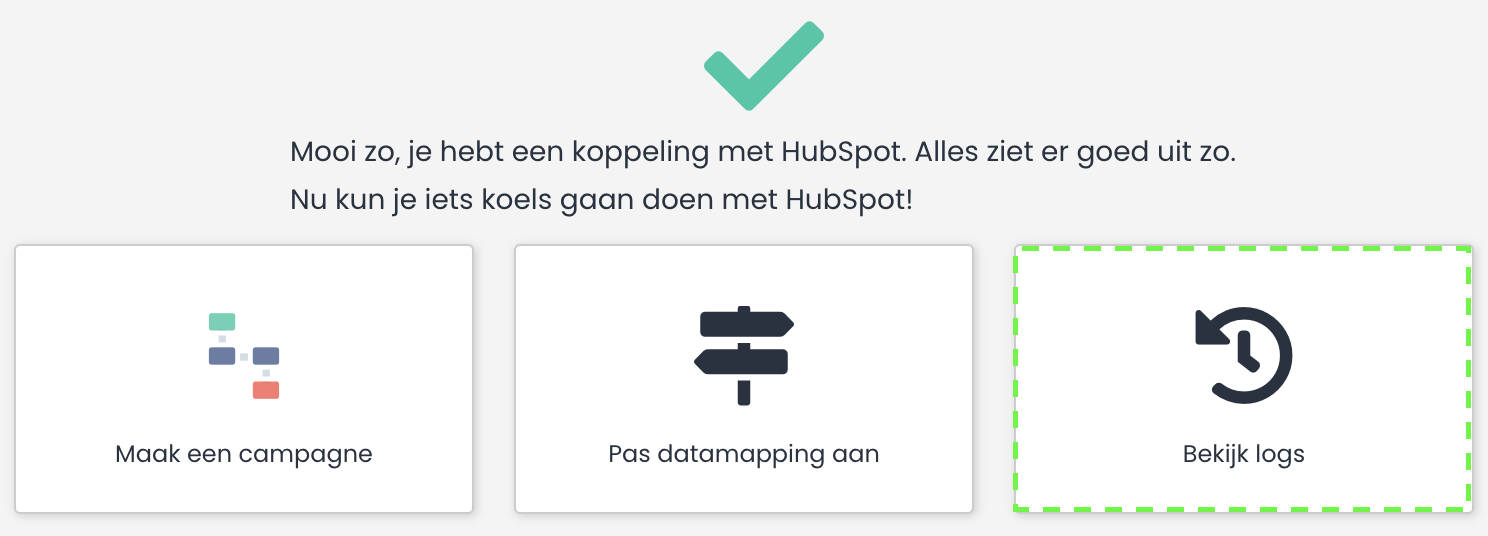
At this final step, 3 buttons will be visible at the bottom of the wizard to further configure the integration. These can also be used later to view logs and expand mappings.
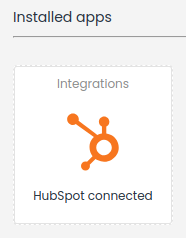
Once the wizard is completed, the HubSpot app will be visible in the store with the label "HubSpot connected";
2 - Datamappings
If you chose to install the standard mappings in the installation wizard, 2 endpoints have been created. These can be managed from the app in the store by clicking the "Adjust data mapping" button;
The configured endpoints and/or layouts will then be visible, which can be managed. New endpoints can also be created.
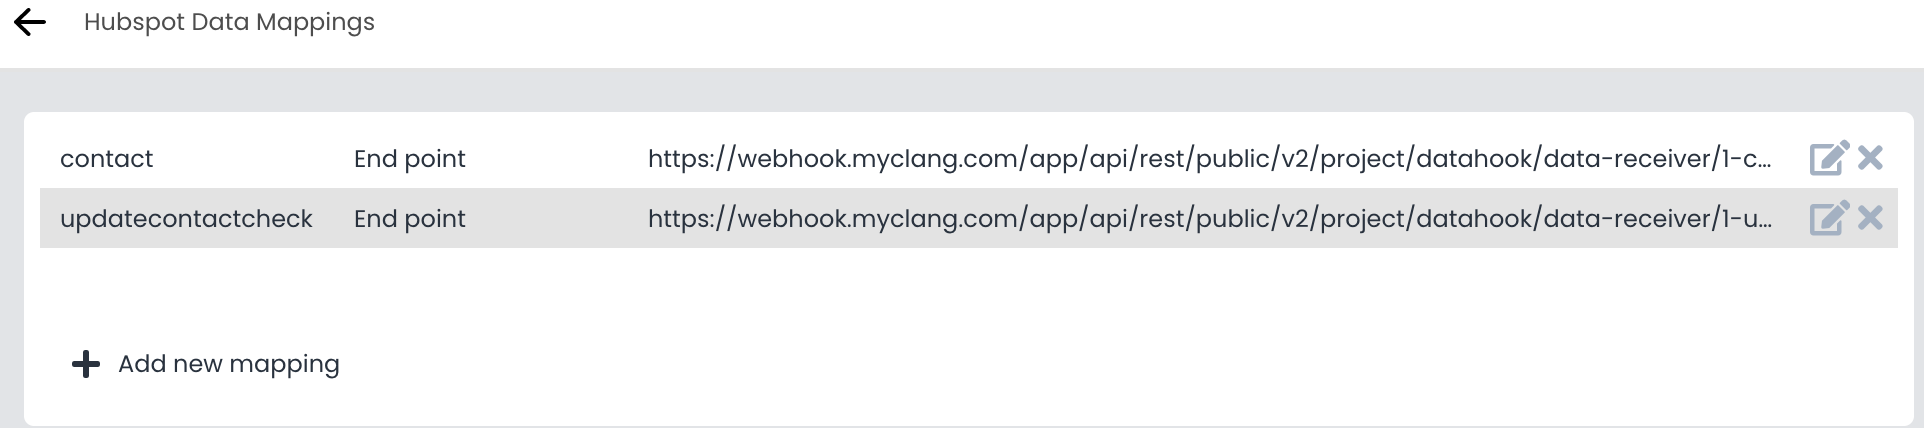
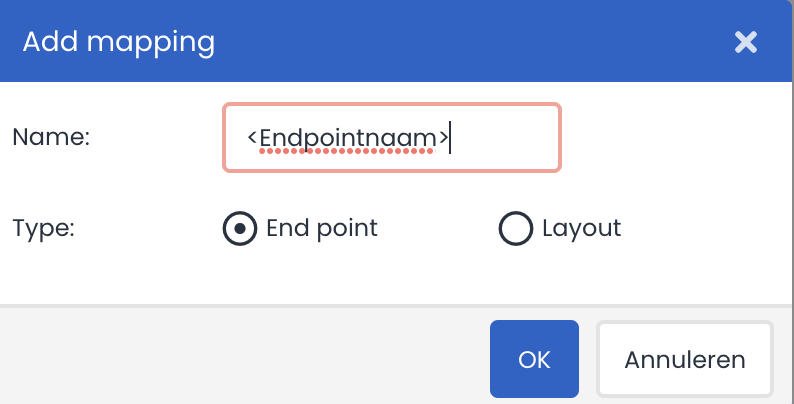
Create new mapping (currently only contact support)
With the plus-sign at the bottom, a new mapping can be created;
Data enrichment
Triggers are sent from HubSpot when a record is created or updated. Based on this trigger, additional information can be retrieved via the HubSpot API. This data enrichment can be set when editing a mapping. You can specify what data is needed to retrieve additional information and in which element the result should be added.
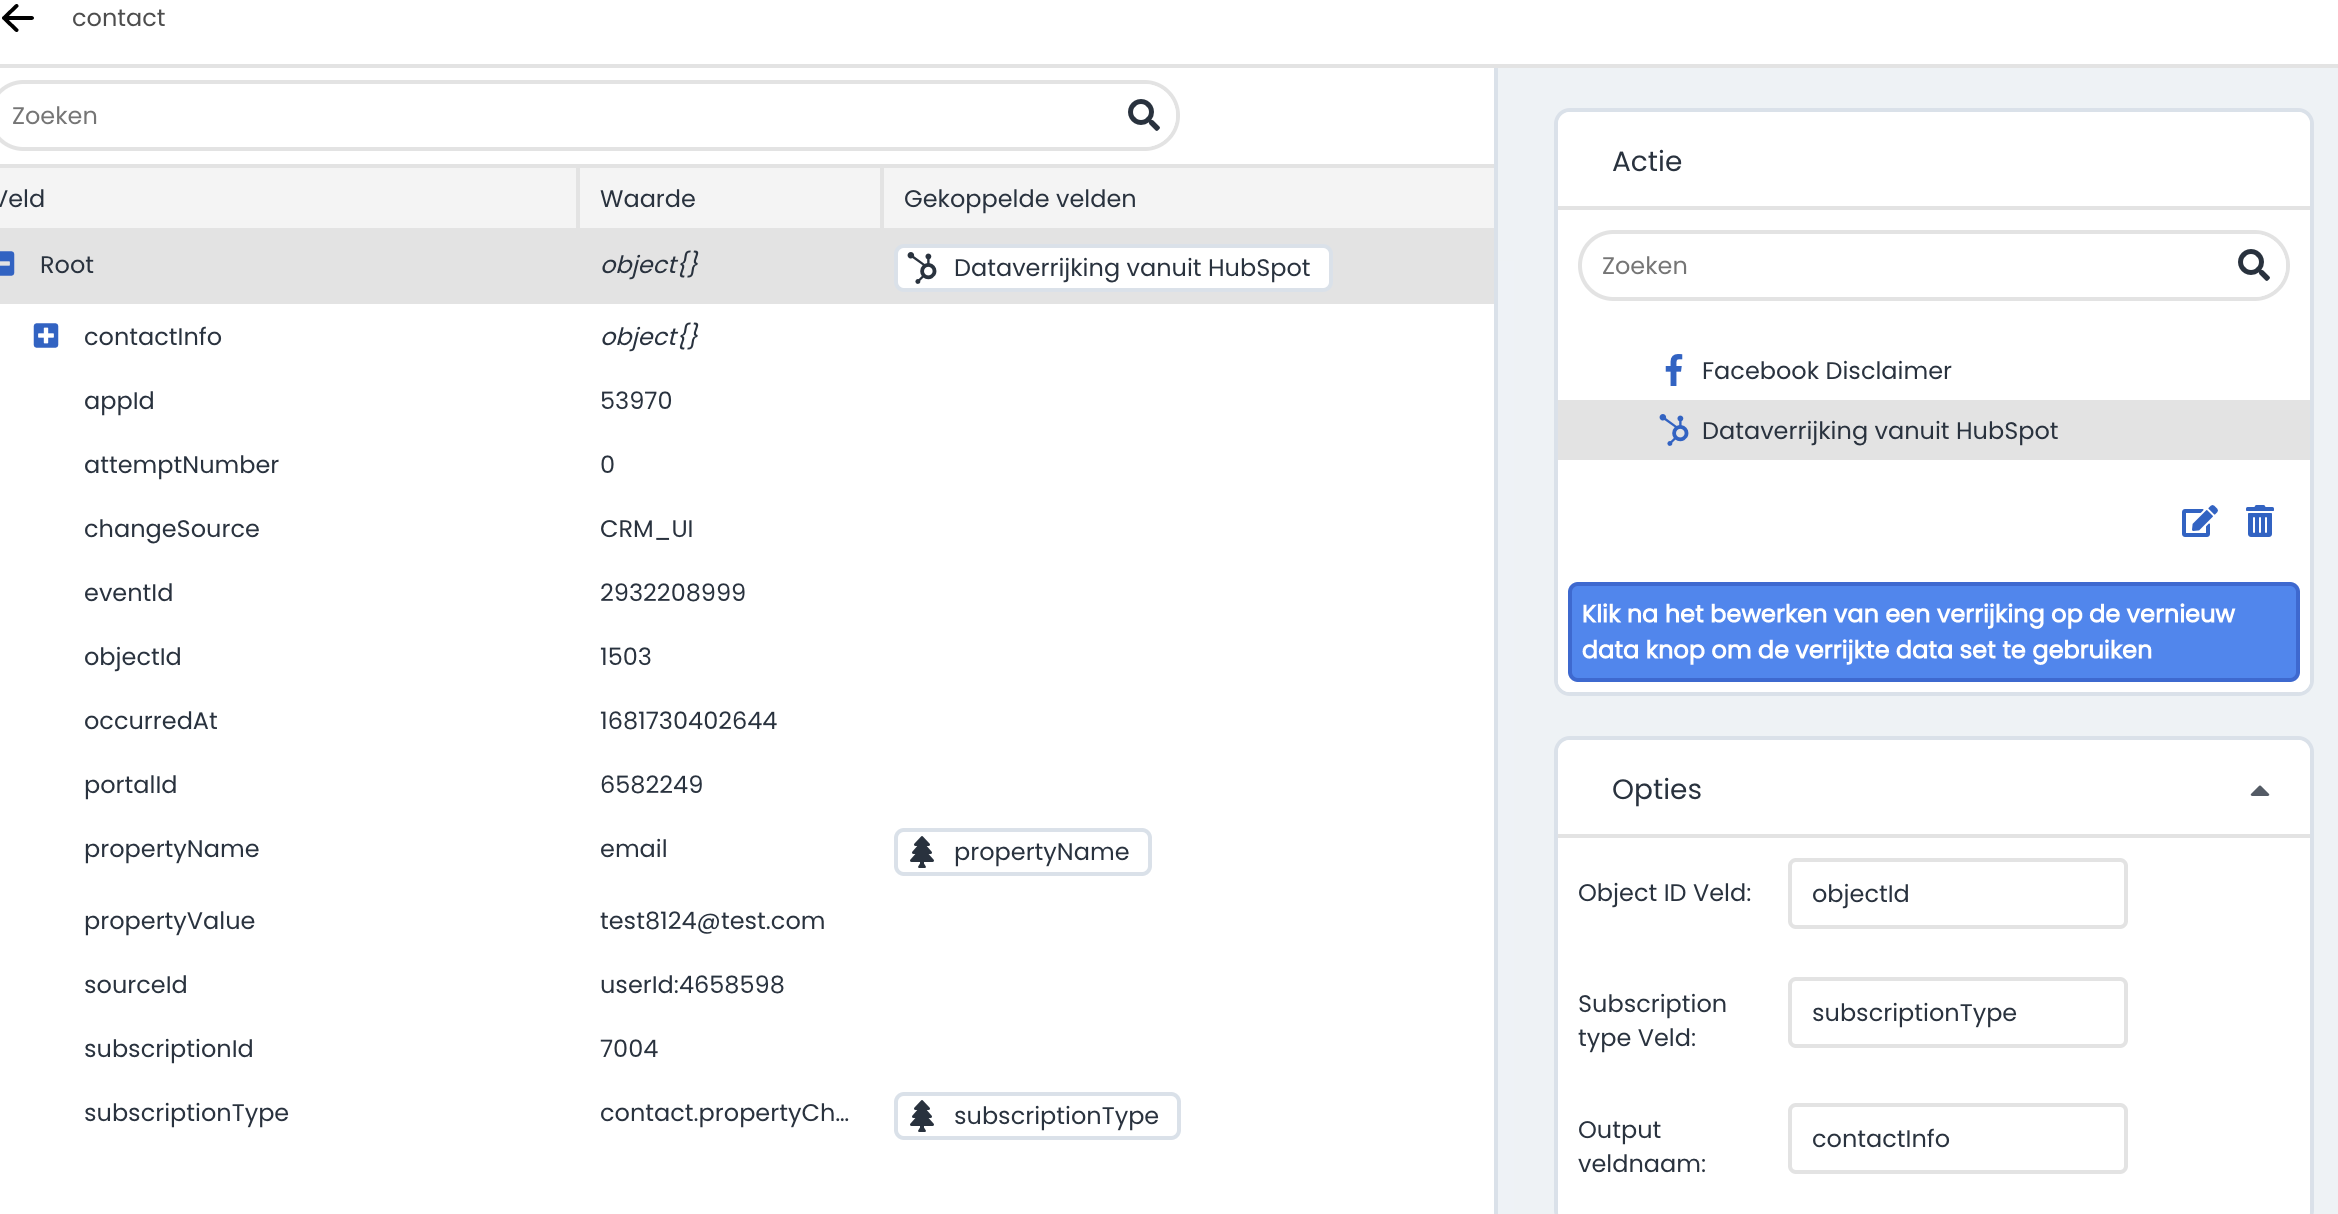
With a standard setup, fields are linked as follows in the enrichment:
- Object ID Field name: objectId
- Subscription Type Field name: subscriptionType
- Output Field name: contactinfo
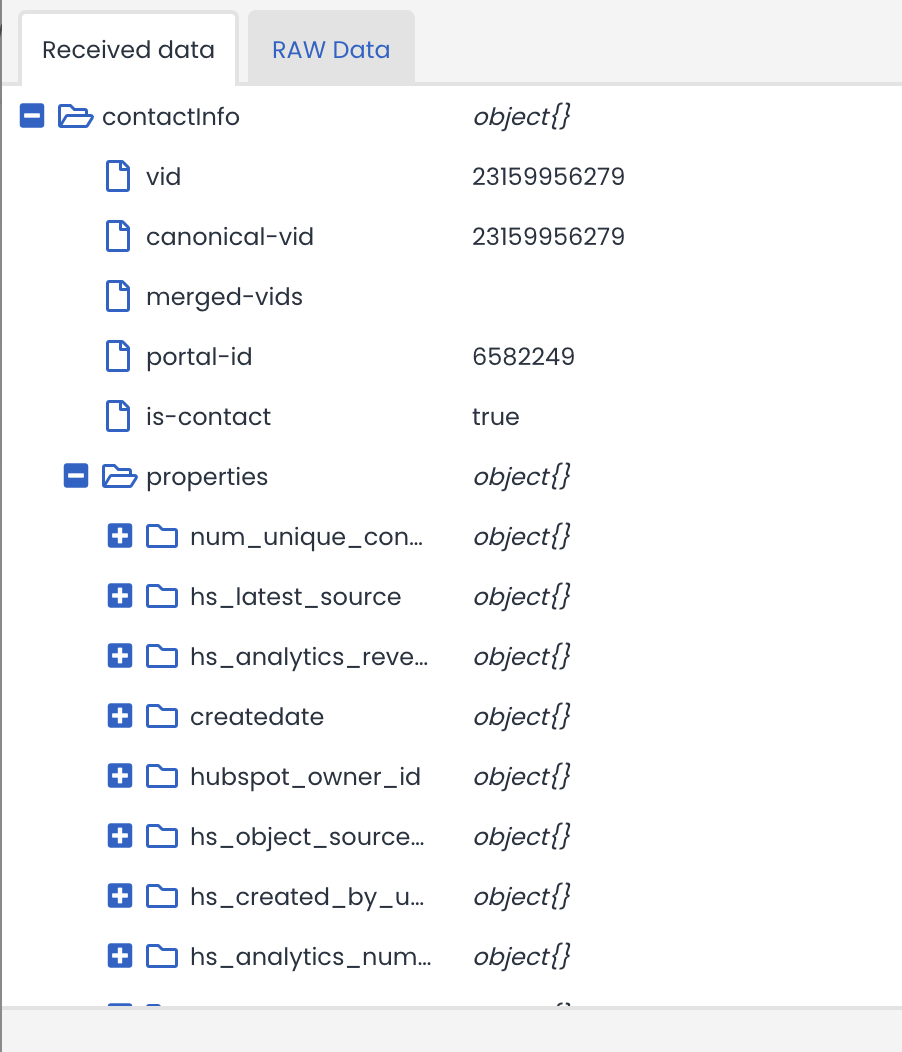
Customer details in the 'contactinfo' element are linked to update the data in Deployteq. The HubSpot properties of a contact can be found under "contactinfo > properties";
By default, deduplication is set to the email address field, and the HubSpot customer identification is stored in the externalid field.
3 - View logs
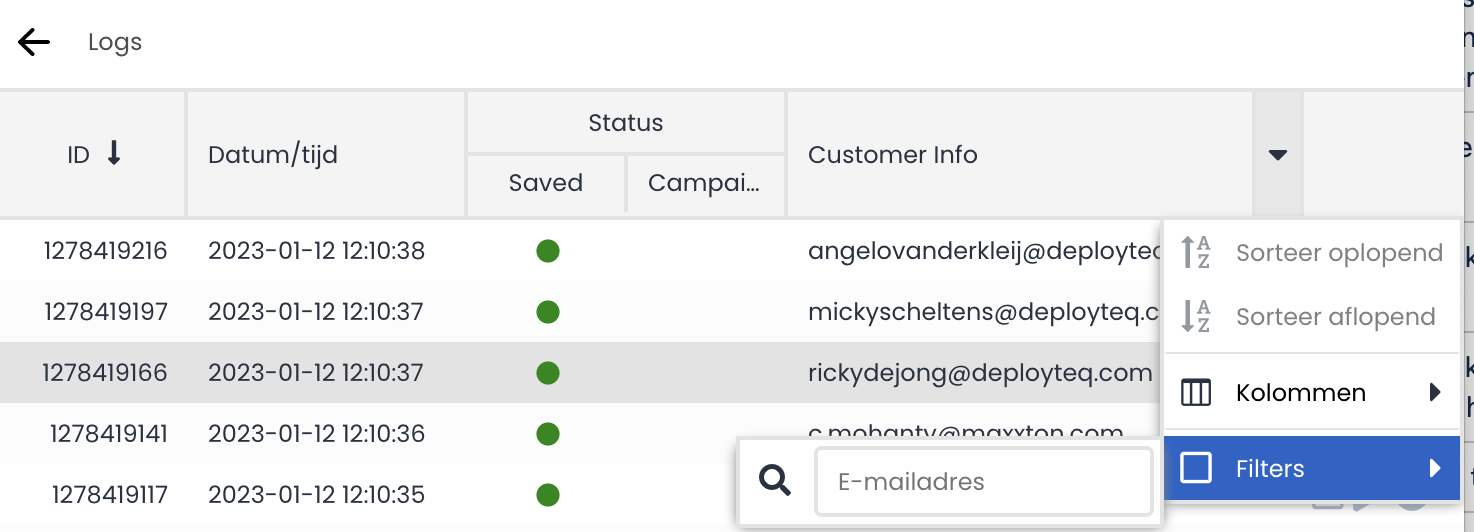
If you want to see the data sent from HubSpot, stored details, or triggered campaigns, you can view the logs. When you open the app in the store, you can click on 'View logs';
When you go into the logs from the main settings screen, you see all received requests in chronological order. Each line shows whether the data was processed successfully, if a campaign was started, a potential customer with the associated email address, and the ability to save the data again or restart the campaign;


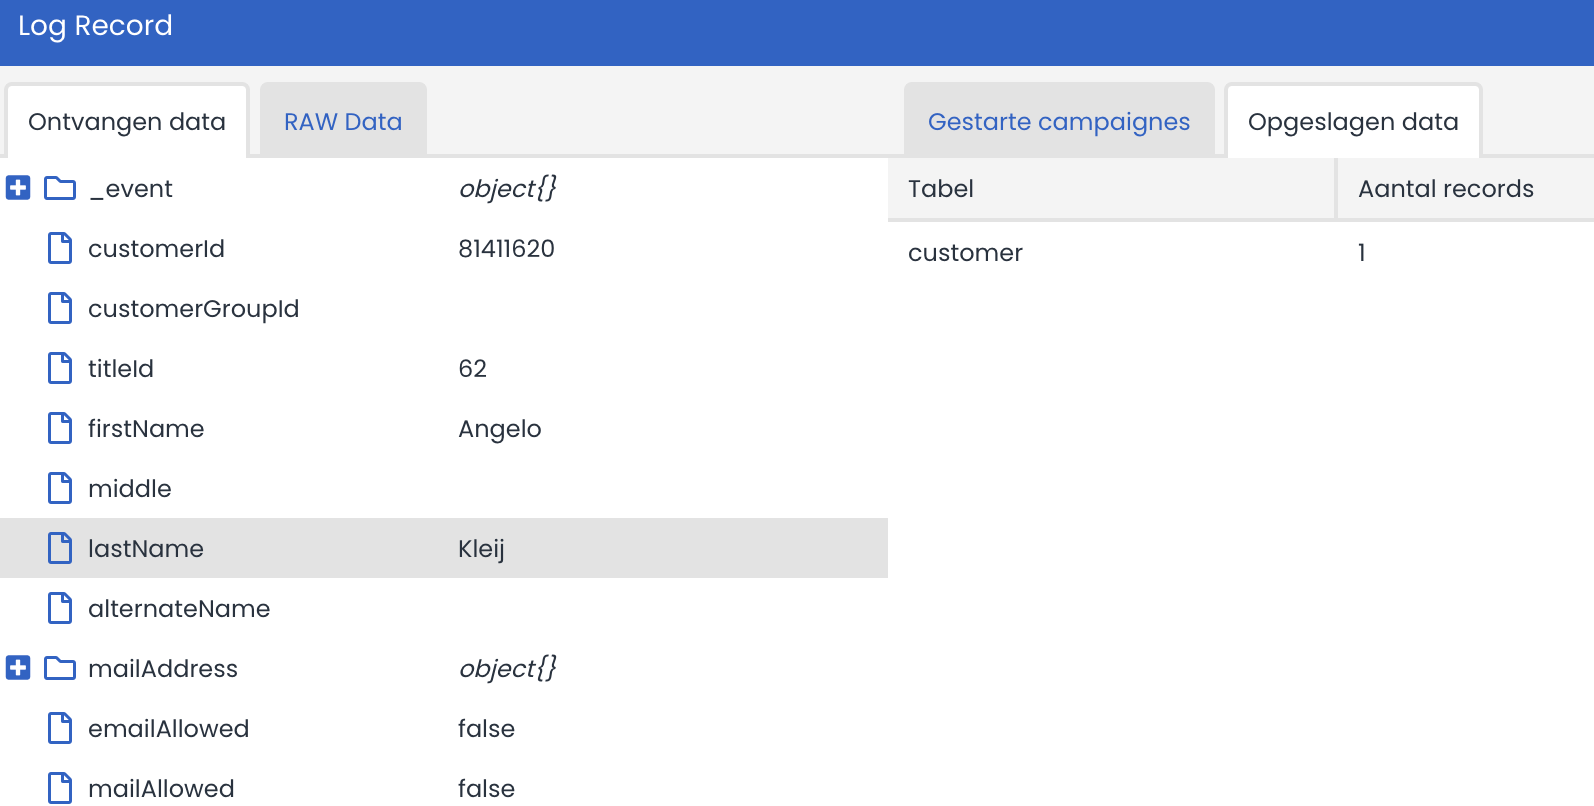
With the (information) icon, you can view the data of the log line and gain more insight into which data was processed:
4 - Contacts
Newly created and updated contacts are synchronized near real-time to Deployteq, where they are processed with a datahook. Below is explained in which situations HubSpot synchronizes a contact and which data is available per activity so that a follow-up campaign can be started based on the environment fields subscriptionType and propertyName.
Contact triggers
In the following situations, a contact is sent to Deployteq. These can be recognized based on the 'subscriptionType' field;
- subscriptionType: contact.creation
- A new contact is created in HubSpot
- subscriptionType: contact.propertyChange
- A contact's data has been changed in HubSpot. Based on the 'propertyName' field, it can be determined which data has been changed. Below are some examples of possibly changed fields:
- propertyName: firstname
- propertyName: lastname
- propertyName: email
- propertyName: hs_email_optout
- A contact's data has been changed in HubSpot. Based on the 'propertyName' field, it can be determined which data has been changed. Below are some examples of possibly changed fields:
- subscriptionType: contact.merge
- The contact has been merged with one or more contacts.
- subscriptionType: contact.deletion
- The contact is deleted in HubSpot.
- subscriptionType: contact.privacyDeletion
- The contact is deleted due to privacy reasons.
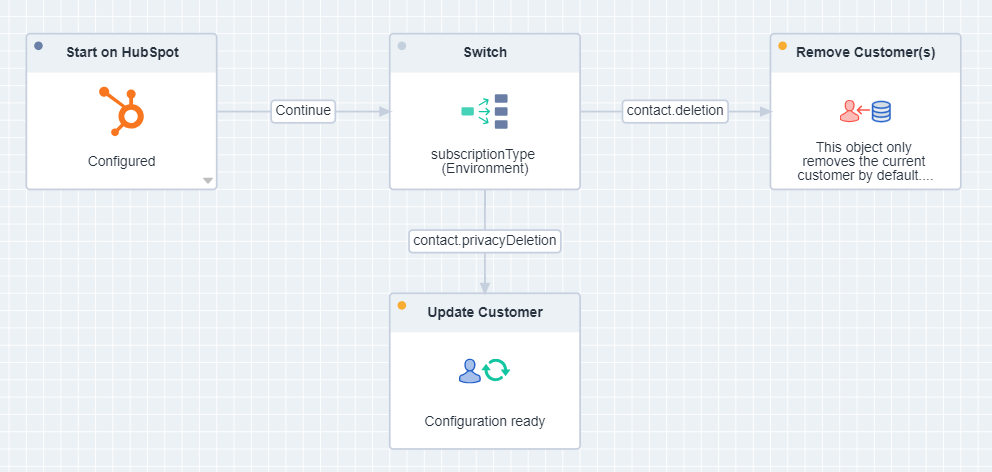
contact.deletion en contact.privacyDeletion
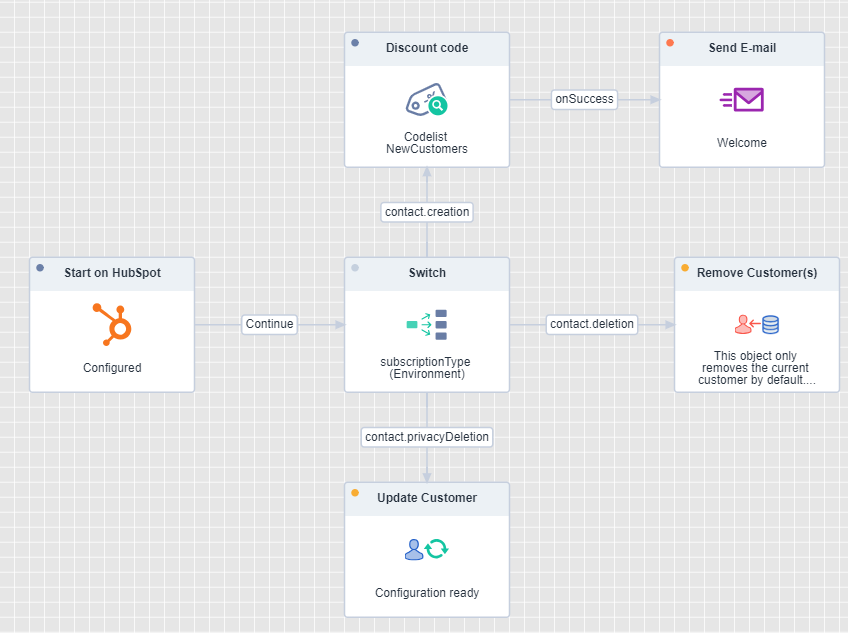
The subscriptionType contact.deletion and contact.privacyDeletion require a follow-up campaign to also delete data in Deployteq. Based on the "start on HubSpot" campaign object, a flow can be started immediately after receiving the data. With a switch or condition object, it can be determined which subscriptionType it concerns:
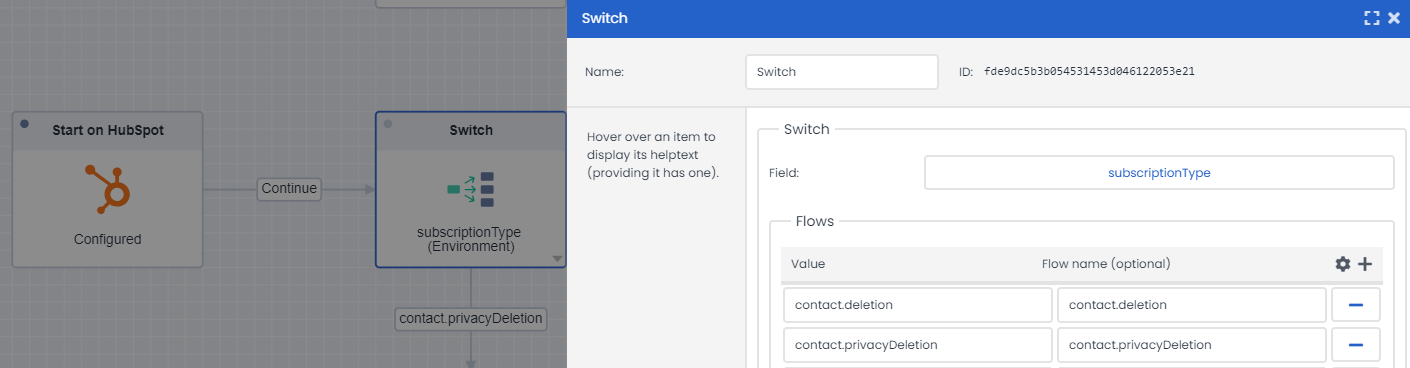
In this example, the customer record is completely deleted for a contact.deletion and for a contact.privacyDeletion, some customer data is deleted;
5 - Campaigns
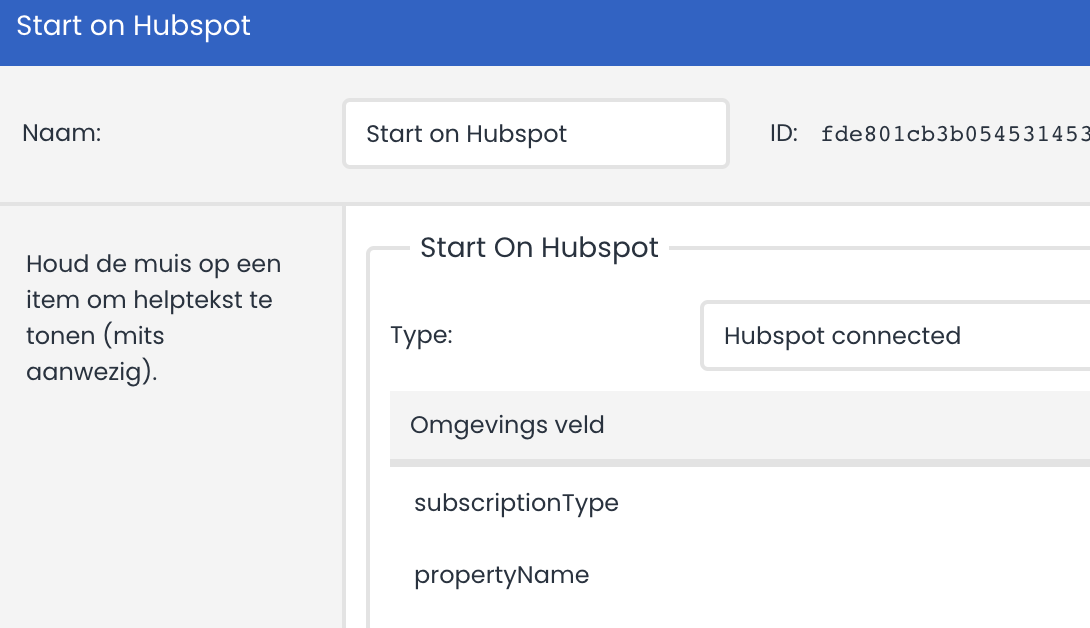
When the app is installed, the campaign object "Start on HubSpot" will be available in your campaign object library;
Like all other "Start on" campaign objects in Deployteq, a campaign flow can be started based on an external trigger. In this case, the trigger is activated when a message is received from your HubSpot account. The campaign object allows you to select a mapping and will immediately display any environment variables from your mapping.
Based on the trigger, a complete journey can be set up for the contact. See more information about the possible campaign objects of Deployteq. In the example below, new contacts are welcomed in an email with a discount action code. See the example campaign below in combination with the code list app from the store:
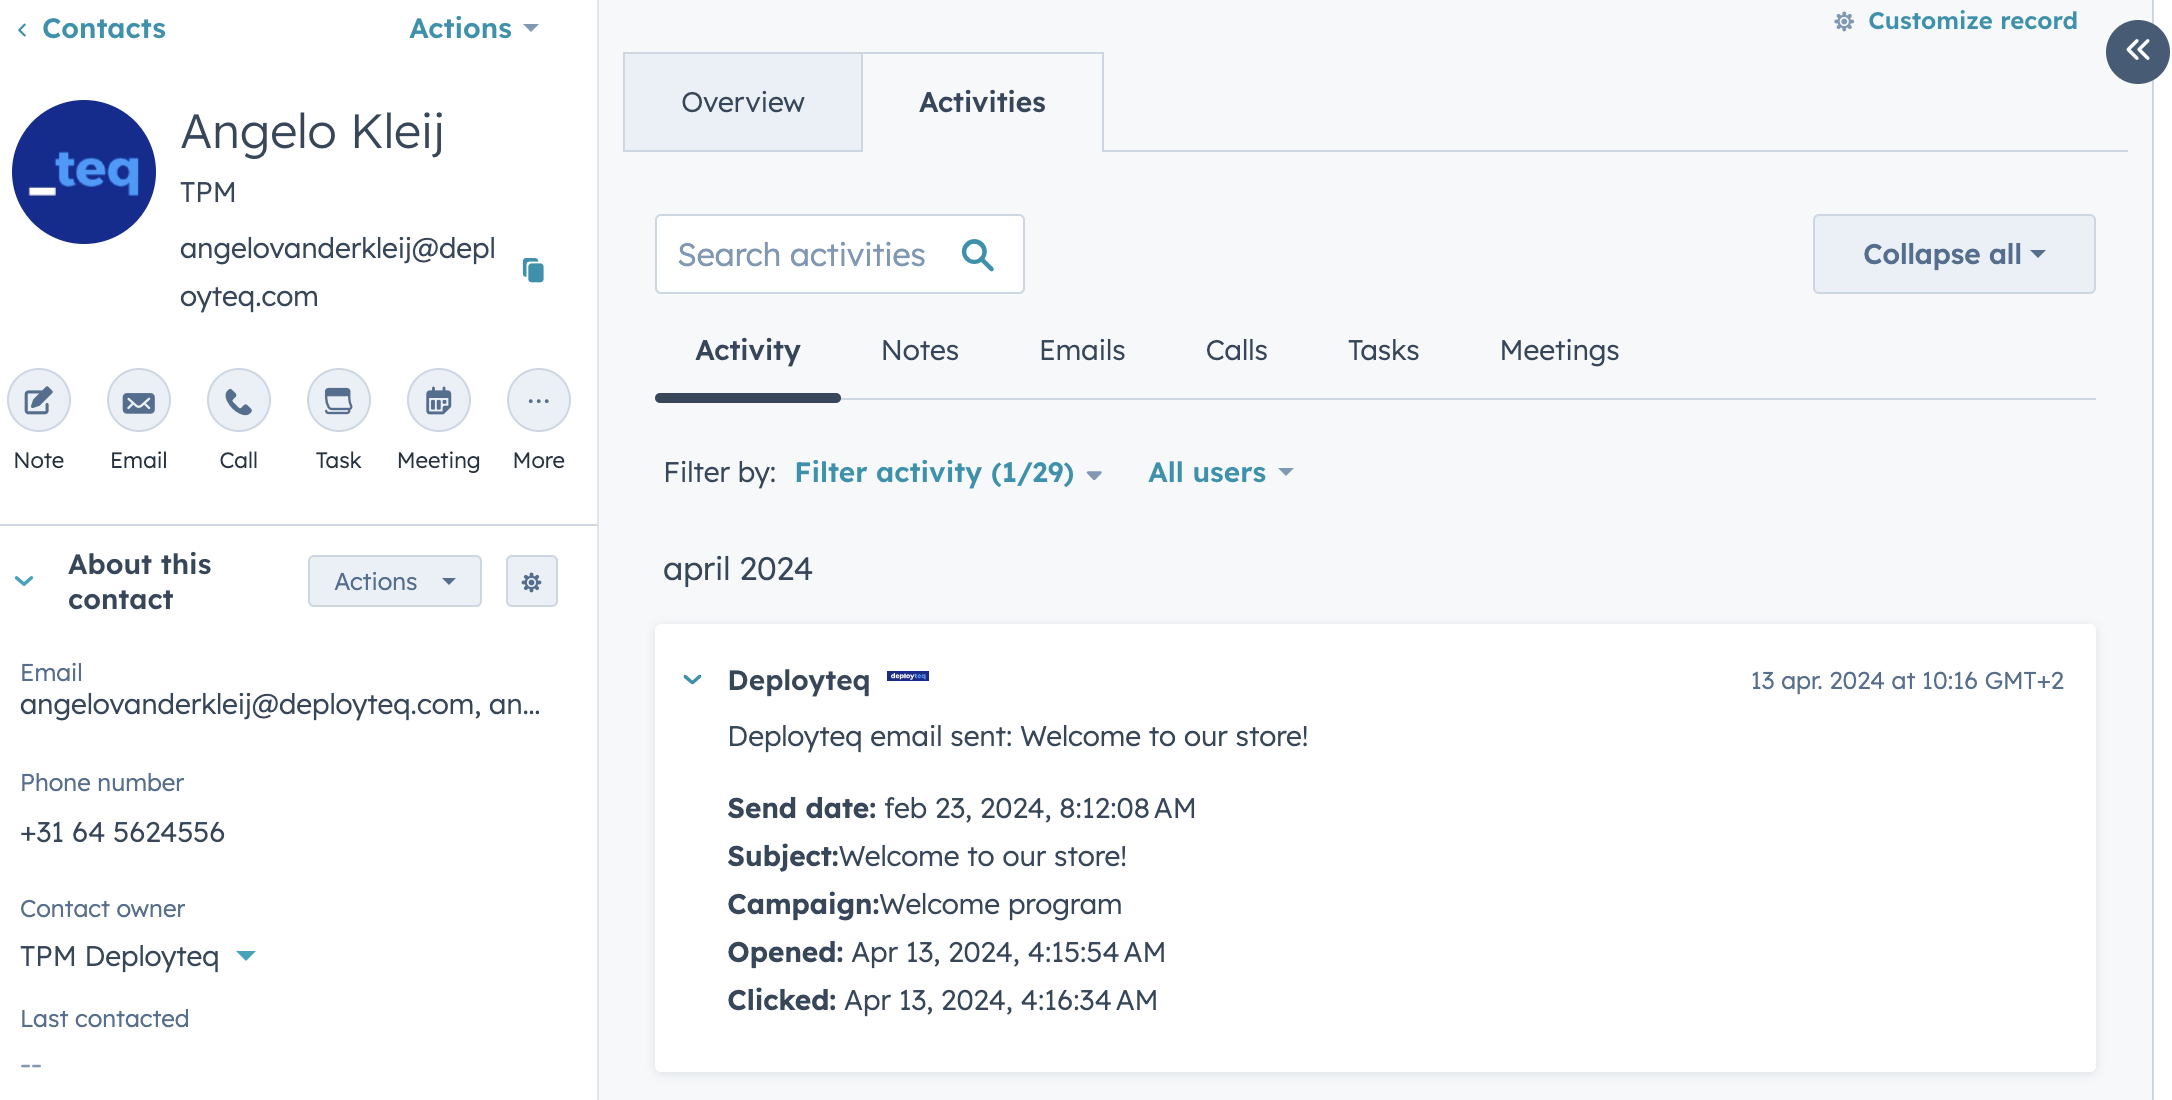
6 - Activities
When the app is installed, a timeline activity on contact level in HubSpot will be added for each email sent. Within the activity, the following data is visible:
- Send date
- Subject
- Campaign name
- Whether the email was opened
- Whether the email was clicked
- Complaints
- Unsubscribed
See the example below: