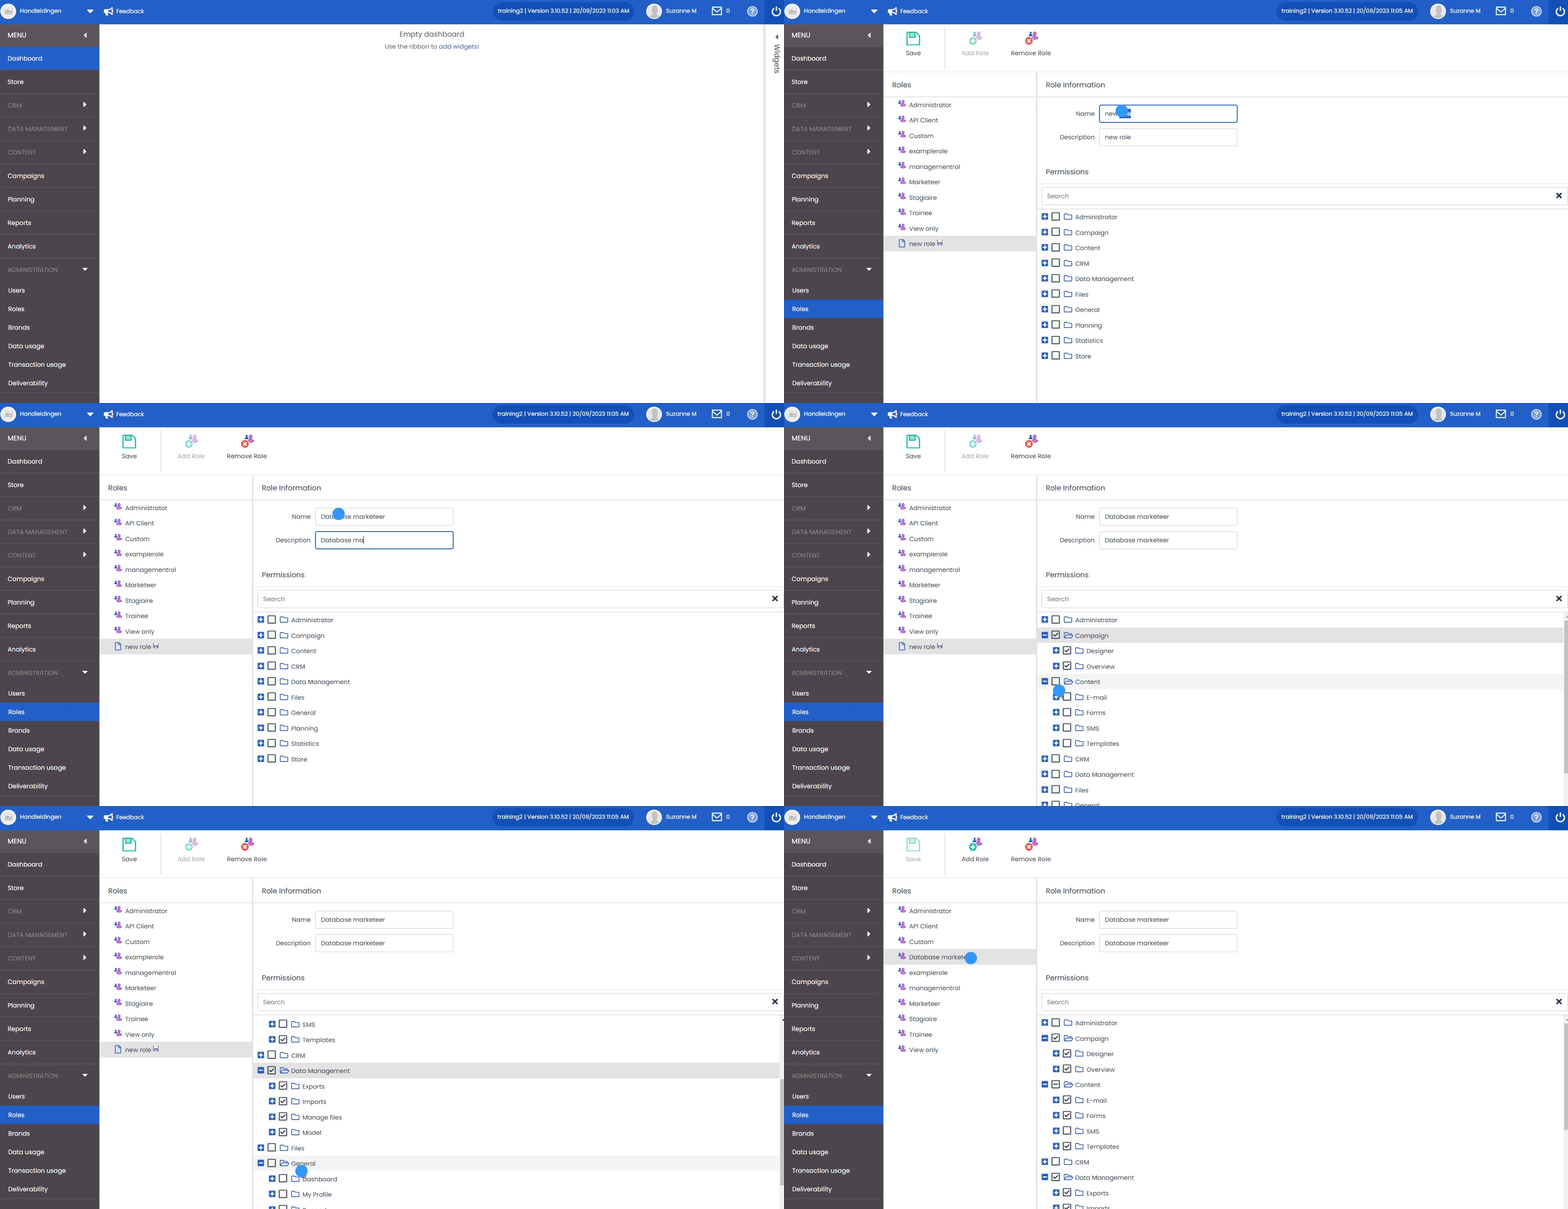
When you create a user, you also want them to have specific rights to the brands. The role that can modify these is the administrator. It is a role that we automatically create for you when you activate your portal. It is advisable to have more than one administrator so that users or brands can be created when an administrator is on holiday or sick. Furthermore, you can make your system of users as elaborate as necessary for your portal. We explain below how to create or modify a role.
Viewing and modifying roles
All the defined roles are listed on the left-hand side of the worksheet. Click on a role to open it in the right-hand section of the worksheet. At the top you will see the name and description of the role.
All relevant sections in Deployteq are grouped in the tree diagram under the heading ‘Group Rights’.
Click on the plus sign to expand the tree diagram for that section. The subsections found in that section of Deployteq will be displayed.
As soon as you click on a subsection, the corresponding rights linked to that section will be displayed on the right. Check the appropriate options to assign these rights to the role.
It is also possible to simultaneously grant all rights for a section or subsection of Deployteq by checking the box beside the relevant section.
Click on the ‘Add role’ button to add a new role. Click ‘Save’ to save changes made to the role. Click on the ‘Delete role’ button to delete a role and its corresponding rights.
In the ‘Manage users’ section you link roles to users. A user can have a different role per brand. You do not therefore need to take this into account when creating your role.

