Using Spotler Activate (previously Squeezely) with the Deployteq Email Platform
By connecting your Deployteq account to Spotler Activate, DMP data will become available for you to use in email campaigns. Find out how to setup and use a connection to Deployteq in this guide.
Setting up the connection
To setup Spotler Activate platform with your Deployteq account an API Token is required. You will be able to get this token from your Deployteq account after installing the Spotler Activate app in the Deployteq Store.
Follow the steps below to get this token and make the connection.
- Step 1: Login to Deployteq and go to your 'Deployteq Store'.
- Step 2: In the Deployteq store find the Spotler Activate app & install it.
- Step 3: The app will show you an API token, copy this token to your clipboard.
- Step 4: Login to Spotler Activate and go to Company Settings, find the Deployteq section and press 'Add Credentials.
- Step 5: Input your API Token from your clipboard and setup your automation limit.
- Step 6: Press save. Your Connection will now be setup between Spotler Activate & Deployteq.

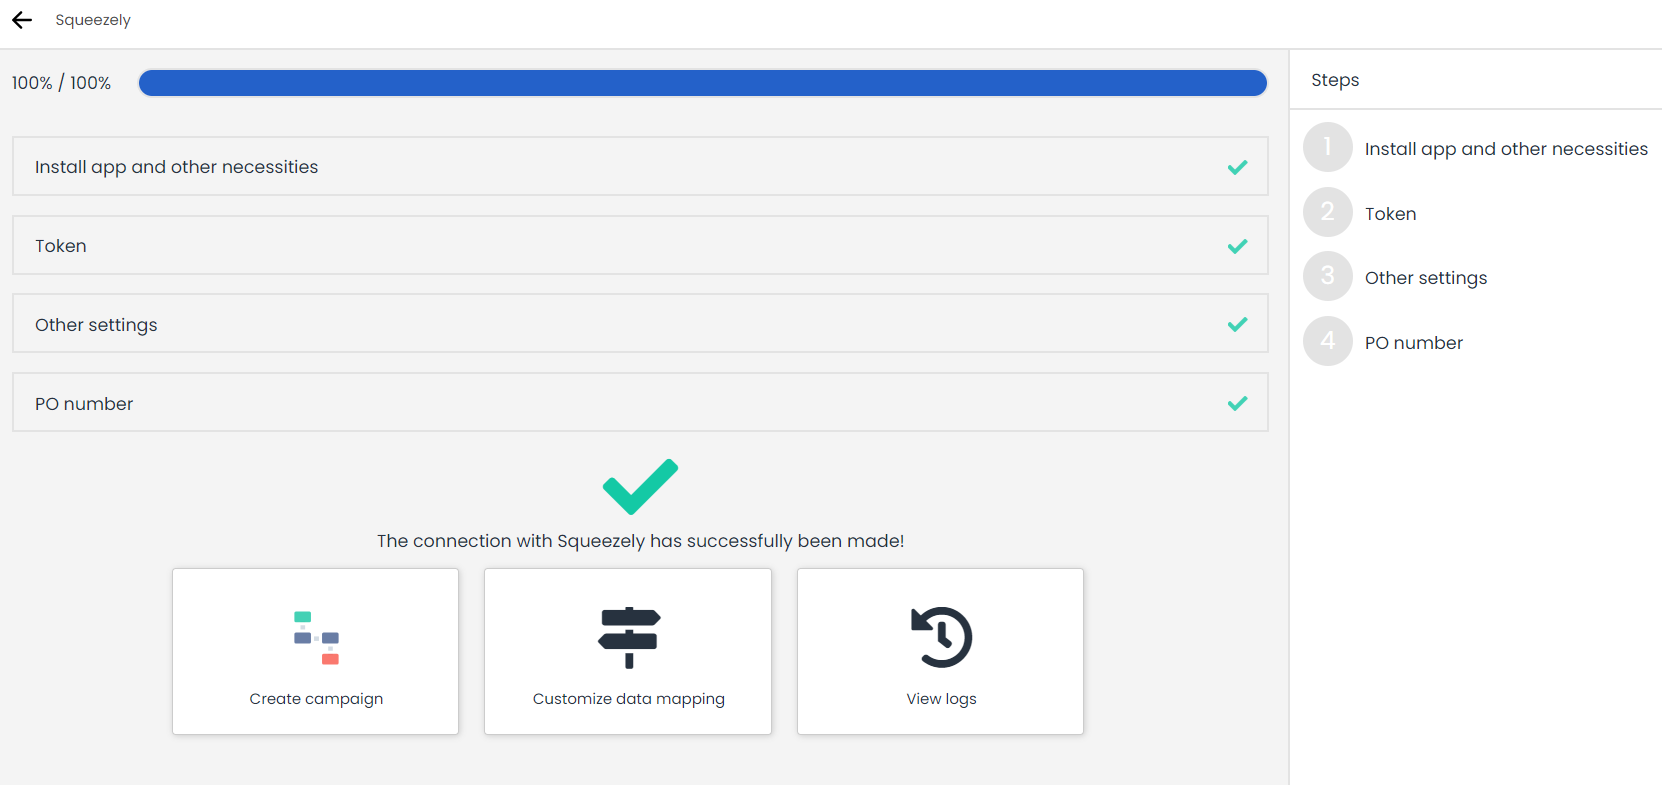
- Step 7: Navigate back to Deployteq and then a screen like below shows up. This indicates the connection has been completed successfully.
Automation Limit
The automation limit makes sure you don't send too many automated emails to your customers. 1 times in 10 days, will make sure that no more than 1 automated email is sent to any user in a period of 10 days.
Data Syncing
Data model
After setting up the connection, Spotler Activate will be able to sync data from audiences to Deployteq customer records under squeezely_segments.
Data Syncing
Spotler Activate syncs data with Deployteq in the following cases:
- When a segment is published from Spotler Activate
- When a user needs to be added or removed from a segment based on your audience criteria in Spotler Activate
- Each time a segment is updated, Spotler Activate updates custom fields for these profiles as well.
- Each time Spotler Activate receives an Opt In status for a profile, this is synced to Deployteq
- New Opt ins recieved by Deployteq are automatically synced to Spotler Activate as they occur.
- Hourly statistics from your Deployteq campaigns are synced to Spotler Activate
Mapping of Spotler Activate Custom Profile Fields
Using the Spotler Activate Integration your Spotler Activate Custom Fields will be synchronized to Deployteq. To use these fields in Deployteq, they need to be mapped to customer options in Deployteq.
Below you will find an explanation on how to map these fields in Deployteq.
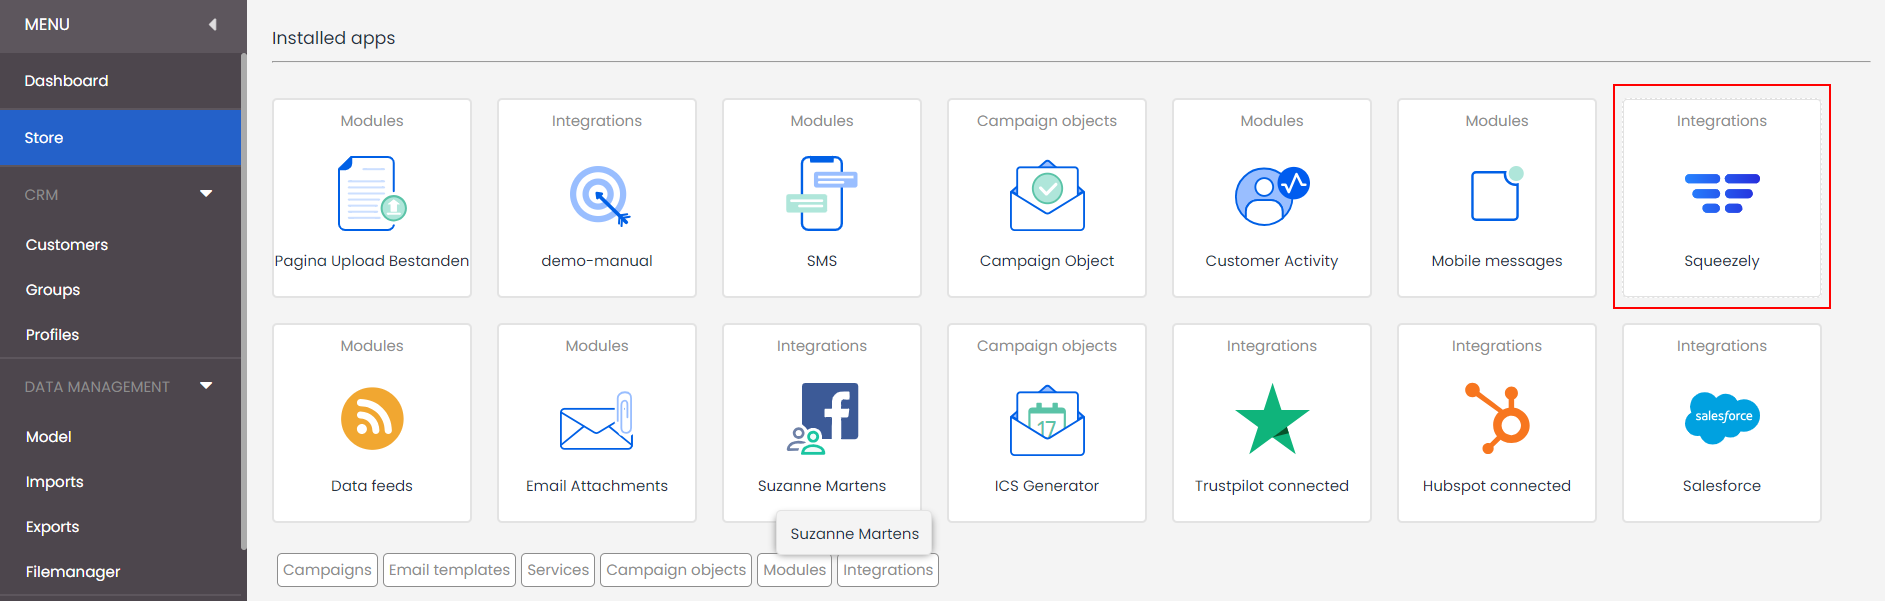
Step 1: Find your Spotler Activate App in your Deployteq Store and open it.
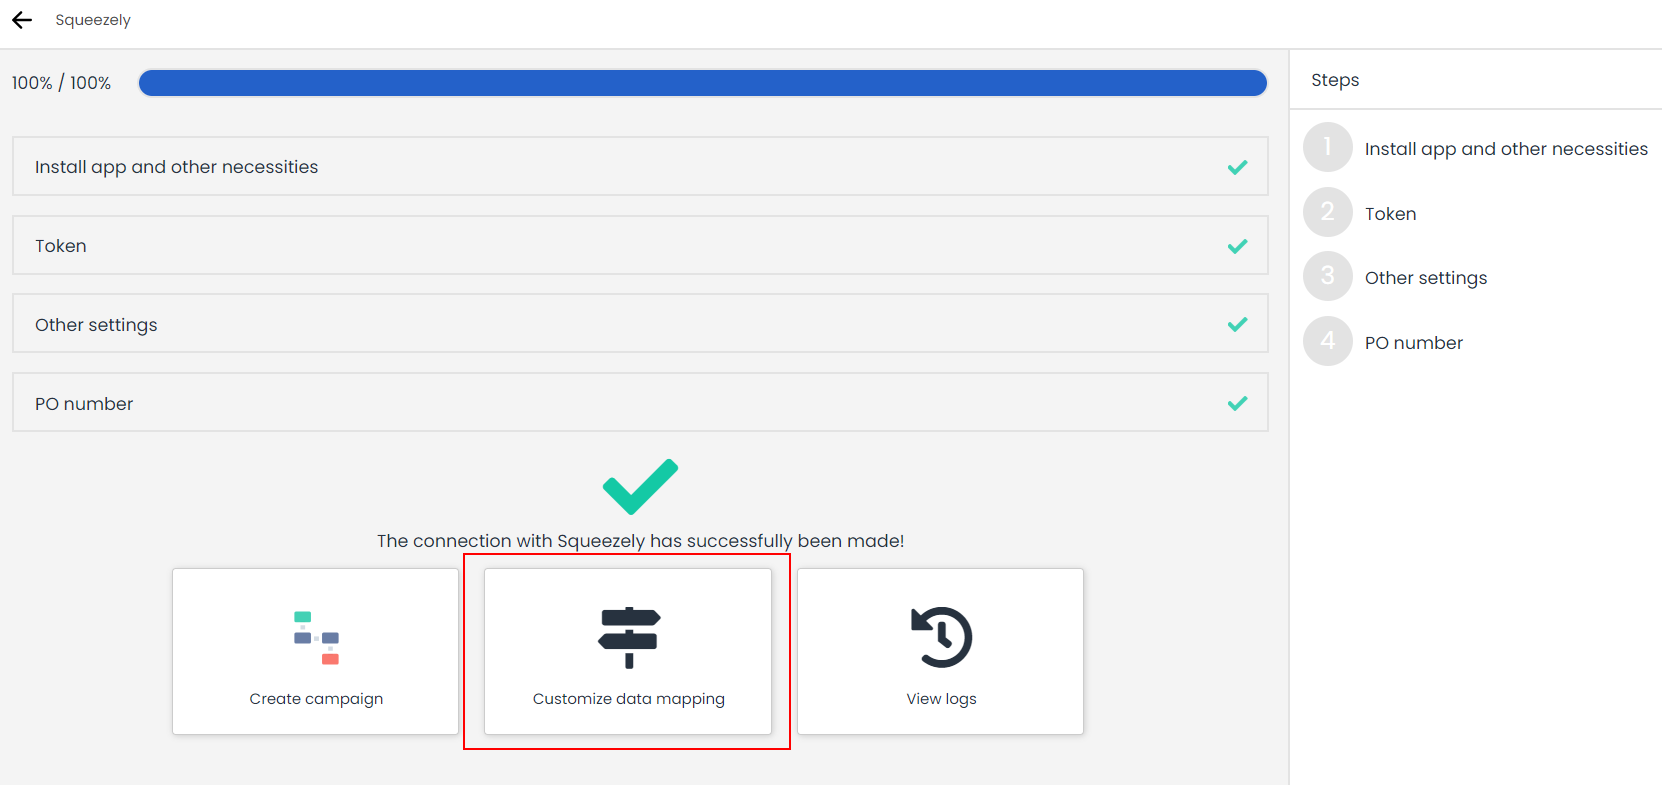
Step 2: In your Spotler Activate App, select 'Customize data mapping'.
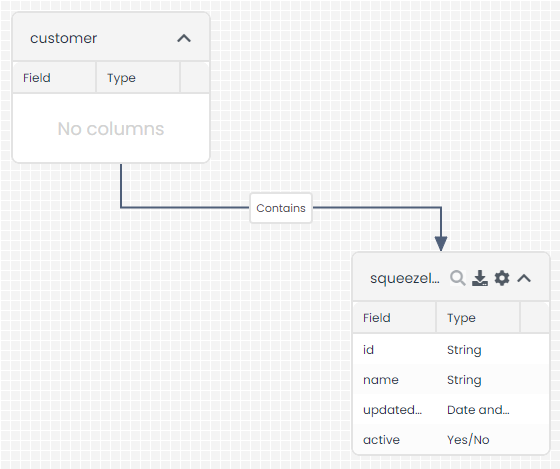
Step 3: Double click on the end point 'customers' to open it.

Step 4: Open the Root folder to find your Spotler Activate fields.
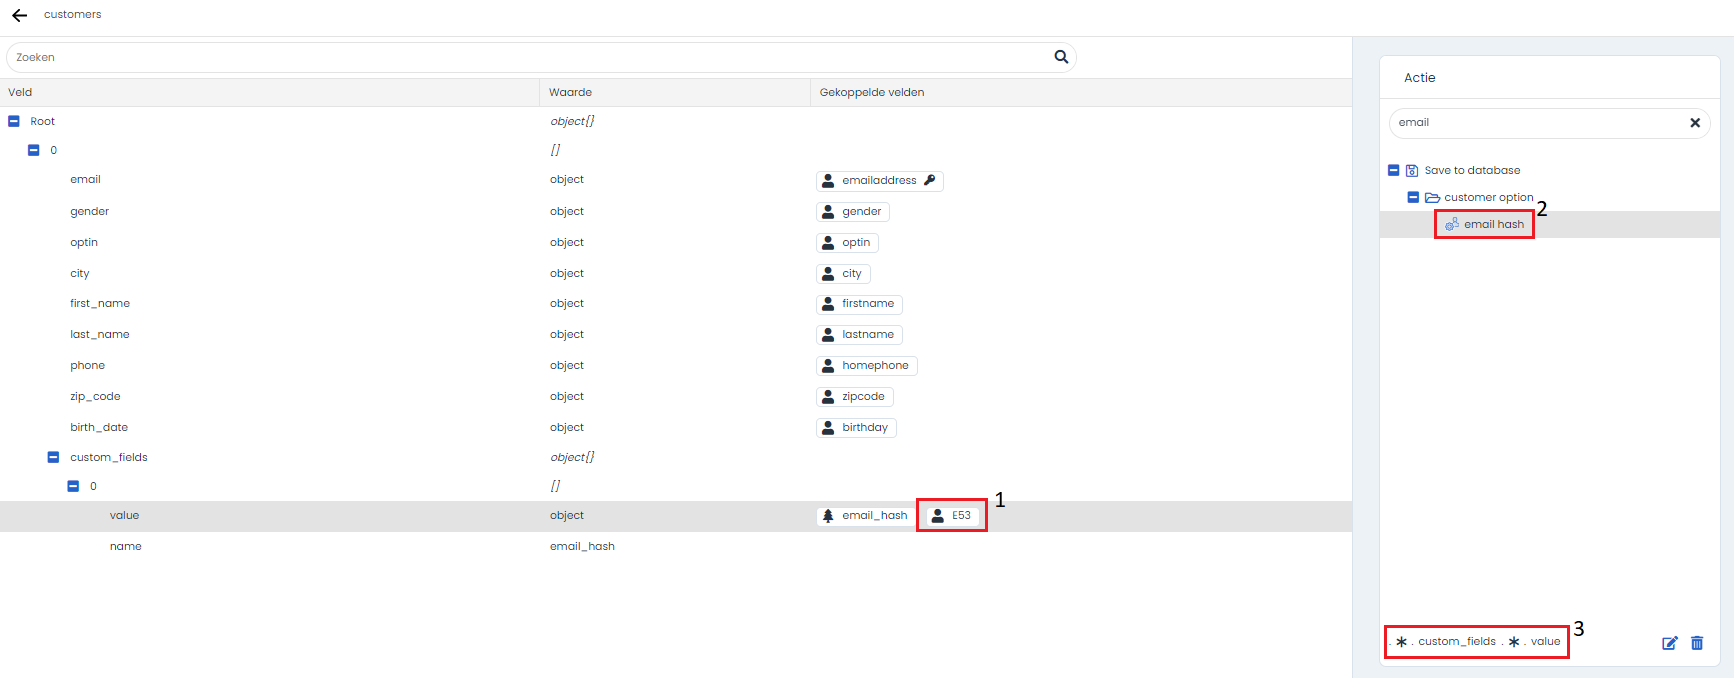
- Under custom fields, open field '0'. This is where you will find 'email_hash'.
- Add a connected field to the line named 'value', by clicking on the '+' icon.
- Select email_hash from customer_option.
- Find the filters (marked with '3' in the example image below). Set the first parameter '0' to 'Wildcard'
- Click on the third parameter (Behind custom_fields) and set it to 'Filter'.
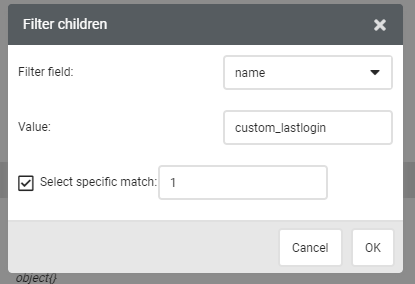
Step 5: Setting up your mapping filter.
- Set 'Filter field' to 'name'
- Set 'value' to the name of your custom field, in this case email_hash.
- Check the checkbox for 'select specific match'
- Click 'OK'.

Step 6: Mapping other custom fields.
- Select which field you want to map (See step 6).
- Select the customer option that needs to be mapped to the field.
- Setup your filters (See step 7)
Using a customer option value
Any Customer Option field can be loaded dynamically into Deployteq content. Use {{customer_option field='fieldname'}} to load the value of your customer option field into your Deployteq Template. This could f.e. be: {{customer_option field='E1'}}.
Onboarding CRM using Email Hash
By following the steps above, the field 'email_hash' has been mapped to a customer option field 'E1' in Deployteq. This is an important step in using your email campaigns to onboard CRM data in your DMP.
If you add the email hash to the parameter 'email' in campaign URLs, Spotler Activate will automatically recognize the email address of the visitor and onboard it's CRM details to the Cookie Id of this user.
Adding this to Deployteq in HTML would give you the following result: <a href="https://squeezely.tech?email={{customer_option field='E1'}}" alt="klik" target="_blank">link</a>
Using a Spotler Activate Audience in Deployteq
Any audience you create in Data Management Platform can be exported to Deployteq. To do this select Deployteq as a channel and press save for any new or existing Spotler Activate Audience.
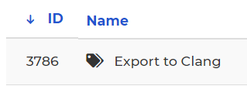
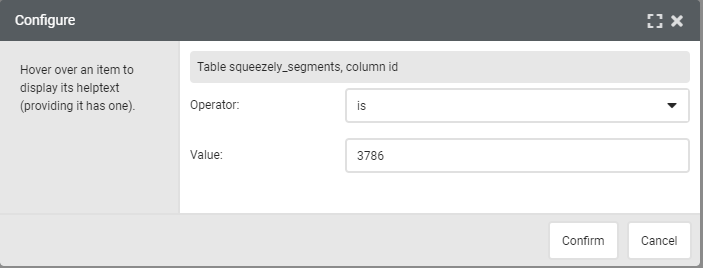
After saving your audience in Spotler Activate, you will find it has an ID, 3786 in the example below.
Use this ID to select your Spotler Activate audience in Deployteq. Do this by accessing profiles in Deployteq and using squeezely_segments as a condition.
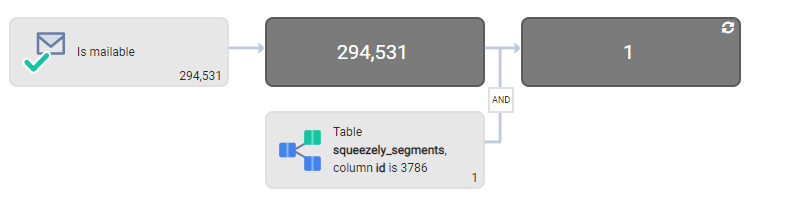
Configure this object using any operator you like and set the value to the Spotler Activate Audience ID.
Trigger a Deployteq Campaign from Spotler Activate Journey Builder
You are able to trigger Deployteq campaigns directly from Spotler Activate Journey Builder.
In below example the 'play' icon determines who will enter your journey. In this case an email will be sent to everybody that enters your journey after 1 day.
Find out more about building journeys here.
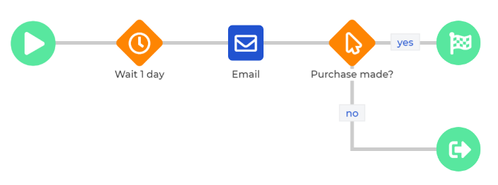
When using our Deployteq connection sending of the email triggers will be handled by Deployteq. You can select which automation should be triggered within the email object in a journey.
You will also be able to send along a product set with your trigger.
Before you will find any automations in Spotler Activate Journey Builder, first you have to create an automation in Deployteq. Find out how to do so below.
Creating a Trigger End Point in Deployteq
To automatically trigger Deployteq campaigns using a Trigger from Spotler Activate, we need to create an endpoint in Deployteq first.
To do this, go to your Spotler Activate App in the Deployteq Store and follow the below steps:
- Select 'Customize data mapping'.
2. Select '+ Add new mapping'.
You can now give your trigger a name and select the option 'End Point'. When done press ok.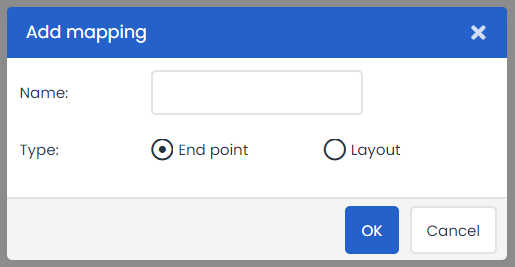
3. Open your Endpoint in the list by double clicking it. Click on the '+' icon under 'connected fields'.

4. Select an action in the menu on the right. Under 'layouts', select 'include-trigger'.
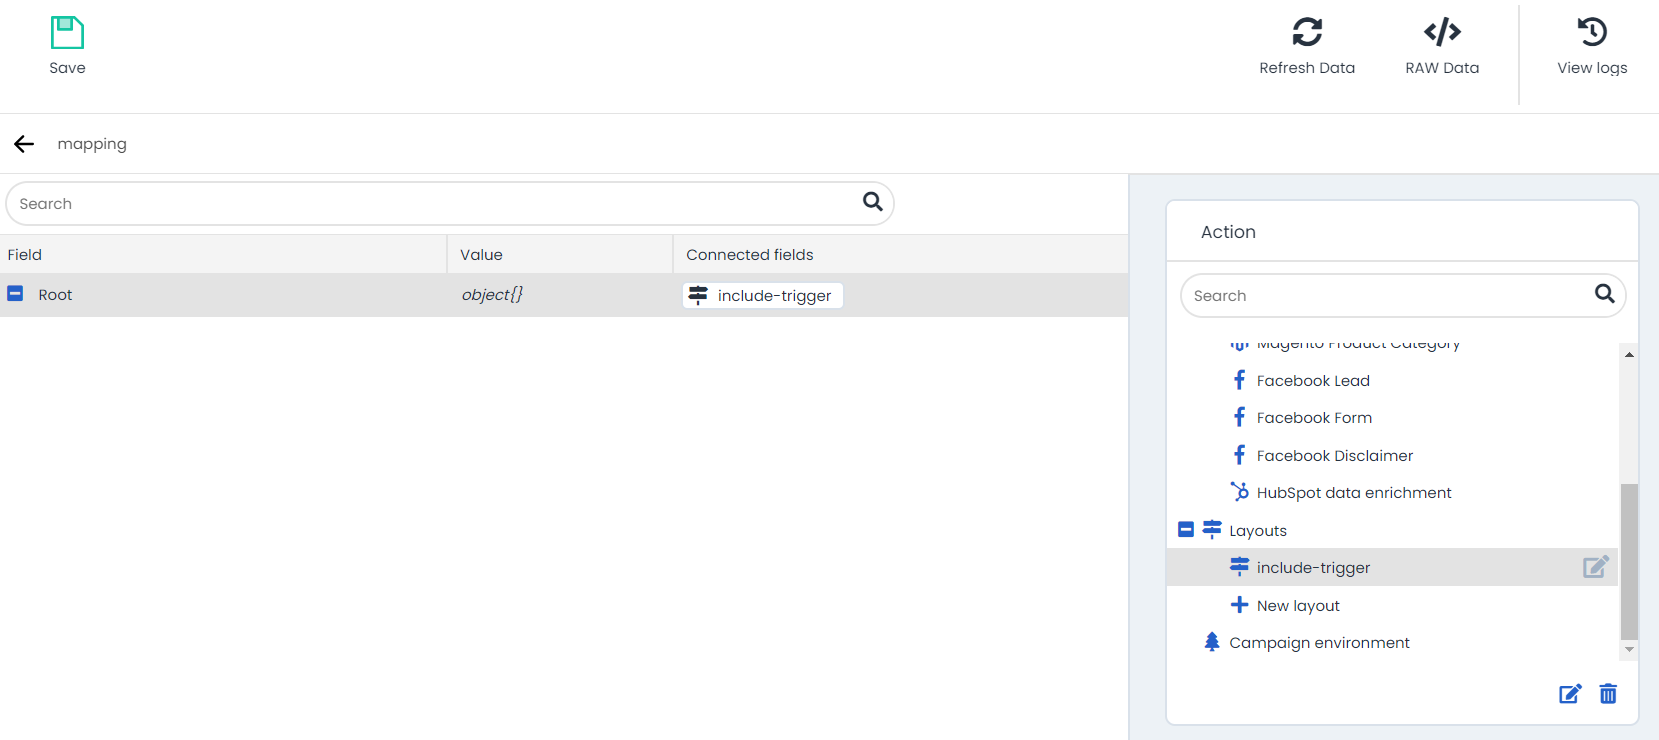
5. Save your settings and your endpoint is successfully setup. Keep reading below to use your endpoint as a trigger in a Deployteq Campaign
Using the Trigger Endpoint in a Campaign
Start by creating a campaign within Deployteq.
When in the campaign editor, find the object 'Start on Spotler Activate' within Campaign Objects and add it to your campaign flow.
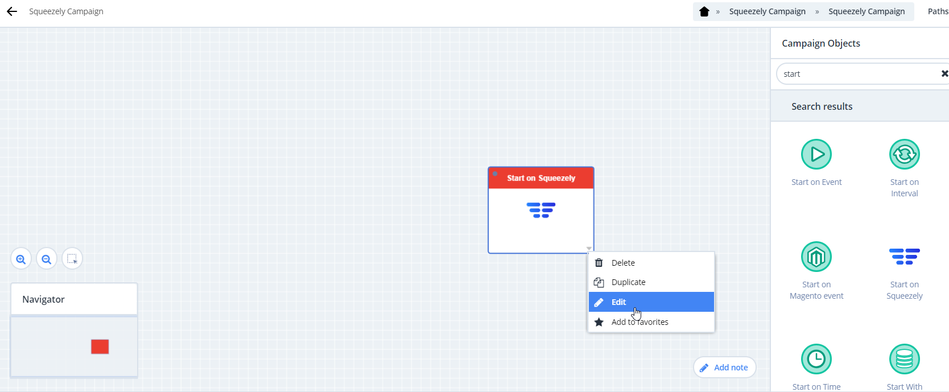
Open your start on Spotler Activate object by selecting 'edit'.
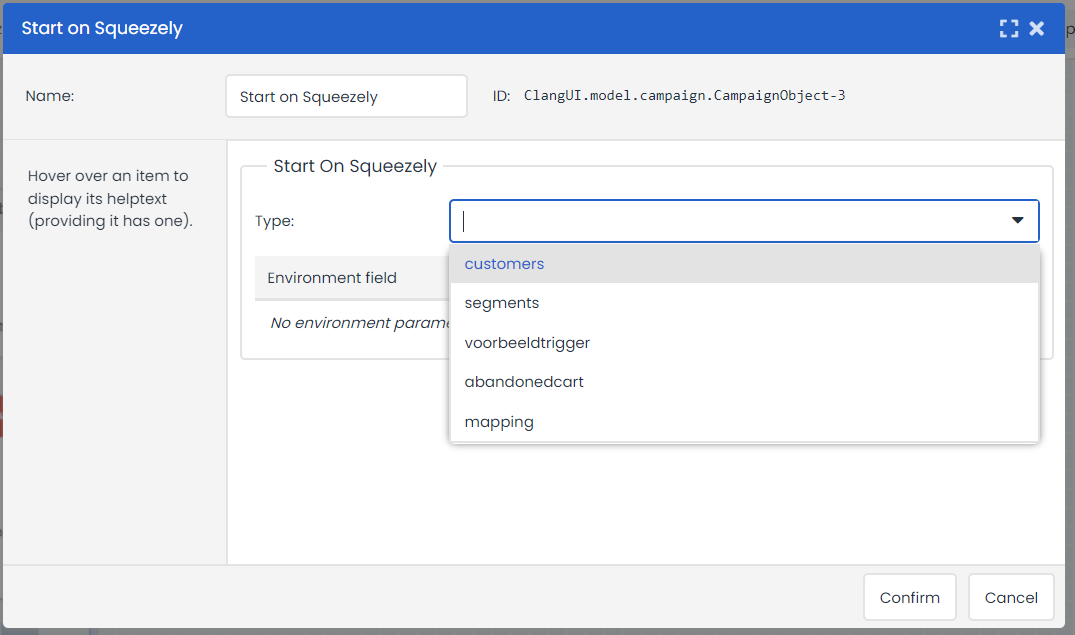
To recognize your object when using it in Spotler Activate, start by renaming you 'Start On Spotler Activate' object. In this example we use 'My Spotler Activate Campaign'
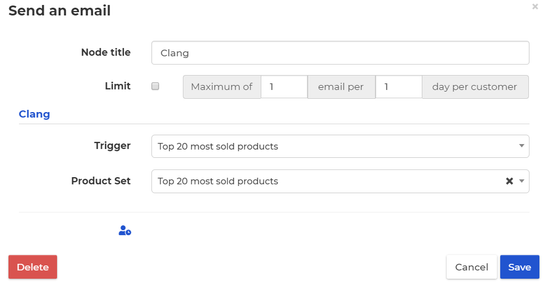
Next move on to selecting the Deployteq trigger you want to use for this campaign. Press 'Confirm'.
After setting up your trigger endpoint in a clang campaign, you will be able to select it within a journey.
Deployteq Statistics in Spotler Activate Dashboard
Unique Email Opens: This metric is synced to the column 'Impressions' in your Spotler Activate Dashboard.
Unique Link Clicks: This metric is synced to the column 'Link Clicks' in your Spotler Activate Dashboard.
