There is an option in Facebook to create Lead Ad forms. Of course, you could download these leads in a CSV file and import them manually in Deployteq, but it is much easier and more fun to receive the leads directly in Deployteq so that you can start creating campaigns with them. This is now possible with our Facebook Lead Ads extension.
![]()
Configuring Facebook Lead Ads in Deployteq Store
At the top of the menu, you will find the Deployteq Store where we have made all the default integrations available for you. Select Facebook Lead Ads
You can now create a new Facebook link with your page, for lead ads, and also optionally with your ad account for audiences. Click on the Facebook logo to go to the first step of the link.
Start by adding a new Facebook account or selecting an existing one. Even if an existing account has already been activated in your brand, you may need to approve it again to add the new permissions to the Deployteq app.
Step 1:
To connect a Facebook account, you click on "Add New Facebook Account"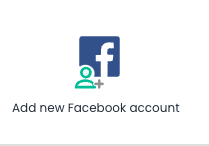
Step 2:
Once you click on that you will be directed to Facebook and you can login with your password of the account that you want to connect with Deployteq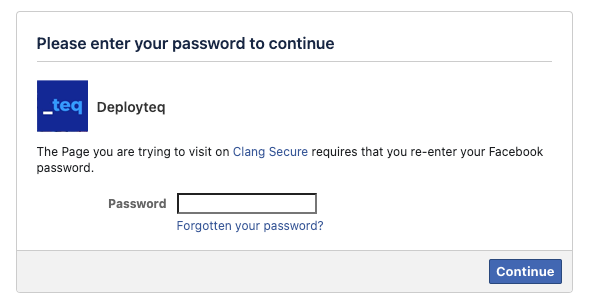
Add your password here and click on Continue.
Step 3:
You will now see the following screen:
If there arent any other pages that you want to connect to Deployteq that you are Admin of, click on the blue button that says "Continue as ***** (where **** is your profile)"
If you have other pages that you are admin account and that you want to connect aswell to deployteq, click on the Grey Button "Edit Settings". There you will select all the pages with forms that are connected to them.
(shown in screenshot below)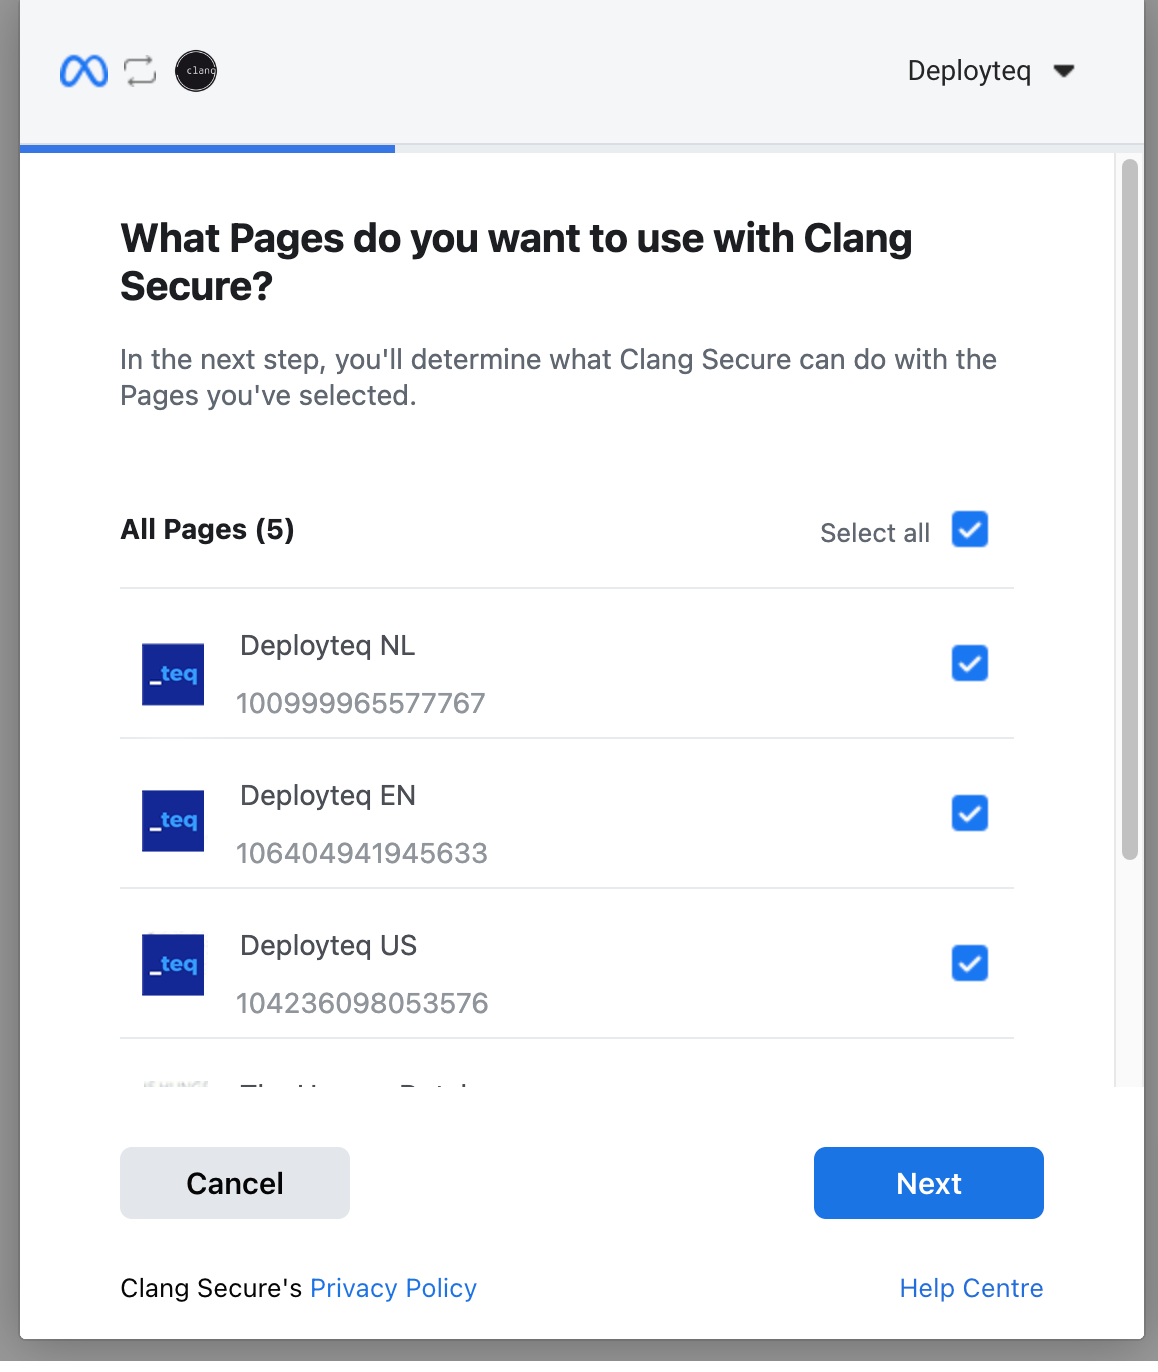
Step 4:
If you are satisfied with all the pages and settings, you can click on "Next" and in the following screen you can leave everything as is. Just click on "Done" and your set to go!
You have now succesfully connected your account and you will see the message that Clang Secure is connected to Facebook. Hit Done again and go back to Deployteq (this will happen automaticly now)
In Deployteq you will see the account connected and you can click on "Next Step"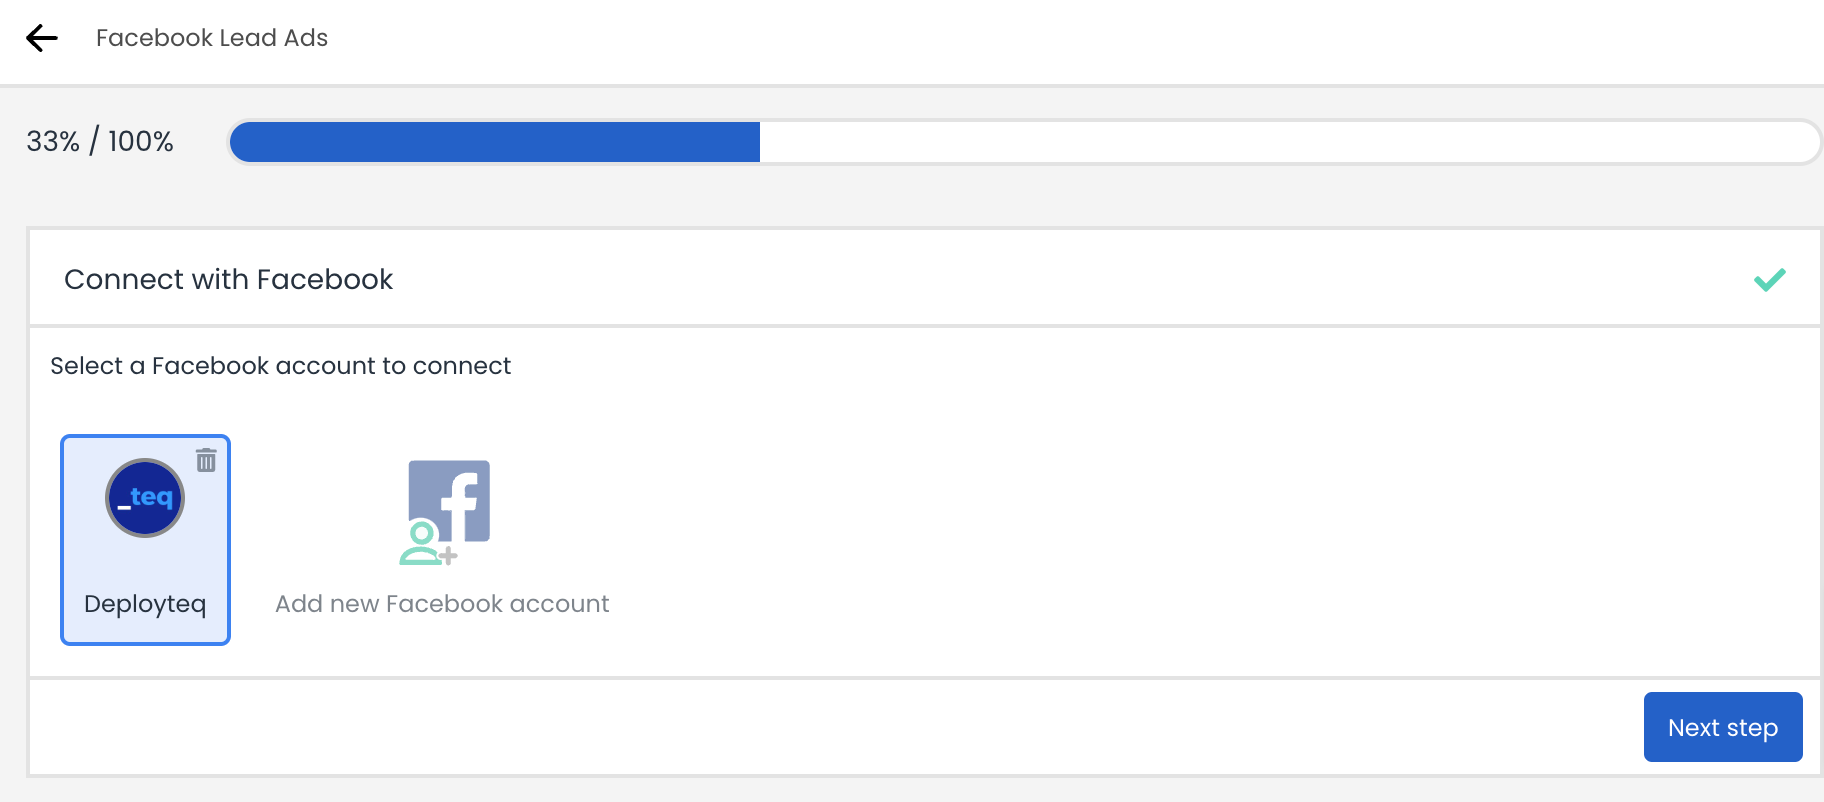
Step 5:
Now we will start selecting the form that you want to connect to a campaign.
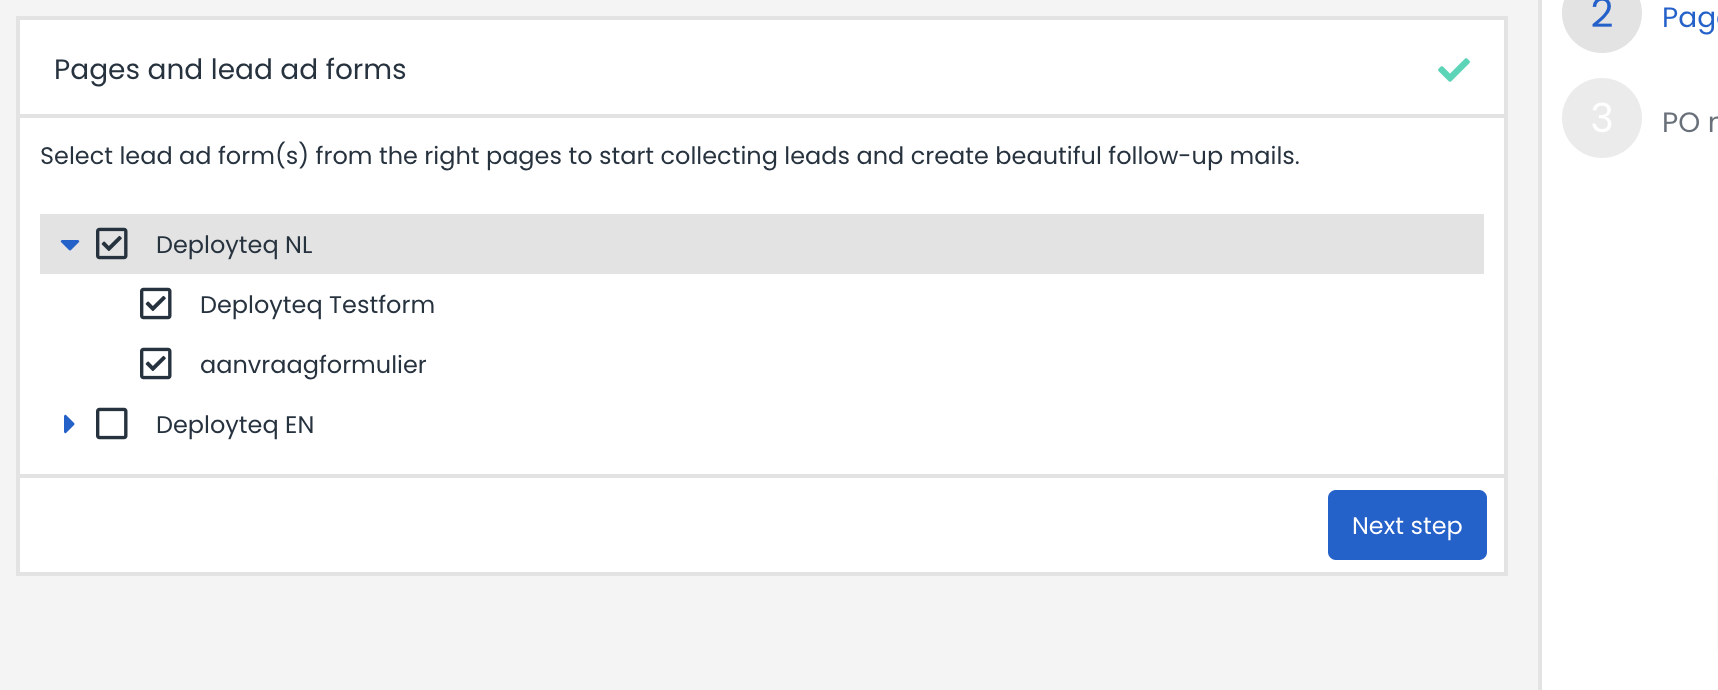
If you are satisfied with your selection, hit "Next Step".
Step 6:
Now choose your invoicing method (monthly or Anually) and add your PO number if that is needed.
The activation & configuration of the Facebook lead forms is now officially activated and you can now use the objects in your campaigns and use them as fit.
Click on Next and your link has been created! You can now create a Deployteq campaign, create new field links, or view the logs of leads submitted earlier from this linked form.

Problems which may arise
I can't automatically link Facebook with the Clang connector
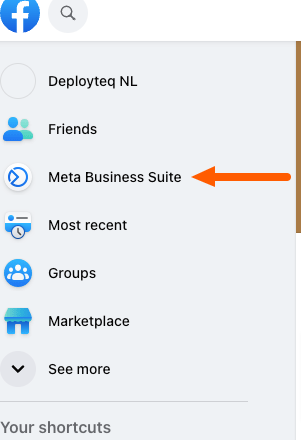
It can happen that Deployteq doesn't automatically connect with your Facebook page. This can have several reasons. The most common reason is that the Clang connector doesn't automatically link with your Facebook page. You'll have to do this manually. This can be done via the Meta Business Suite. You can find this on the left side in the Facebook menu.
Next, click on 'All Tools' in the menu on the left side.
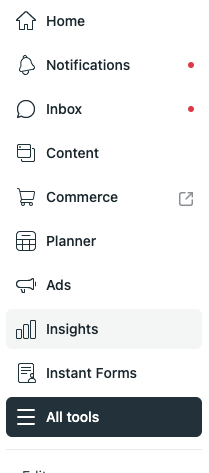
Now, click on 'Instant Forms' in the large menu at the bottom left.
You'll now be in the overview of all forms, and at the top of the menu, you'll find the menu item 'CRM Setup'.
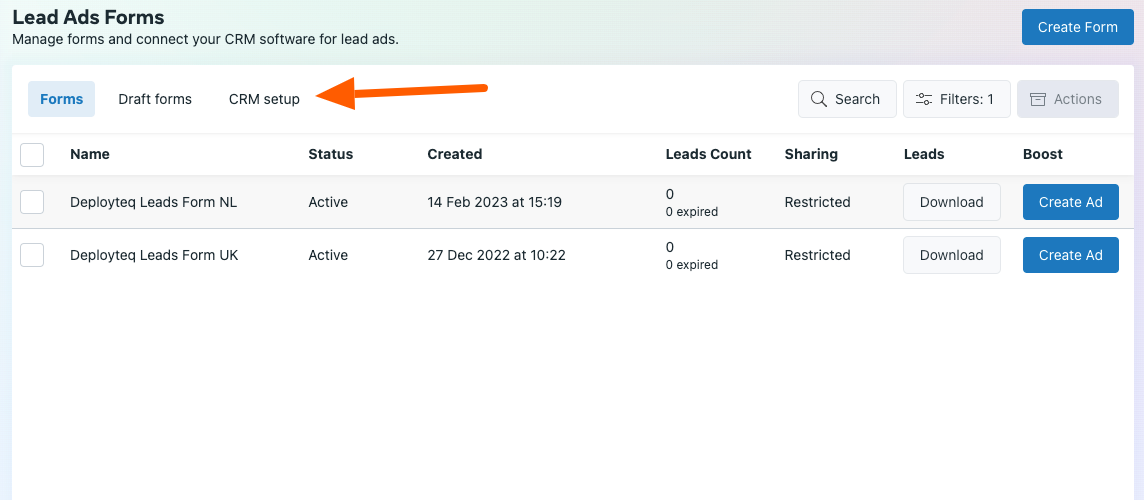
Click on CRM setup. You'll now be in the section where you can connect CRM apps. Normally, the Clang Connector should already be listed here. If not, it needs to be manually connected OR you need to remove the account you're linked with in Deployteq settings from the Facebook Lead Ads App and sign in again. Then, you'll probably see the app connected in the CRM Setup section and can start gathering leads.
Still not working? Please contact our support department!
Field links
During the installation, a number of default fields are already linked to default Deployteq fields.
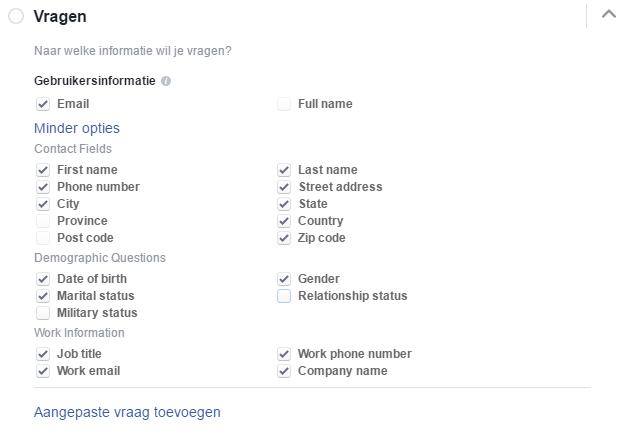
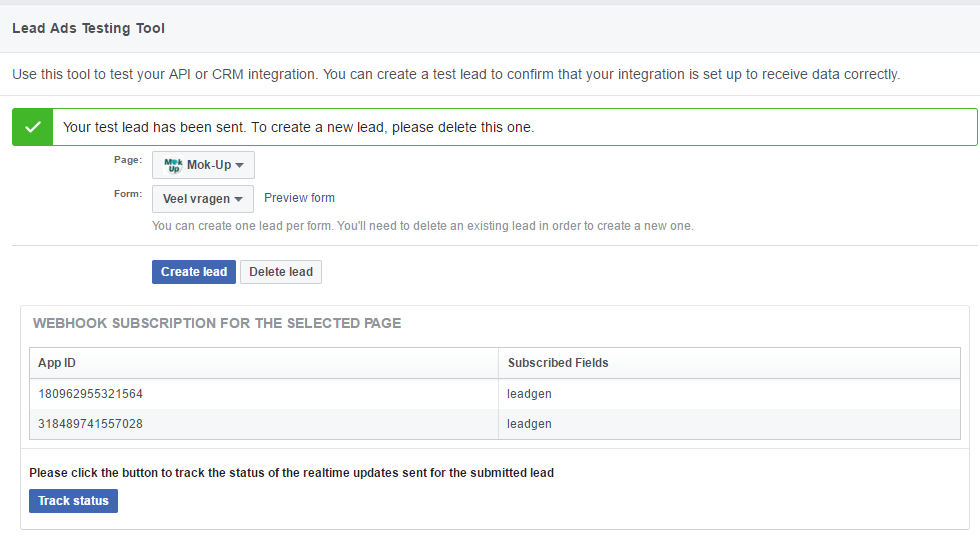
You will need to link any customized questions yourself using our data mappings interface. This is easiest when you have already received or created a lead using Facebook’s testing tool https://developers.facebook.com/tools/lead-ads-testing (also see the section on Testing below)
Once you have submitted a lead, it will be shown when you click on the ‘Customize data mapping’ button.
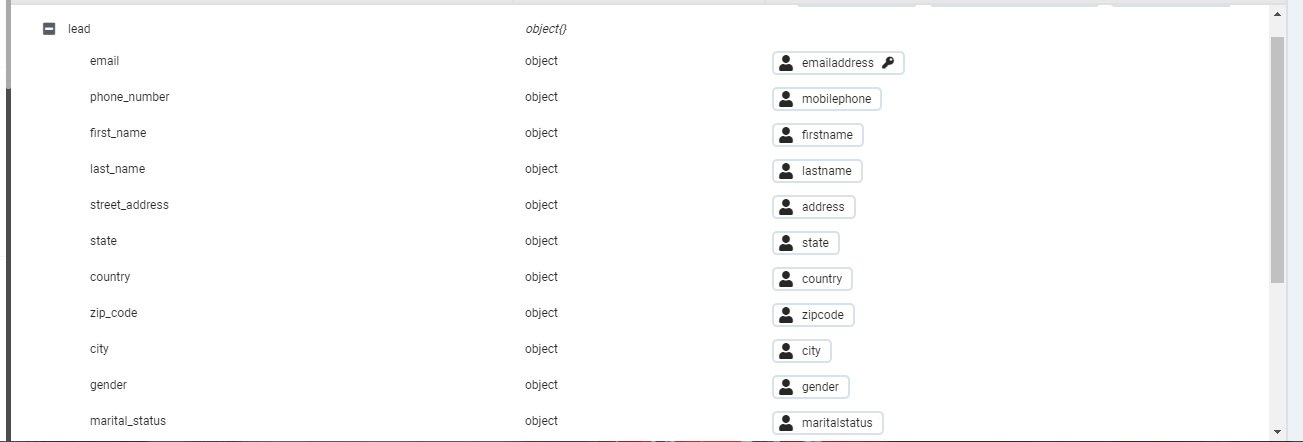
You will see the links that have already been established in the right-hand column. You can also see a key symbol after the e-mail address. This means that it is deduplicated. When you want to connect a new field, hover over this field with your mouse and you will see a plus sign. Click on this plus sign to see all the fields available in Deployteq on the right-hand side. In addition to the customer and customer option fields, you can also choose to select fields in the data model or make them available as environment variables in the campaign.
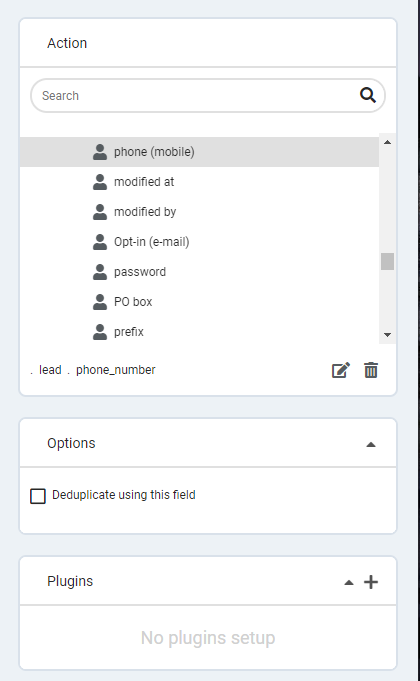
Select the field that you want to link and continue until you have finished linking your form. Then click on Save in the top left and all these fields will be saved as well with the next lead.
Custom disclaimers
It is also possible to create custom disclaimers in Facebook. These are not linked by default. The connection for this is slightly different.
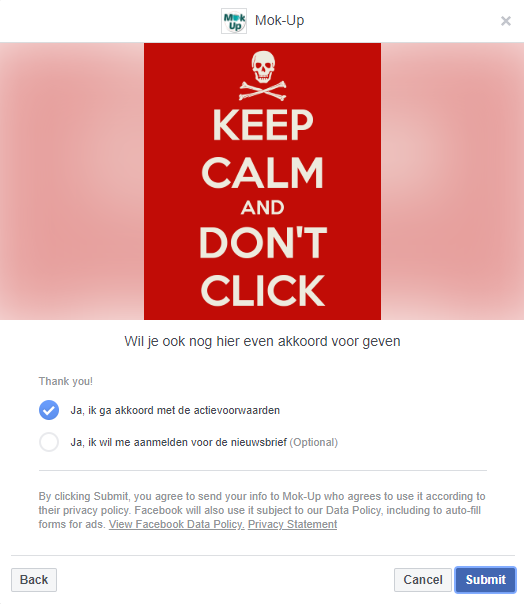
In the above example, two questions have been added to the form. The Facebook disclaimer enrichment enables us to retrieve extra data for these questions. You want to save the answer for each question.
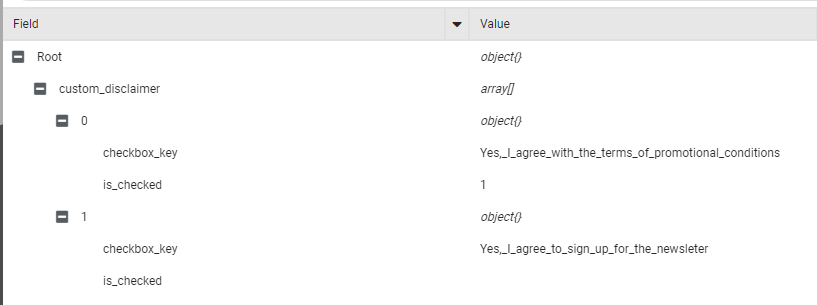
Click on the plus sign behind the answer ‘is_checked’ and select the field where you want to save the answer.
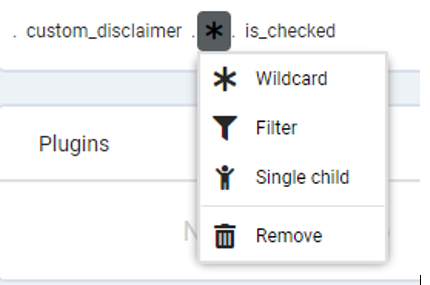
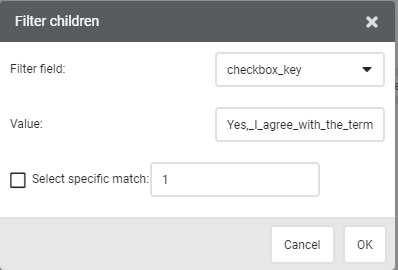
Click on the asterix (Wildcard) after ‘.customer_disclaimer.’ and select ‘Filter’. Clicking on this brings up a pop-up window where you can define the conditions for saving a field. In this case we only want to save the answer ‘is_checked’ when the question (‘checkbox_key’ field) is ‘Yes,
_I_agree_with_the_term_and_conditions_of_the_promotion’. Enter this value word for word in the ‘Value’ field. Select the field ‘Select specific match’ and click on OK. Do the same with the rest of your questions.
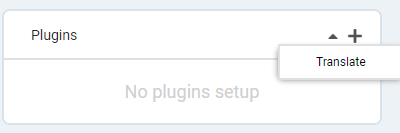
Facebook will always give us a 1 as answer if the checkbox is checked but the field ‘is_checked’ will remain empty if the checkbox is not checked. If you would like to change this to Yes, you can do so using Plugins.
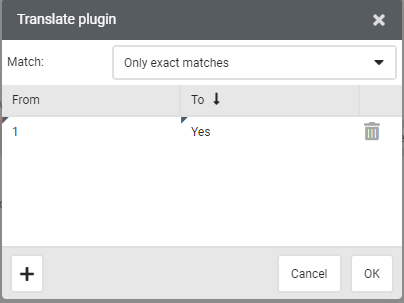
Click on the plus sign next to Plugins in the bottom right and select ‘Translate’.
You can now click on the plus sign in the bottom left of the pop-up to add extra translations. Choose to translate from 1 to Yes. When the answer from Facebook is a 1, Deployteq will place a Yes in the field.
Campaigns
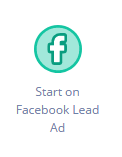
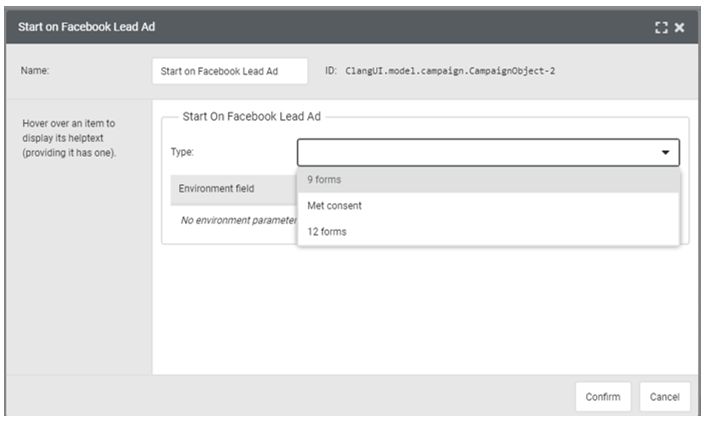
Once you have configured pages, you can link a campaign to them. A new object has been added to the campaign objects called ‘Start on Facebook Lead Ad’.
Select the link you want to use in this object. This object automatically has the environment variable form_name so that it can be used in your campaign. If you do not have it yet, this means that you have not yet received a lead in Deployteq. Read the section on Testing to see how easy it is to send a lead. The name is forwarded precisely as it is called in Facebook. In the example above, the names are ‘Veel vragen’ (Many questions) and ‘Versieren-mok’ (Decorate mug).
Customers that come in as a lead via Facebook will automatically be forwarded to this campaign once all the data has been saved. Here you can send e-mails, save people in groups, and do everything you are used to doing in Campaigns in Deployteq.

Testing
Of course, you’ll want an easy way to test the flows and e-mails without actually having to create a lead in Facebook. Facebook has created a developer’s tool for this purpose: https://developers.facebook.com/tools/lead-ads-testing. Here you can use preview form to complete and send your own form. If you receive the thank you message immediately during the preview, click on delete lead for that particular form and submit it again.
When mapping fields, it is also very useful to first submit a lead with these details