With the e-mail verification module it is possible to validate the validity of an e-mail address in order to limit the number of bounces in a transmission. Install the app and use the 'Email Validation' campaign object in all your (sign-up) campaigns. To save the results of the verification you need to create 3 customer option fields in advance (eg "last message", "last date" and "last status"). A monthly report can be sent with the numbers of validations that have been done.
Installation
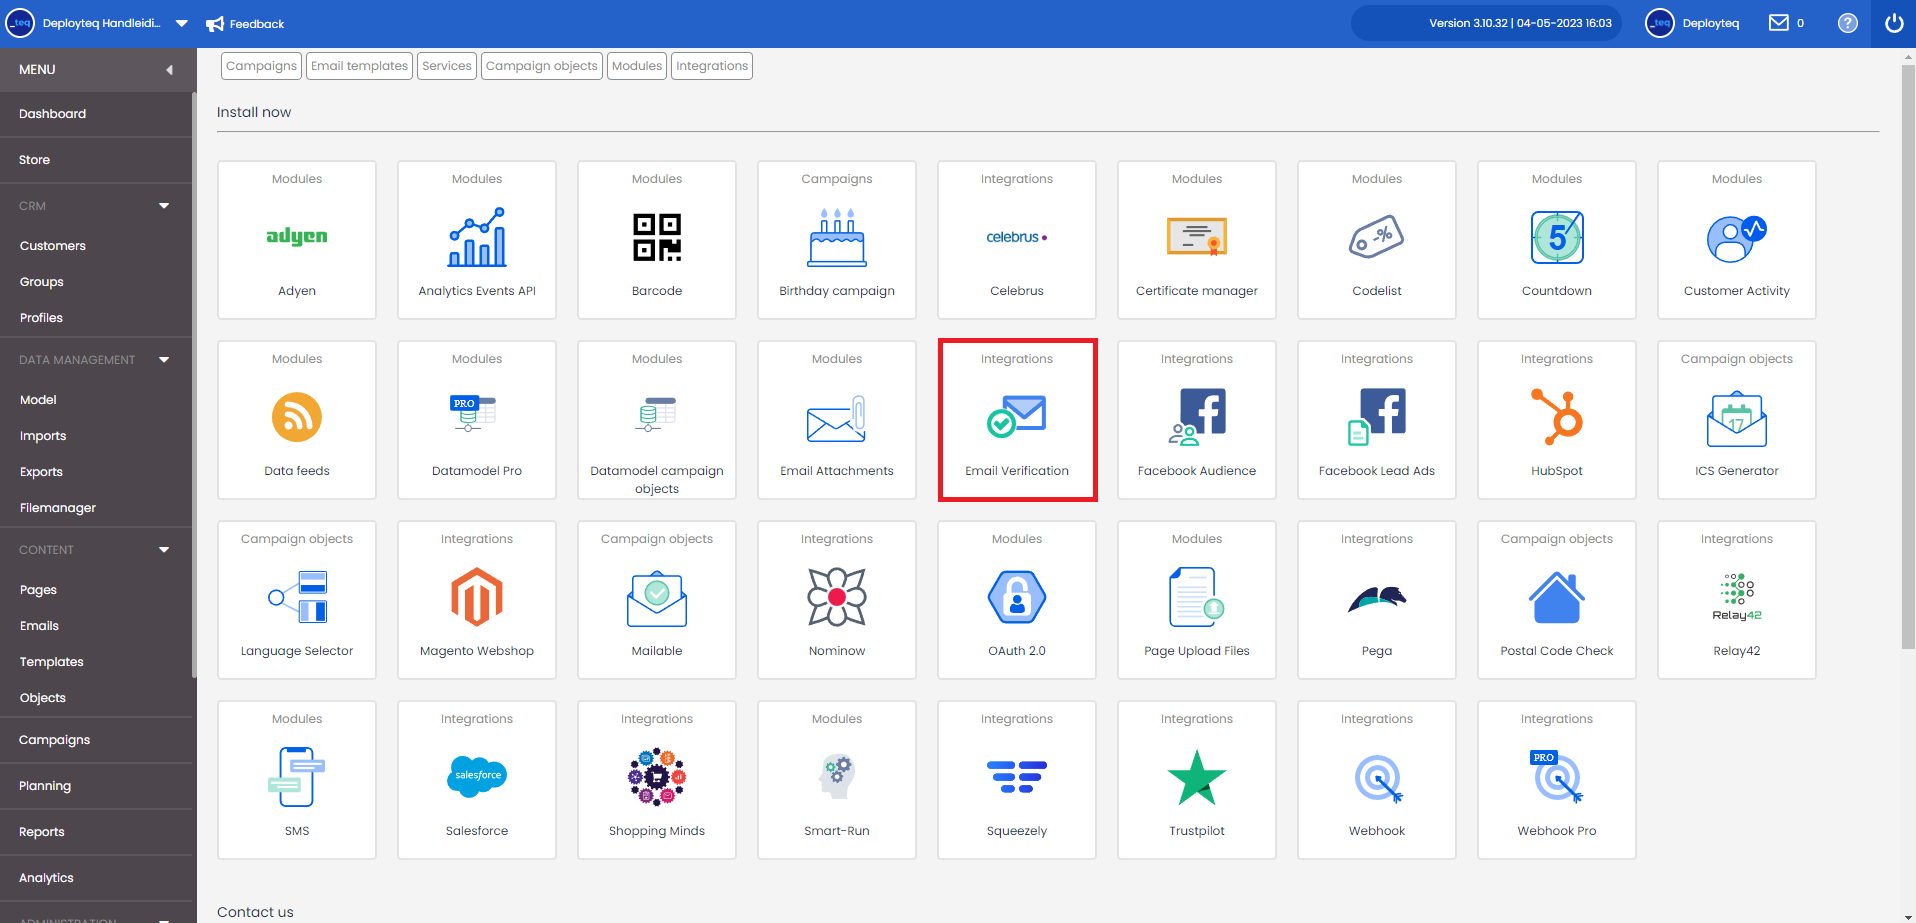
You can easily install the email verification integration via the Deployteq Store. You can find the app under "integrations" in the Deployteq Store:
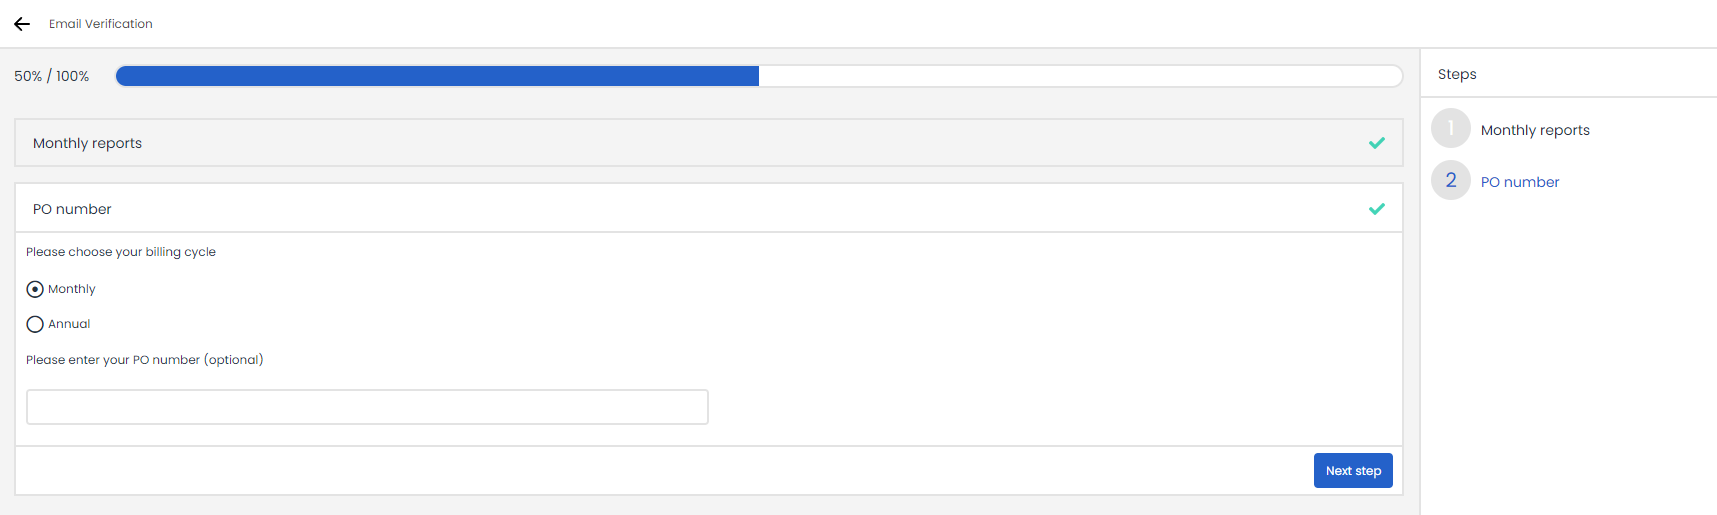
After clicking on the app, the installation will start and the first step (optional) is to enter an email address to which a monthly email will be sent with an overview of the number of validations that have been done, grouped by status.

The last step is the usual billing settings. If you are only going to use this app for a short time, choose monthly. As soon as you remove the app, the monthly bill will also stop. If you are going to use it for a longer period of time, you will receive a one-off invoice for the entire year in advance. If a PO number is required for this, you can add it to the settings.
In Campaigns
Once the app is installed you will have access to a new Campaign object.
The following settings can be applied within the object:
| Setting | Description |
|---|---|
| Send monthly report to | Feature to enter an email address which will receive an email confirmation at the beginning of each month containing, per status, the number of validations over the past month for this specific campaign. |
| Maximum number of tests | Limit the number of validations per chosen period, to dose the cost of the number of validations. |
| Per period | The period over which the maximum number of verifications must be limited: per hour, day or month. |
| On invalid update* | The ability to configure what should happen in the event of an "invalid" status. Adjust opt-in, hard bounce to 1 or take no action. |
| Write last status into* | Save last email verification status in the customer record, the following statuses are available:
An output is also available per status, from the campaign object, to be able to forward a specific flow to these customers. |
| Write last date into* | Save last email verification validation date in the customer record. This date can be used to prevent an already validated record from being validated again or, if required, to revalidate the email address after x period. |
| Write last message into* | Save last email verification comment in the customer record, this concerns the secondary_status from our email verification service. This status can be used for a deeper analysis of the invalid addresses and to determine whether the valid address is an Accept All address. Below is an overview of the possible values for this field:
|
| Write last result into | Save last email verification result in the customer record (for example deliverable, undeliverable, risky, unknown) |
| Write last reason into | Save last email verification reason in the customer record (for example low_quality, timeout, unexpected_error, unavailable_smtp) |
| Write last sendex into | Save last email verification sendex score in the customer record (a score between 0.00 and 1.00). More information on the Sendex score can be found here: https://docs.kickbox.com/docs/the-sendex |
* Mandatory fields
Object Links
The Email verification object has several outputs. After completing the verification and updating the customer option fields, it is possible to continue the campaign by, for example, placing customer records in different groups. The following outputs from the object are available:
| Link | Description |
|---|---|
| Continue | This output contains all customers that are offered to this object regardless of the status of the email verification. |
| Valid | Email address is valid. |
| Invalid | Email address is invalid. Will most likely bounce. |
| Unknown | These are the addresses for which we were unable to validate whether the status is invalid or valid. |
| On Fail | The email addresses could not be validated, for example when the service is temporarily unavailable. |
| Exceeded Threshold | This output is followed for each customer after reaching the set threshold. |
Transactions
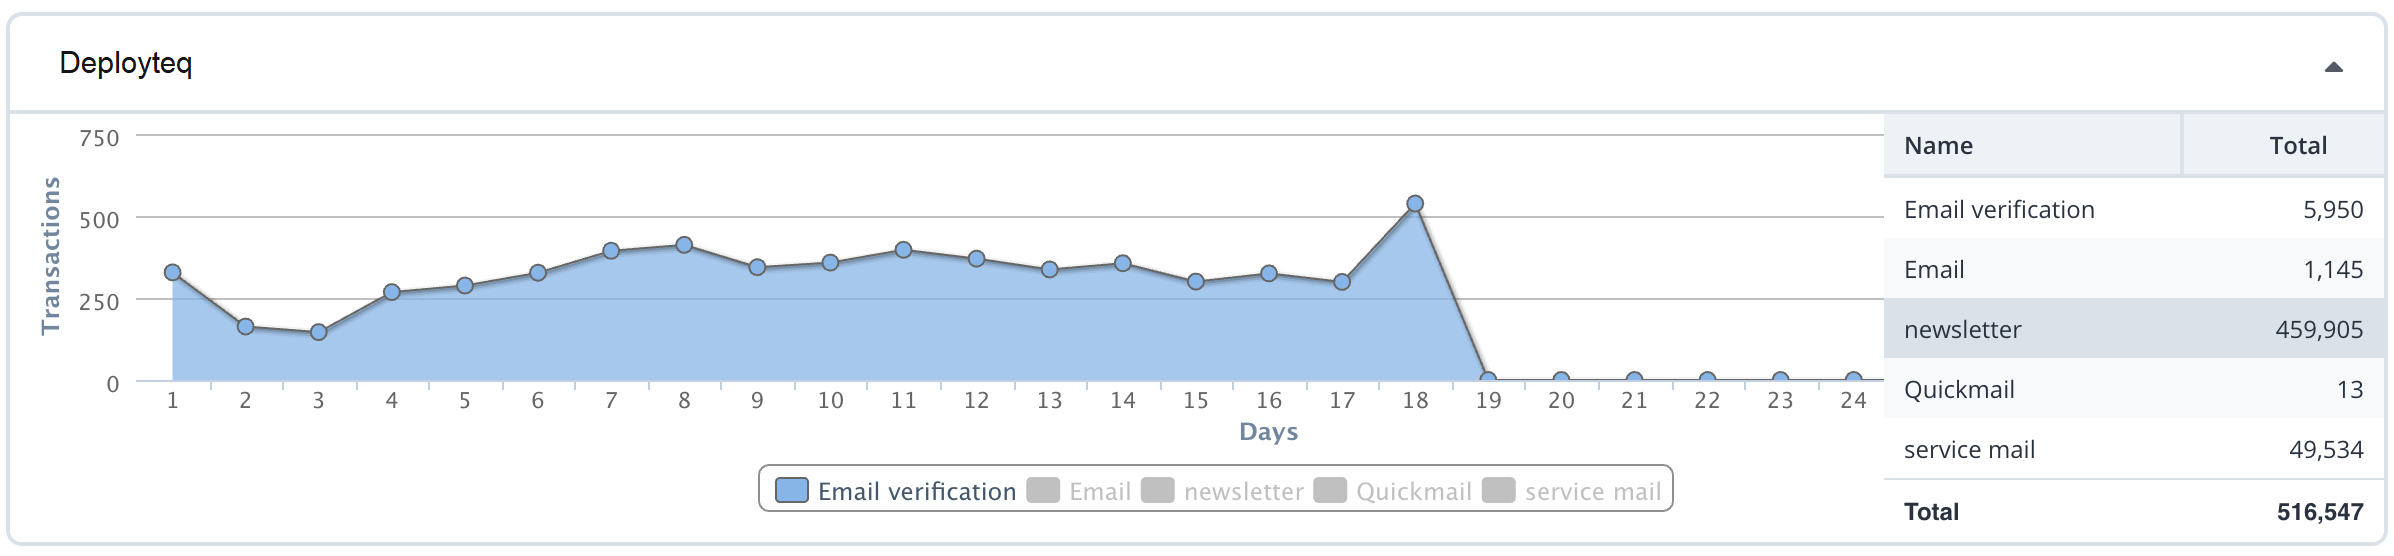
It is possible to receive an e-mail confirmation via the App or per campaign with the number of verifications per month for the relevant brand. It is also possible to view the transactions on a daily basis via the Transactions section in the brand manager.
Tip: build a clean-up campaign wih this object
Step 1 - Create a cleanup profile with the following two options:
The created customer option field for 'last update date . Set it to 'Is Empty'. This way, you will only get the untested records in the profile.
The Random object. Set it to 5000. This allows you to control the daily throughput of contacts through the object.

Step 2 - Create an interval campaign and set it to run daily
Start the campaign with a "Start on Interval object" and set the repeat interval to "Every X day(s)."
Set the number field to 1 to ensure the campaign runs every day. Next, select the "Select Customers" object and choose the newly created 'Cleanup Profile.' Then, select the Email Verification object from the campaign options.

Step 3
Draw an arrow from the "Select Customers" object to the "Email Verification" object. Then, configure the "Email Verification" object by double-clicking on it and setting the following settings:

Settings for this object:
Fieldname | Explanation |
|---|---|
Send monthly report to: | Here, you enter an email address where the monthly results/report should be sent for this object. |
Maximum number of tests | Here, you can set a maximum limit on the number of contacts you want to process per run of the campaign. |
Per period: | Set here whether you want to configure it per Hour, Day, or Week. This allows you to define the number of contacts per hour, day, or week. |
On invalid Update | Set what should happen when a contact is 'invalid.' With 'Optin,' the opt-in status changes to opt-out. With 'Hard Bounce,' the contact is marked as hard bounced and will not be included in other emails. If you choose 'Nothing,' no action will be taken. |
Write last status into: | Choose the field 'Email Verification - Last Status' so that the status can be stored here. |
Write last date into | Select the customer option field 'Email Verification - Last Update Date' here so that the timestamp can be stored |
Write last message into: | Select the customer option field 'Email Verification - Last Message' here so that additional information can be stored. |
Step 4
After filling in all the settings, add four checkpoints as the last step (this is optional but good for analytical purposes).
One for Valid, one for Invalid, one for Unknown, and the last one for Fail.
You can give them the following names: "Cleanup Campaign - Valid," "Cleanup Campaign - Invalid," "Cleanup Campaign - Unknown," and "Cleanup Campaign - Fail."
These can be displayed in the Analytics Dashboard. The campaign will look like this:

The campaign is now ready to be scheduled to run at the time you prefer. It is advisable to run such campaigns at night to avoid interfering with the 'Business as Usual' campaigns that take place during the day.
Questions
If you have any questions about the use after installing the app or if you need help using the app, please send an email to support@deployteq.com