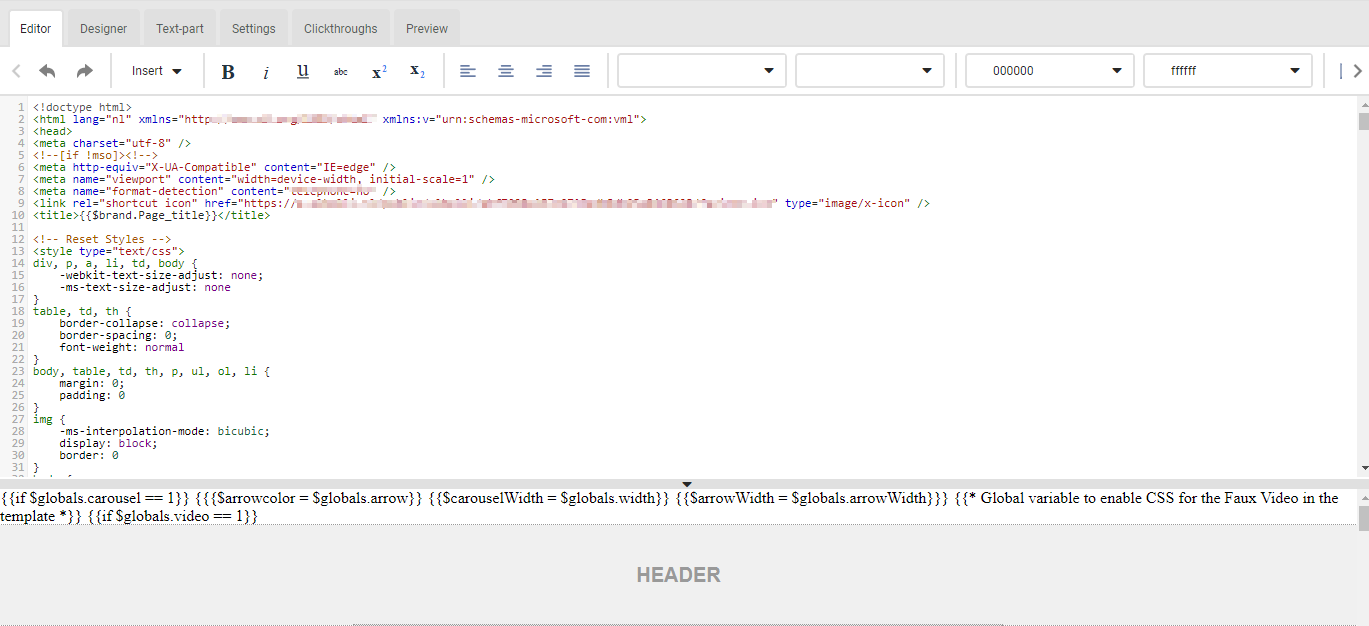
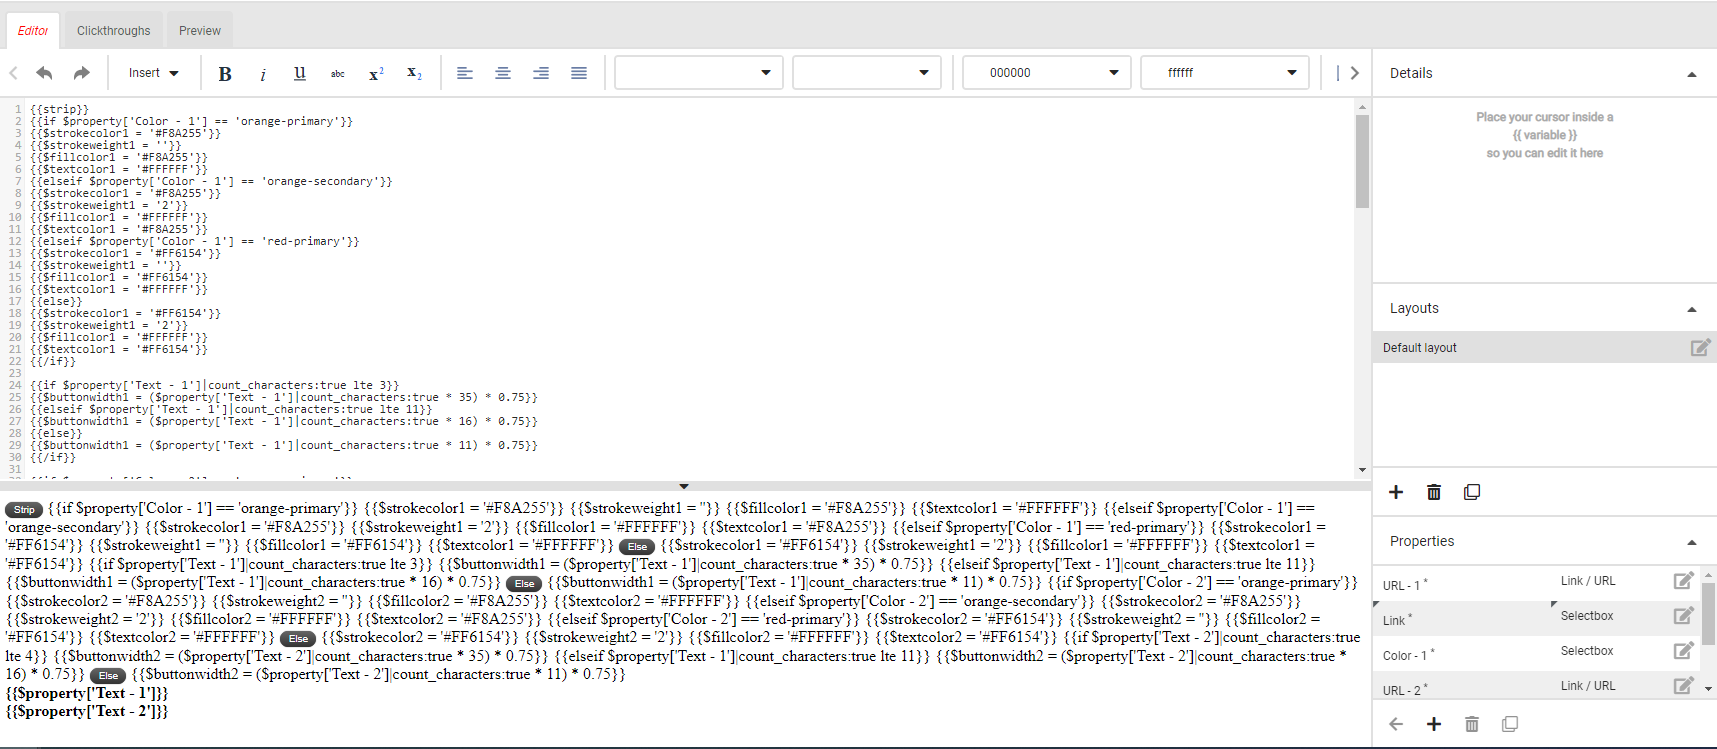
The template editor screen is divided into a section for the code and a section in which an example of the entered code is displayed. By default, the HTML code is shown at the top and the example is shown in the bottom part of the screen.
Templates will be created in HTML. However, you will need no HTML knowledge when it comes to composing the e-mails. You can drag objects straight into the zone and select the layout. After entering the object properties, you can immediately see how they will appear in the e-mail.
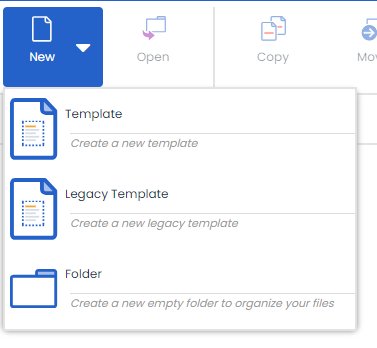
If you have the necessary authorization, you can select templates from the menu:
Once you have selected a new template, you can insert the HTML source code for your template into Deployteq and the template will be displayed in the preview screen. You can then divide your basic template into zones.
When creating a template with zones, you are actually creating a template for your e-mail. A zone is a framework within your template that is reserved for objects. In the details panel of your template editor, you can specify per zone which objects are allowed to be placed inside it. A number of layouts can be selected per object.
To create a new zone, select the relevant HTML code that you would like to configure as a variable zone. There are two options:
- Insert zone
Use this button to insert a zone without creating an object. - Generate object
Use this button to create a zone and an object from your selected HTML code. The selected HTML code is placed in the created object.
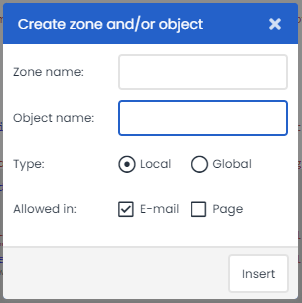
Enter a zone and object name and specify whether it should be a local or global object.
- Local: object only available for this template.
- Global: object available for all templates
See the objects section for more information about objects. Once all the variable components of your template have been converted into zones, you can start creating your e-mail.
Properties
Properties are used to specify the variable content within an object. There are various types of properties, such as Text, HTML, Image, Link/URL, Numeric, and Selection list. As soon as an object is dragged into a zone, its property values can be entered.
Use the + button to add a new property. Once you have created the property, you can insert it into the HTML code at the current position of the cursor using the form button on the left. You can delete a property using the red button on the right.
![]()
Once you have clicked on the + button, give the property a name, and select its type.
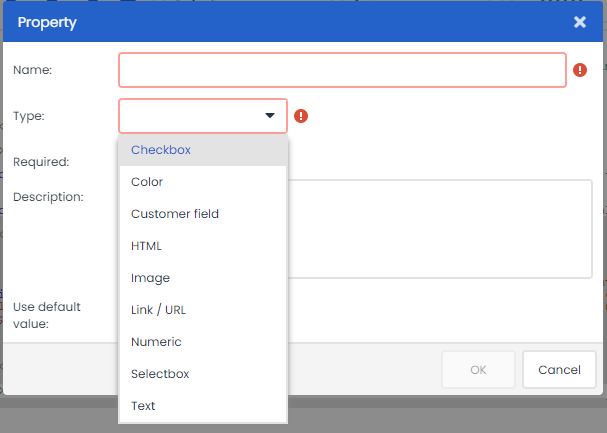
Text property
When choosing the type Text, you have the option of inserting a textbox/line, such as a title.

HTML property
When choosing the type HTML you have the option of inserting text into your e-mail. Within an HTML property, it is also possible to include personalized information in the e-mail. When creating the e-mail, customer data can be included via a link.
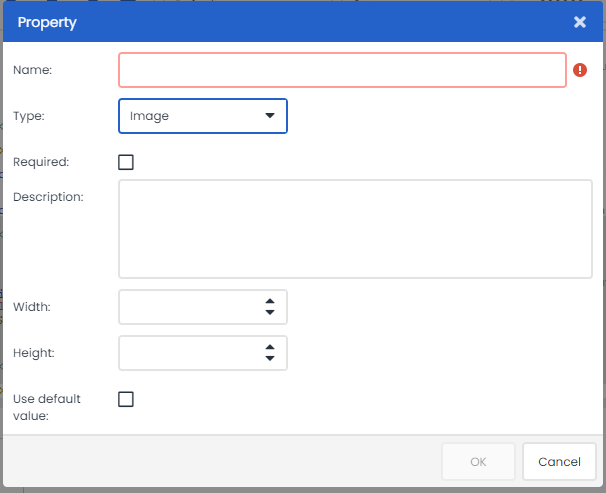
Image property
When choosing the type Image, you have the option of specifying the height and width of the image. An image that is added to the e-mail later must have exactly the same height and width.
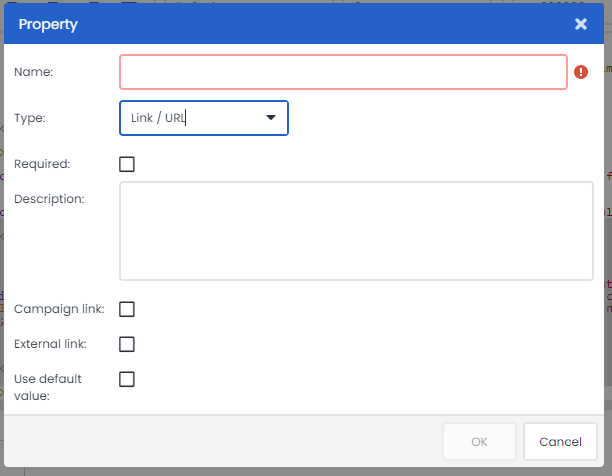
Link/URL property
When choosing the type Link/URL, you can specify whether it should be a campaign link or an external link. A campaign link is a reference to a Deployteq campaign object. The external ink is a reference to an external page.
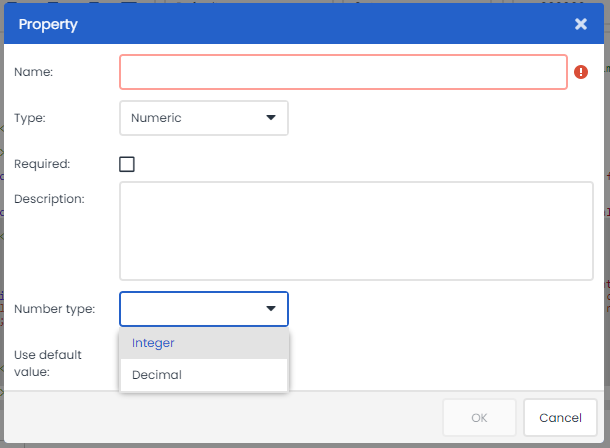
Numeric property
When choosing the type Numeric, you can specify whether or not the number should contain a decimal.
Selectbox property
When choosing the type Selectbox, you can compile a list of possible values and descriptions. The value is what is inserted into the HTML code and the description specifies what the user can choose from.

You can now use the properties you have created in all object layouts.
Layouts
A layout is the specific way in which an object is displayed, such as a news item with an image on the left-hand side (layout1) or right-hand side (layout2). The properties of the object can be used in all layouts. Use the buttons below to copy, create, rename or delete a layout.
You can then design the rest of the layout in the Layout editor.
If you add an object with multiple layouts in an e-mail, you can then choose the layout you want.
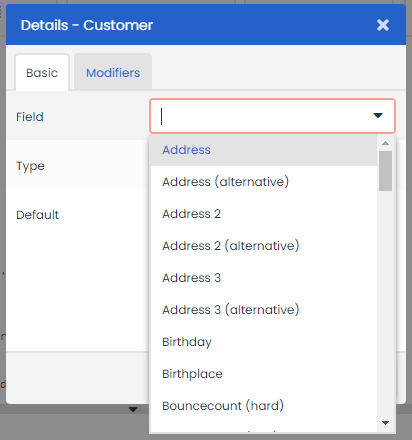
You can use customer fields, customer option fields, manual fields, or a current date in the object editor, template editor, and text editor. To do so, use the ‘Insert’ drop-down menu at the top left of the editor.
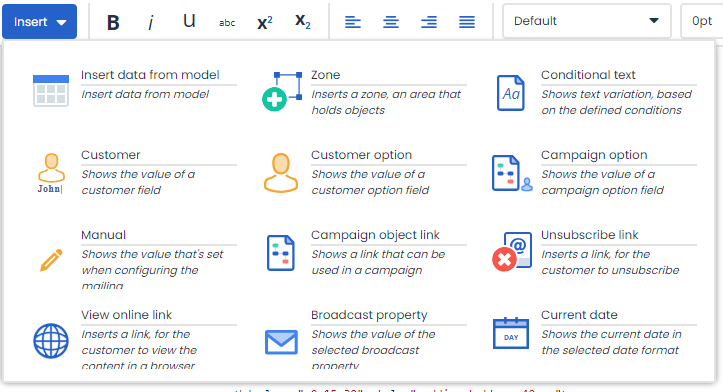
After selecting the fields to be inserted, you can further define these in the details panel on the right-hand side of the screen. Further definition is not necessary when inserting a date field.
You now choose the type of field, the relevant field, and a possible default value. In a layout, you could also apply a filter to the selected fields.
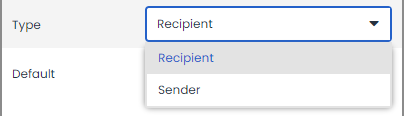
- Specify the type; recipient or sender.
- Choose your preferred Deployteq basic field, customer option field or manual field.
If you specify a default value, this value will be used if no value has been entered into the selected field.
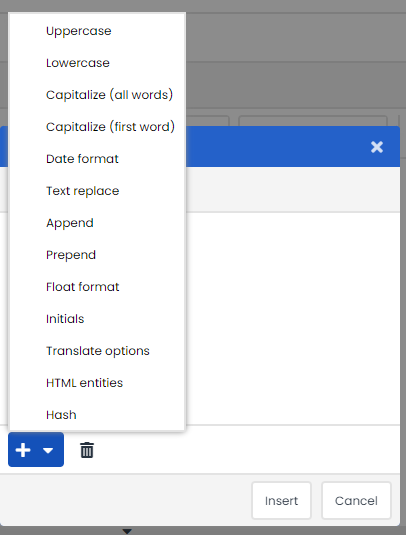
Filters (modifiers)
New Object
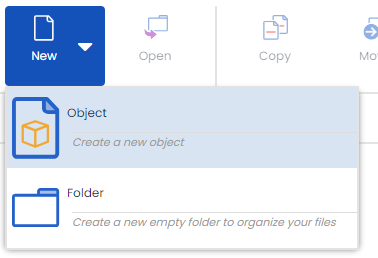
To create a new object, go the Objects menu item, and click on the ‘New object’ button. Then select a completely empty object or a copy of an existing object.
Give the object a name and you will be directed to an empty editor screen. Here you can start constructing the object.
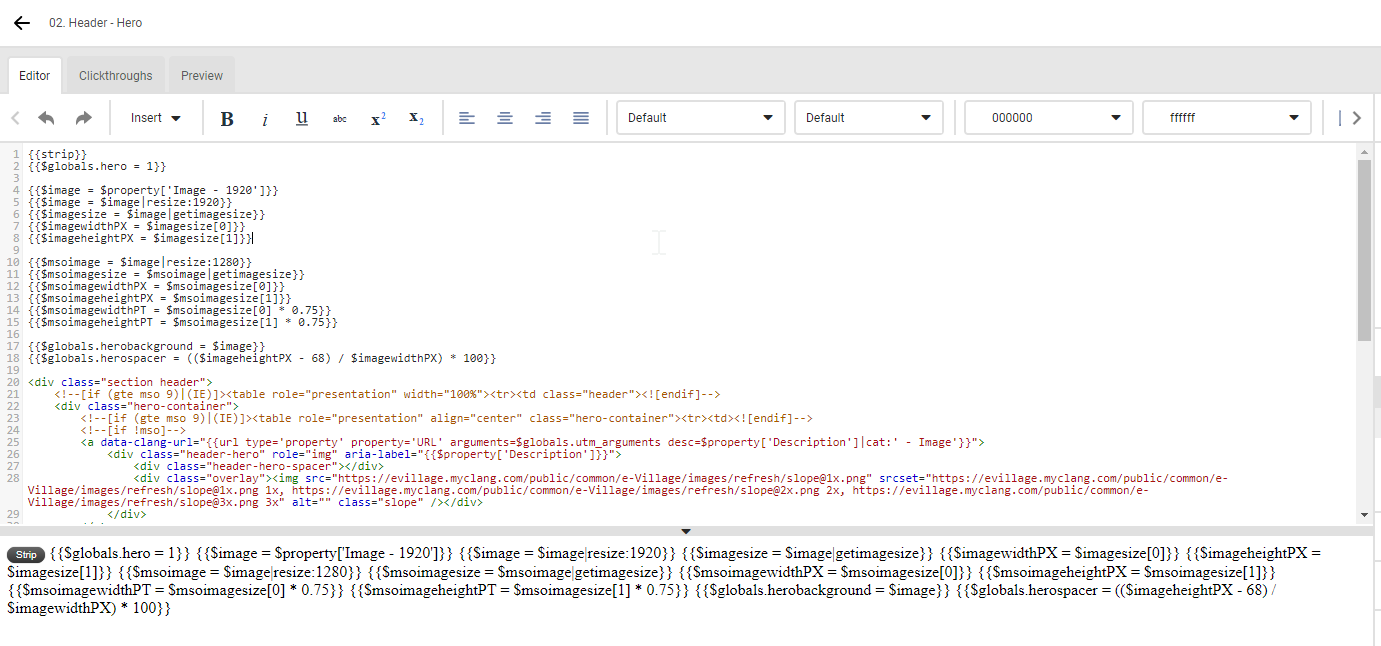
Whatever HTML code you enter will be displayed in the preview screen underneath or to the side. The location of the HTML code will turn grey when you select content or an image.
By default, all objects are available for use in a zone. If you would like a zone to contain certain objects only, configure this as follows. Click on the zone tag: "Template:Zone name=’zone1’" in your template. The details of the zone will be displayed in the details panel, while the name of the zone will appear in the basic tab.
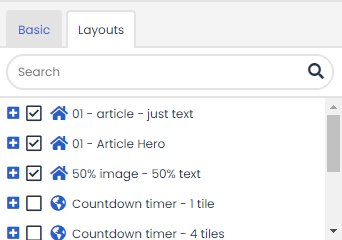
The Layouts tab contains a list of all (local and global) objects for this template. For every object, you can tick which layouts should be available for the relevant zone. If you tick the object, all available layouts can be used.
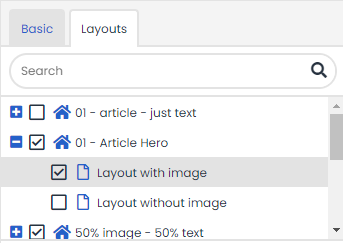
If an object contains multiple layouts, it is also possible to only make specific layouts available. Tick the layout that can be used in this zone.
The following value will be inserted into the HTML code.
